- Details
- Written by: Kaden Smith
- Category: Hunting
- Hits: 5681
This year's deer hunt was unlike any of the previous deer hunts I've ever been on. Every year I have drawn a rifle tag, but this year I drew a muzzleloader tag for the first time because I am no longer a youth hunter. I am grateful my dad planned for this and bought me a new Muzzleloader as a graduation present, CVA MR-X muzzleloader. Later he received a no-powered scope from work that we attached to the muzzleloader. We took the muzzleloader down to the range and shot with it multiple times across the summer and when it neared the deer hunt. It was a bit tricky adjusting the scope for accuracy however, on the last day, we had some pretty good groupings of accurate shots.
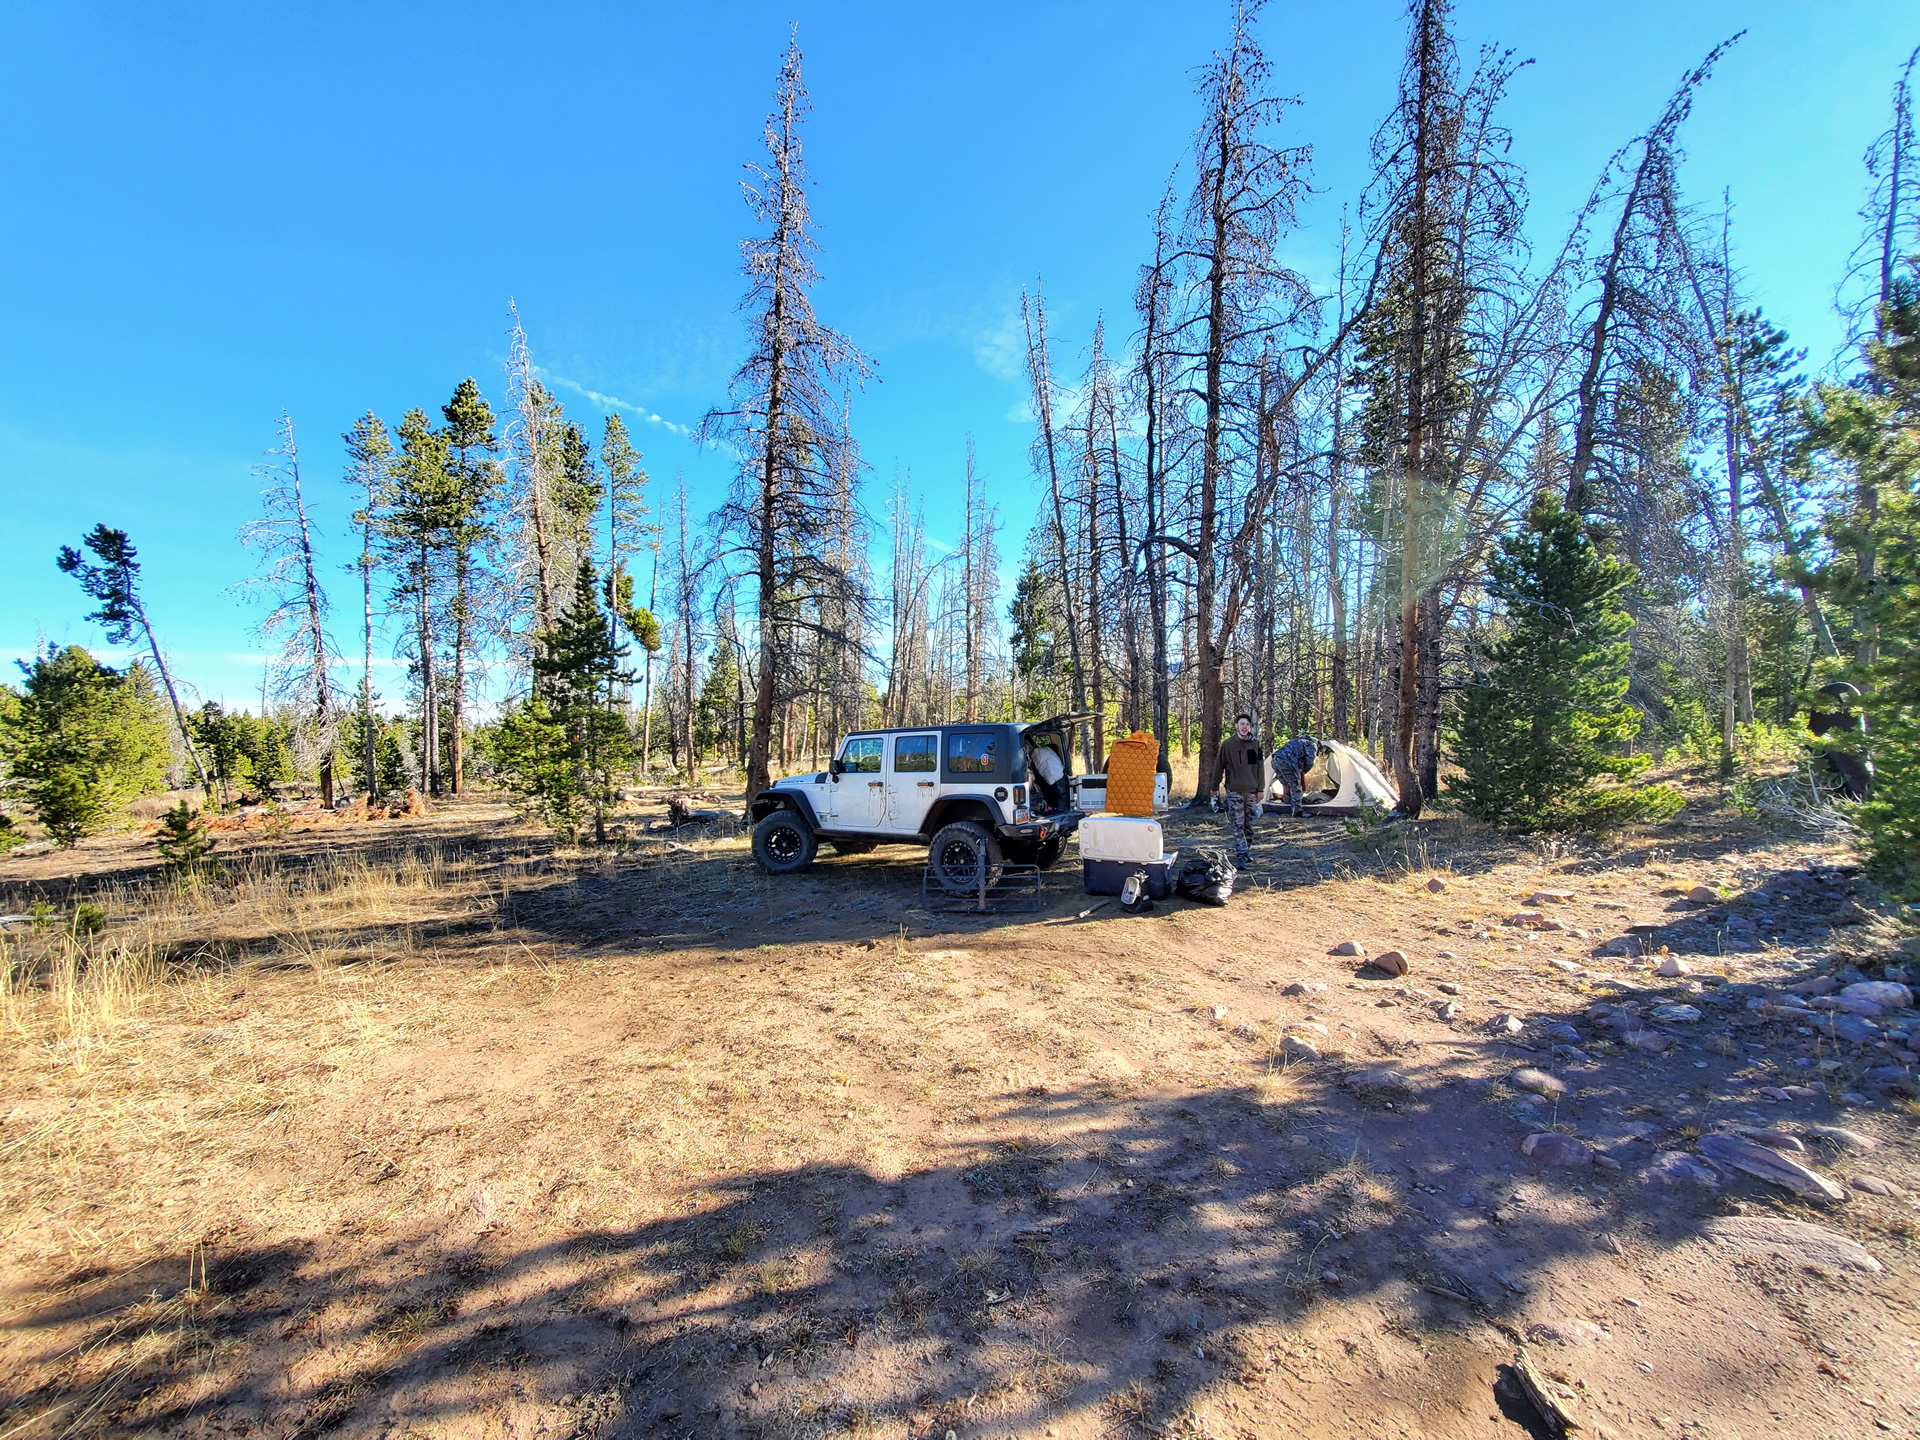
Normally when we deer hunt it would be at Henefer Echo WMA as we have had good success up there, but with that harsh winter a few years ago it wiped out most of the deer up there. So we decided to hunt the top of Farmington Canyon this year. Unfortunately, I couldn't go on the weekend planned with Dallen who drew muzzleloader as well. But I went the following week with just me and my dad, we planned to do day hikes and return to the jeep to eat dinner and sleep. This hunt took place from October 1 through the 3. My brother Dallen planned to come up and hunt a few hours after work every day that week.
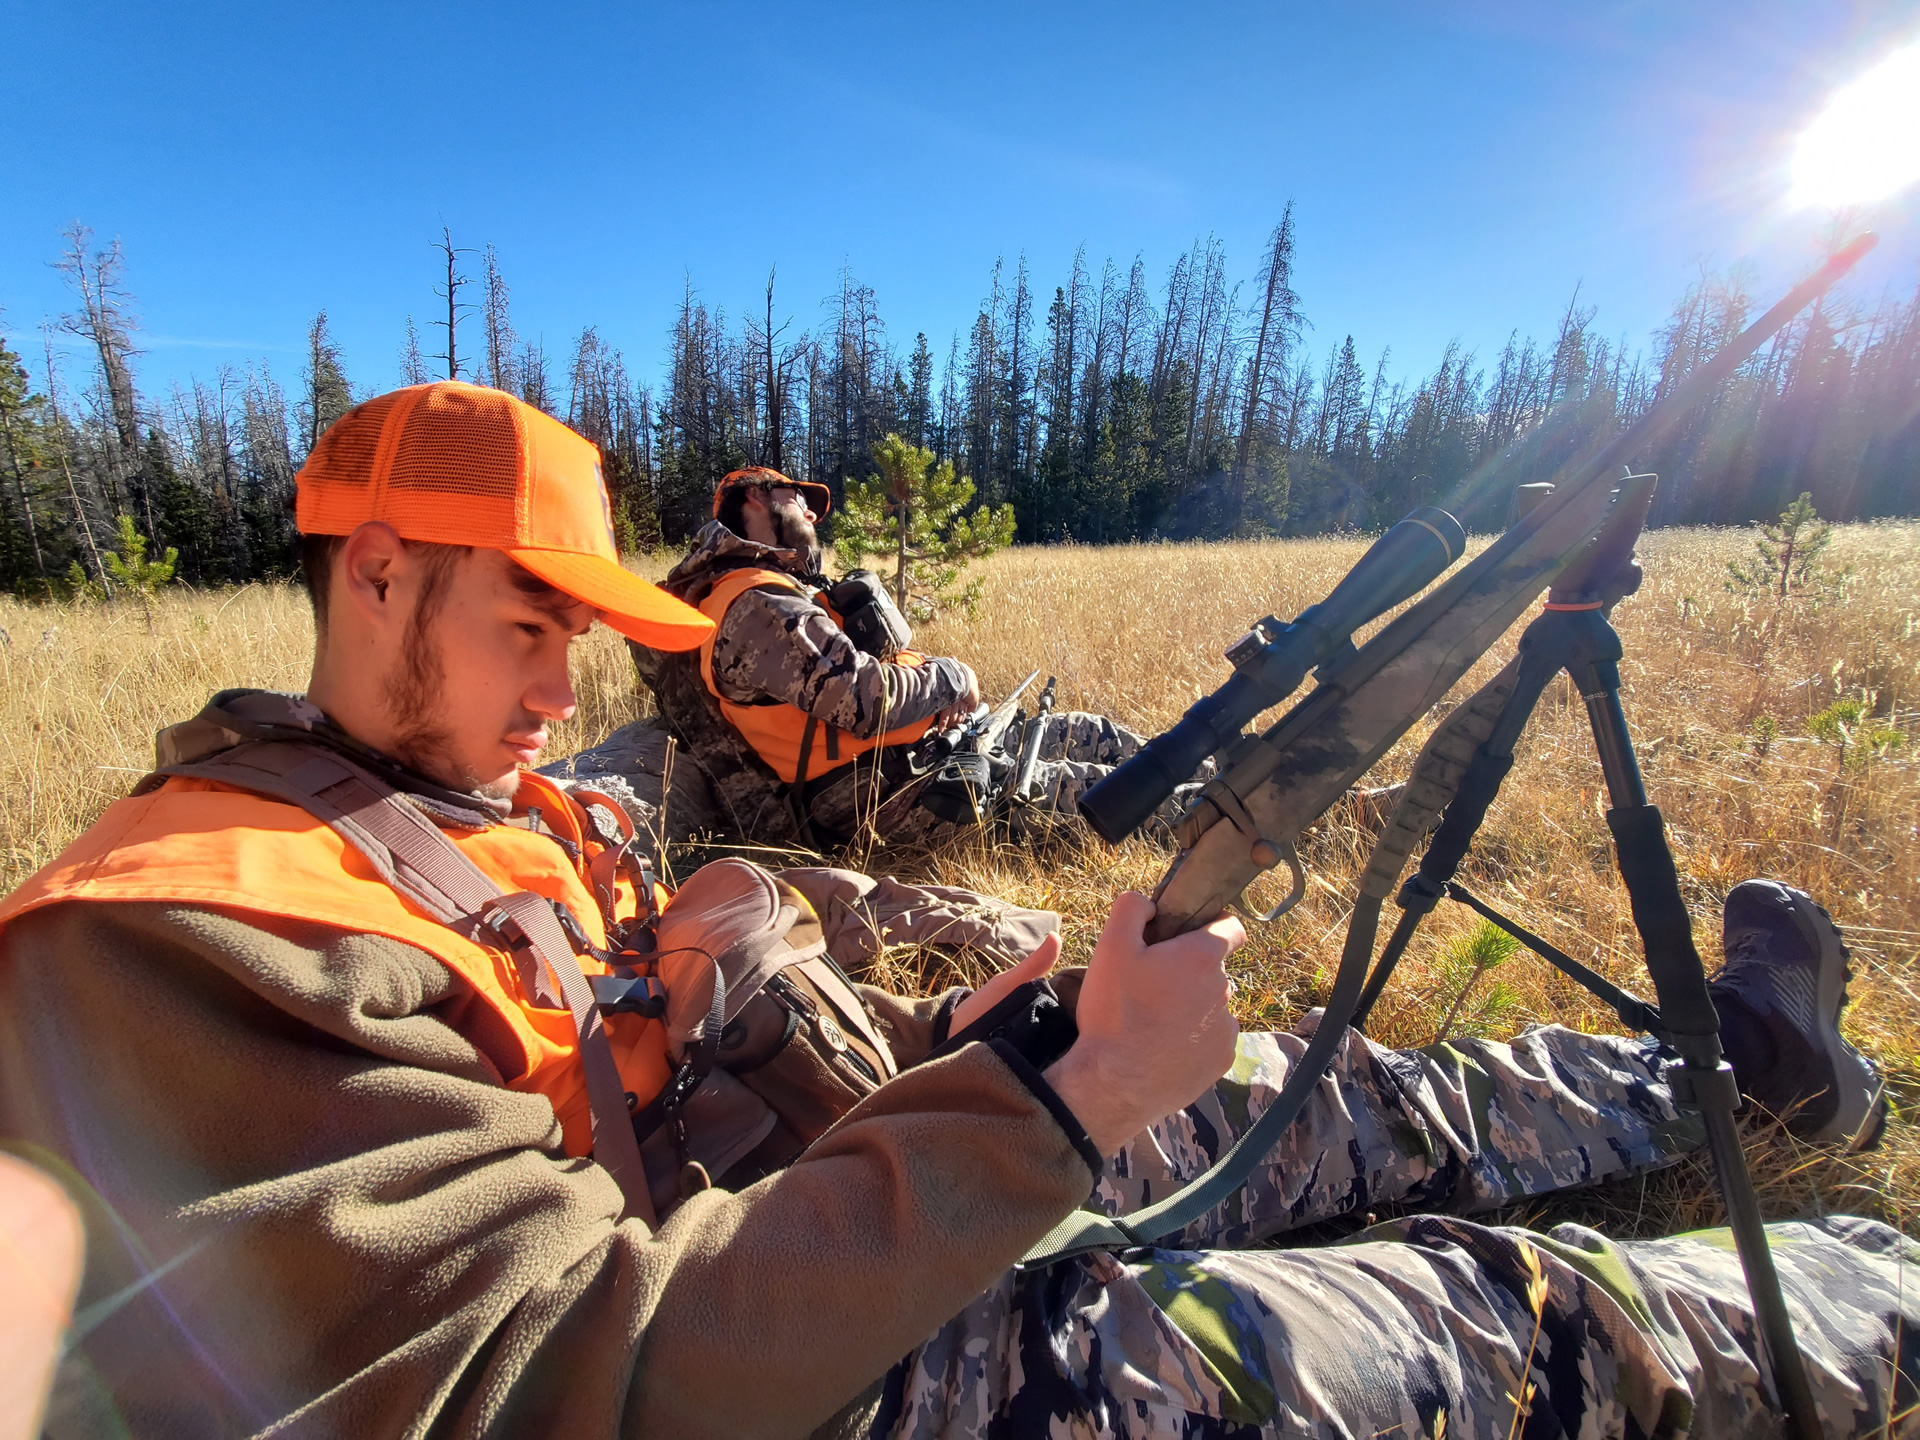
Monday morning we woke up early around five o clock and took off. The first day a few minutes into our arrival we spotted a few bucks four hundred yards away. The biggest buck was a small three-point that I didn't mind trying to get a shot at with the Muzzleloader. So we kept an eye on the three-point and the other smaller bucks, they went lower and lower. So we made a plan to go lower and cut them off essentially. We chose a spot under three hundred yards away from them. We lost sight of the deer in a larger group of trees, and that's when we slowly made our way around to the area where they were located. However, when we went up to move a little closer we bumped the deer. They took off and we couldn't see them through the trees, the three point stopped in the open for a split second but we didn't have time to range them. It is amazing how fast deer and even elk can run, they can travel a thousand yards in just a minute.

Us hiking the first evening of the hunt just after bumping the bucks out.
Bumping the group of bucks out was unfortunate, but at least there weren't any huge bucks. Going after this buck took most of the day, but we slowly traveled back up near the trail. Around that time Dallen arrived and we coordinated with him to try and see if we could bump some deer into him etc. We didn't bump any deer and started hiking back to the jeep for it was close to dark. Dallen walked off to look at another spot. Dad and I made it back to the Jeep and discussed plans to drive to some lakes that night and hunt them the following morning. After talking for a few minutes we heard a gunshot in the direction Dallen was heading.
After that initial shot, we heard a couple more but none sounded like hits except for one. Dad started driving the Jeep as it was beginning to get extremely close to dark while I tried to get a hold of Dallen, I tried calling a few times but he wasn't picking up. Finally, after a few more shots he picked up the phone and explained the situation. Dallen says he spotted a group of bucks where there were two big bucks one with a gray-colored body, and one with a brown-colored body. He targeted the brown one its rack was a little bigger and had some forks in the back. Dallen mentioned that after shooting once at the brown one it wasn't running along with the other bucks, so he proceeded to shoot over and over at it. But he couldn't seem to hit the buck even though he dialed and used his range finder. All of his shots took place while he was behind a large rock so the deer couldn't see him. He said we should try in that area in the morning and look out for the brown and gray-bodied four-point bucks. That night we parked on top of the hill, where we warmed up our stuffing and mashed potatoes, which would be our dinner for the remainder of the week till Wednesday night.
The next morning, we woke up early and headed down to the rock, slowly checking on the other hillside occasionally as we walked. We spotted a few small bucks and does when eventually we spotted a nice four-point going up the bottom of the ravine. If we were a hundred yards further down from where Dallen shot at the deer the night before we'd be at an ideal spot to shoot from. We saw the four-point cautiously bed down and was wary of us looking in our general direction. We were around three hundred and fifty yards away from the buck when we initially spotted it, so we wanted to sneak one hundred yards closer if possible. We began slowly walking with our backs dipped low, as we made our way around the bushes and shrubs.

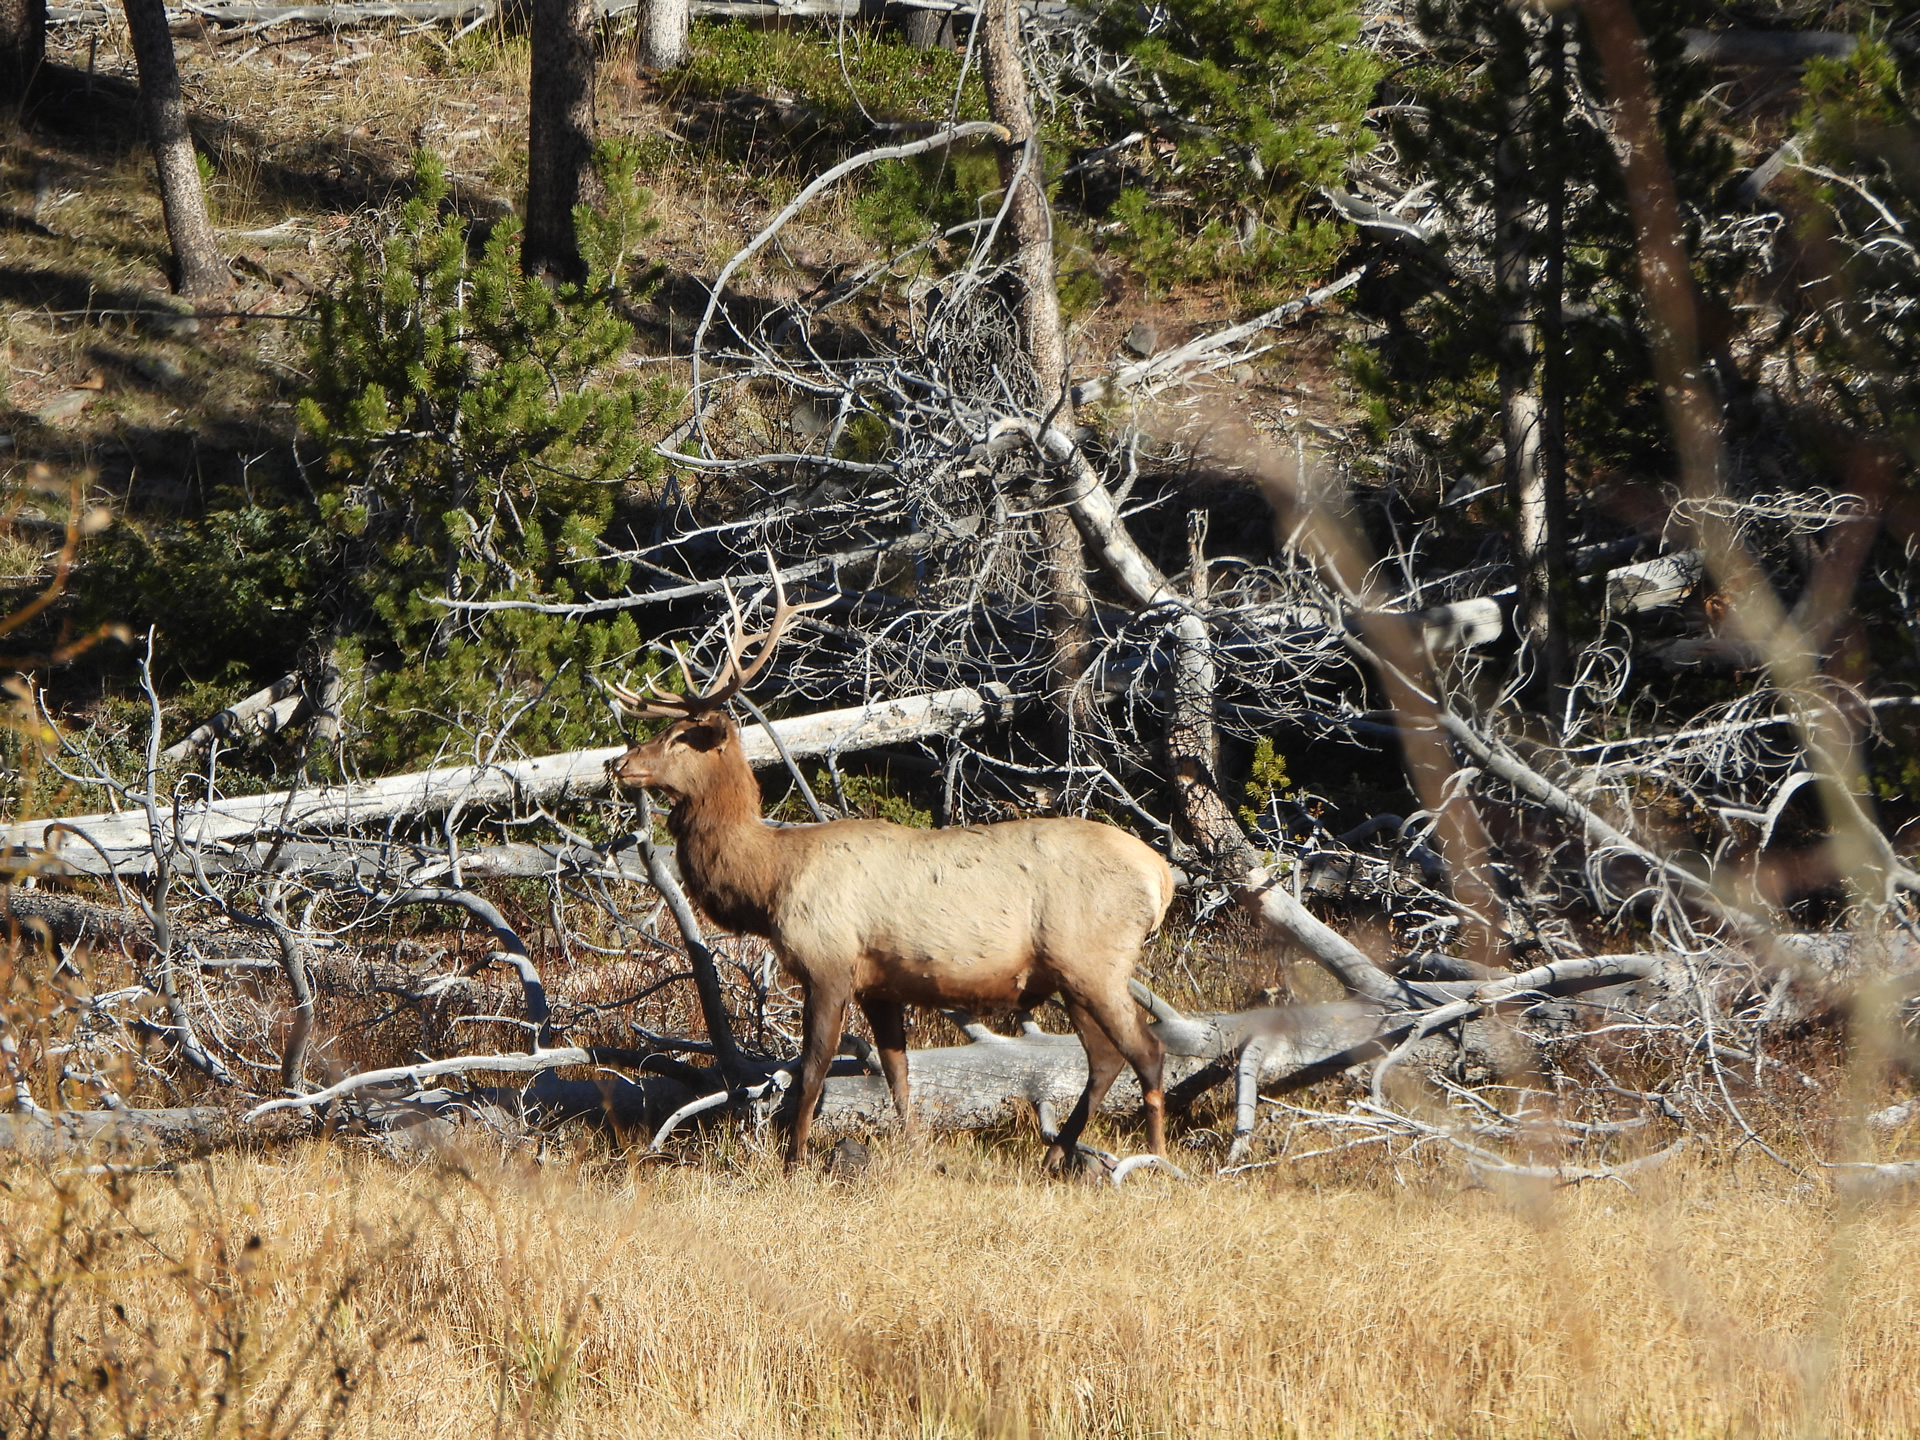
The buck that gave me the slip.
There unfortunately weren't any trees on this hillside to shield us from the bucks gaze. So as we were moving closer the buck was eying us till we eventually went out of sight from the hillside edge. Once we were close enough we poked up and noticed the buck met our gaze again, and just a few seconds later the buck stood up broadside. We rushed to sit down and Dad had the range exactly three hundred yards away. Once I got the gun up towards the buck it trotted a bit higher away from us and was about to go behind some trees. I figured it was around three hundred and fifty yards away, so I aimed accordingly and fired.
As soon as the shot went up I immediately noticed it didn't sound like a normal hit. Which surprised me for it felt like a good shot placement. I looked back at the deer and it looked confused it looked around a bit and started jogging away into some pines. After the shot, another small buck ran off as well. We looked to see if the big three-point I shot at would come out of the pines but we didn't notice. We figured we should wait a while before heading there to look for blood. After about an hour of waiting and eating breakfast, we headed over. As we drew near where the buck was bedded we began scanning for any signs of a hit. We even looked at the top of the ridge and on the other side, but there were no signs of the buck.
After concluding it was a clear miss we stopped and ate lunch. I was upset that I had missed and was confused, for it felt like a good shot placement. Dad consoled me by telling me he and my older brother Dallen have missed multiple bucks with muzzleloaders over the years. Where they have even missed much closer bucks than this one. Dad finished by saying that weird things can happen with Muzzleloaders. After he said all of that I felt a bit better as we crossed over the ravine and sat back where I had originally shot at the buck.
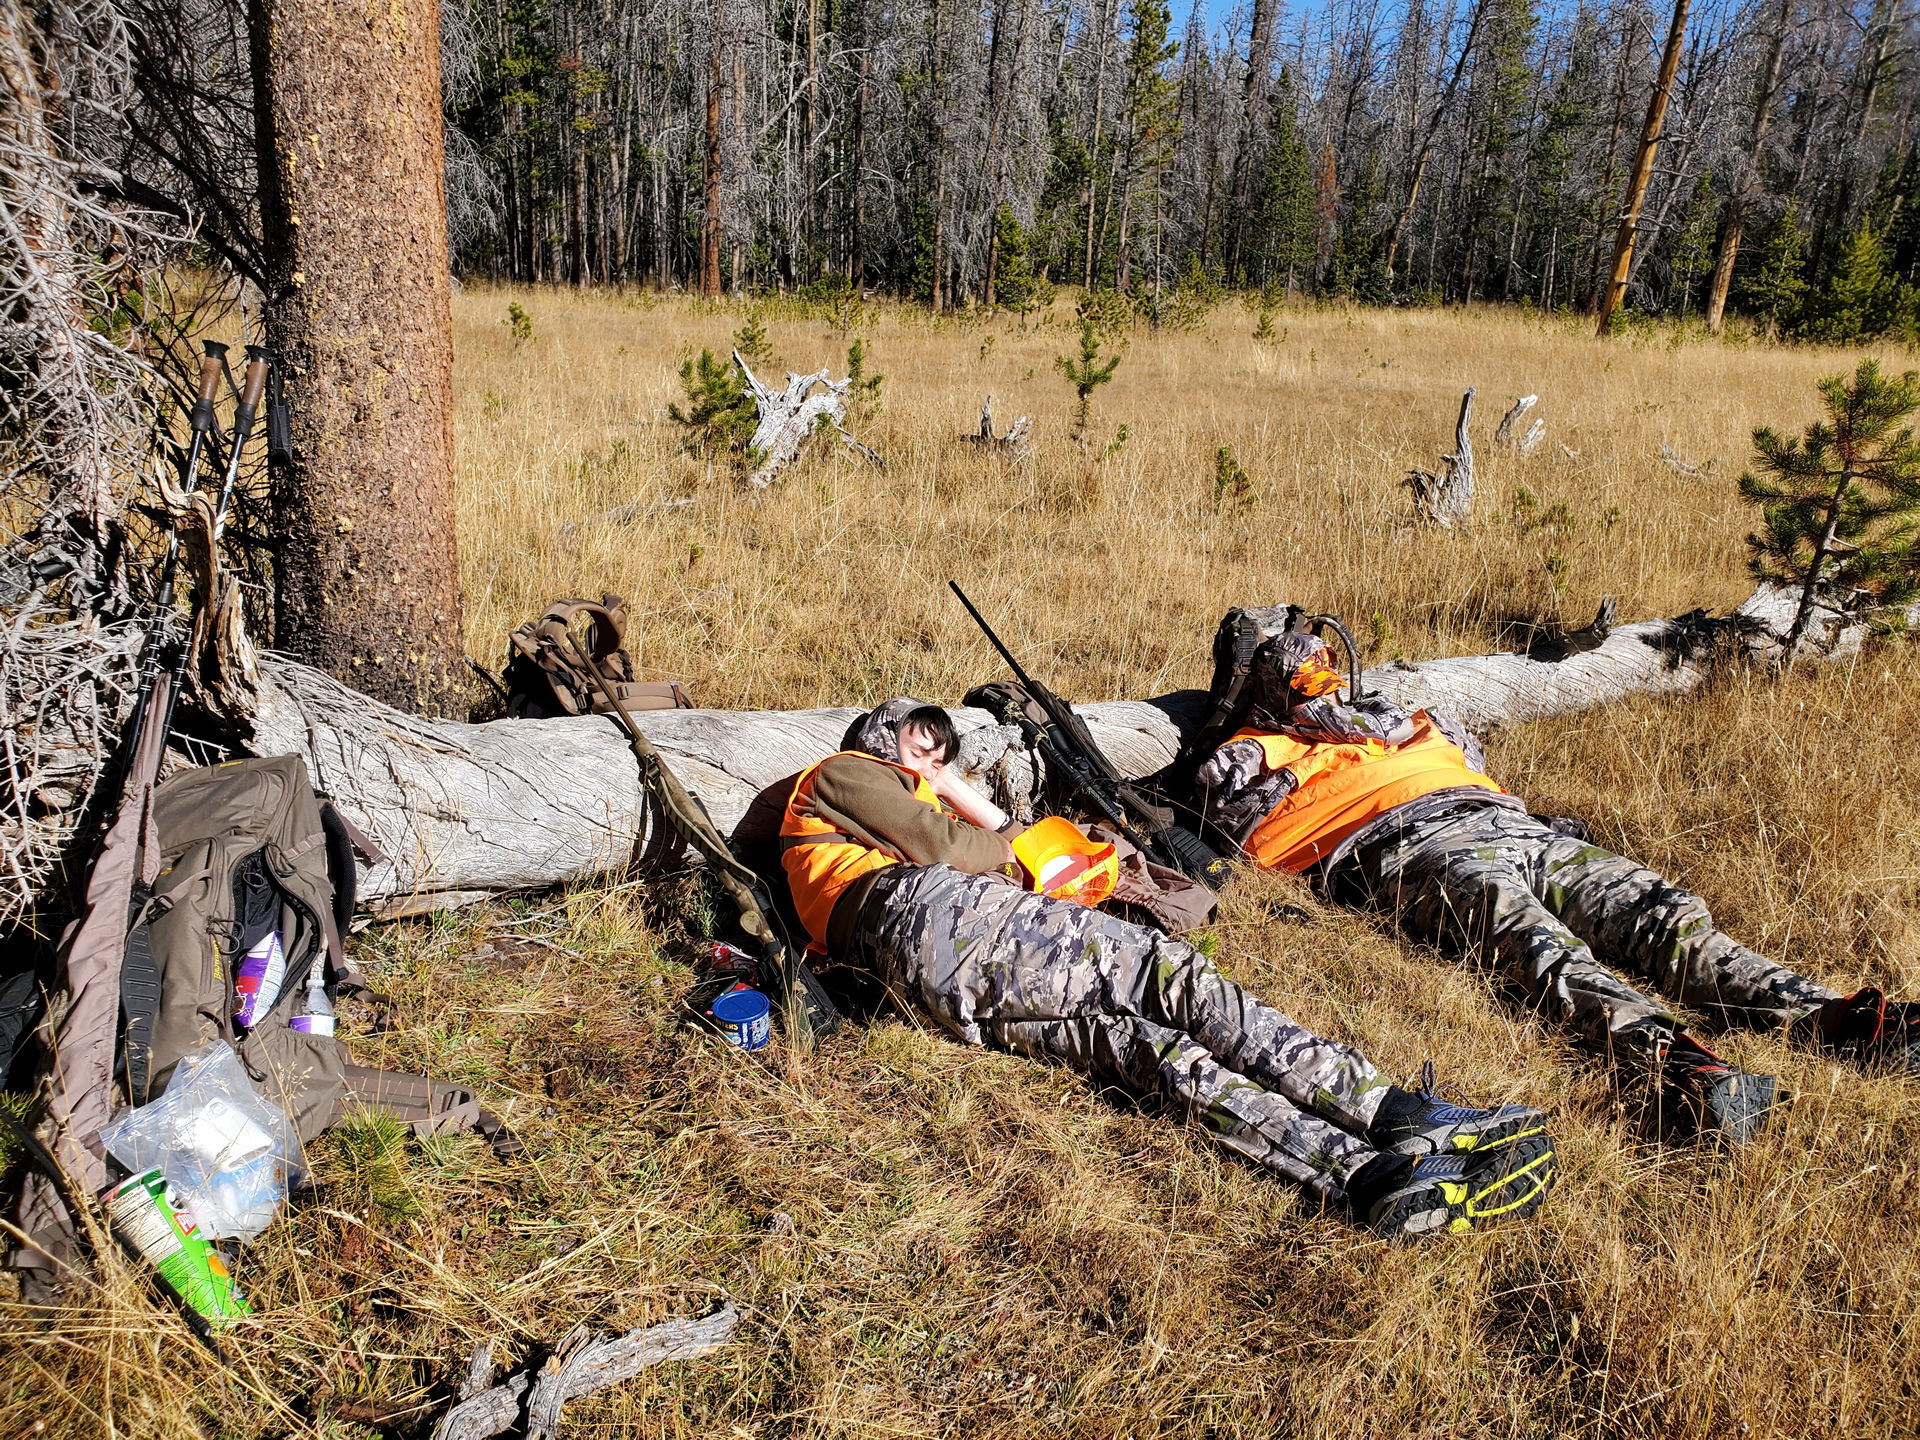
At this time it was a little past noon and we were a little tired so we took naps and would occasionally look out for any potential deer coming. Unfortunately, it started getting too hot to stay there for no shade was on the hillside. So around three o'clock we hiked back to the other side and hung out under a massive tree with branches draping over us like a big umbrella. After less than an hour of staying there, we spotted a two-point dashing down from the left side of us and bed down less than fifty yards away from us. During this time Dallen was hiking down and went to the spot we were previously at.
We were hoping other bucks would do the same thing this small buck did but unfortunately, it didn't happen and we took a shortcut up the hill by hiking from the bottom of the rock ravine. That night we planned on doing the same thing for the last day of the hunt, for we saw plenty of deer in that area. The next morning when we were hiking down we immediately saw some deer on the ridge close to us on the right. There was a decent three-point among some small bucks and does. We decided to go after this three point which was a little over three hundred and fifty yards away. We planned to sneak up just a little closer to take a shot but as we were walking towards it unfortunately some ATV drivers sped past on the road not too far away from us and bumped the deer over the ridge.
We began walking faster and crossed the ridge but didn't see the deer. We began walking around to the left to look further down the canyon and that's when we bumped them and they began running way down. It was unlucky the ATVs bumped them out of range. We didn't close the distance in time to get a shot. After bumping the deer out we sat on some rocks and had breakfast. Then we hiked back up and sat at that good old spot not seeing much, just a few does till Dallen arrived later that night. When Dallen arrived and we started talking we figured out how Dallen missed the four-point buck in this area. When Dallen was using his range finder it wasn't matching with the yardage of Dad's range finder.

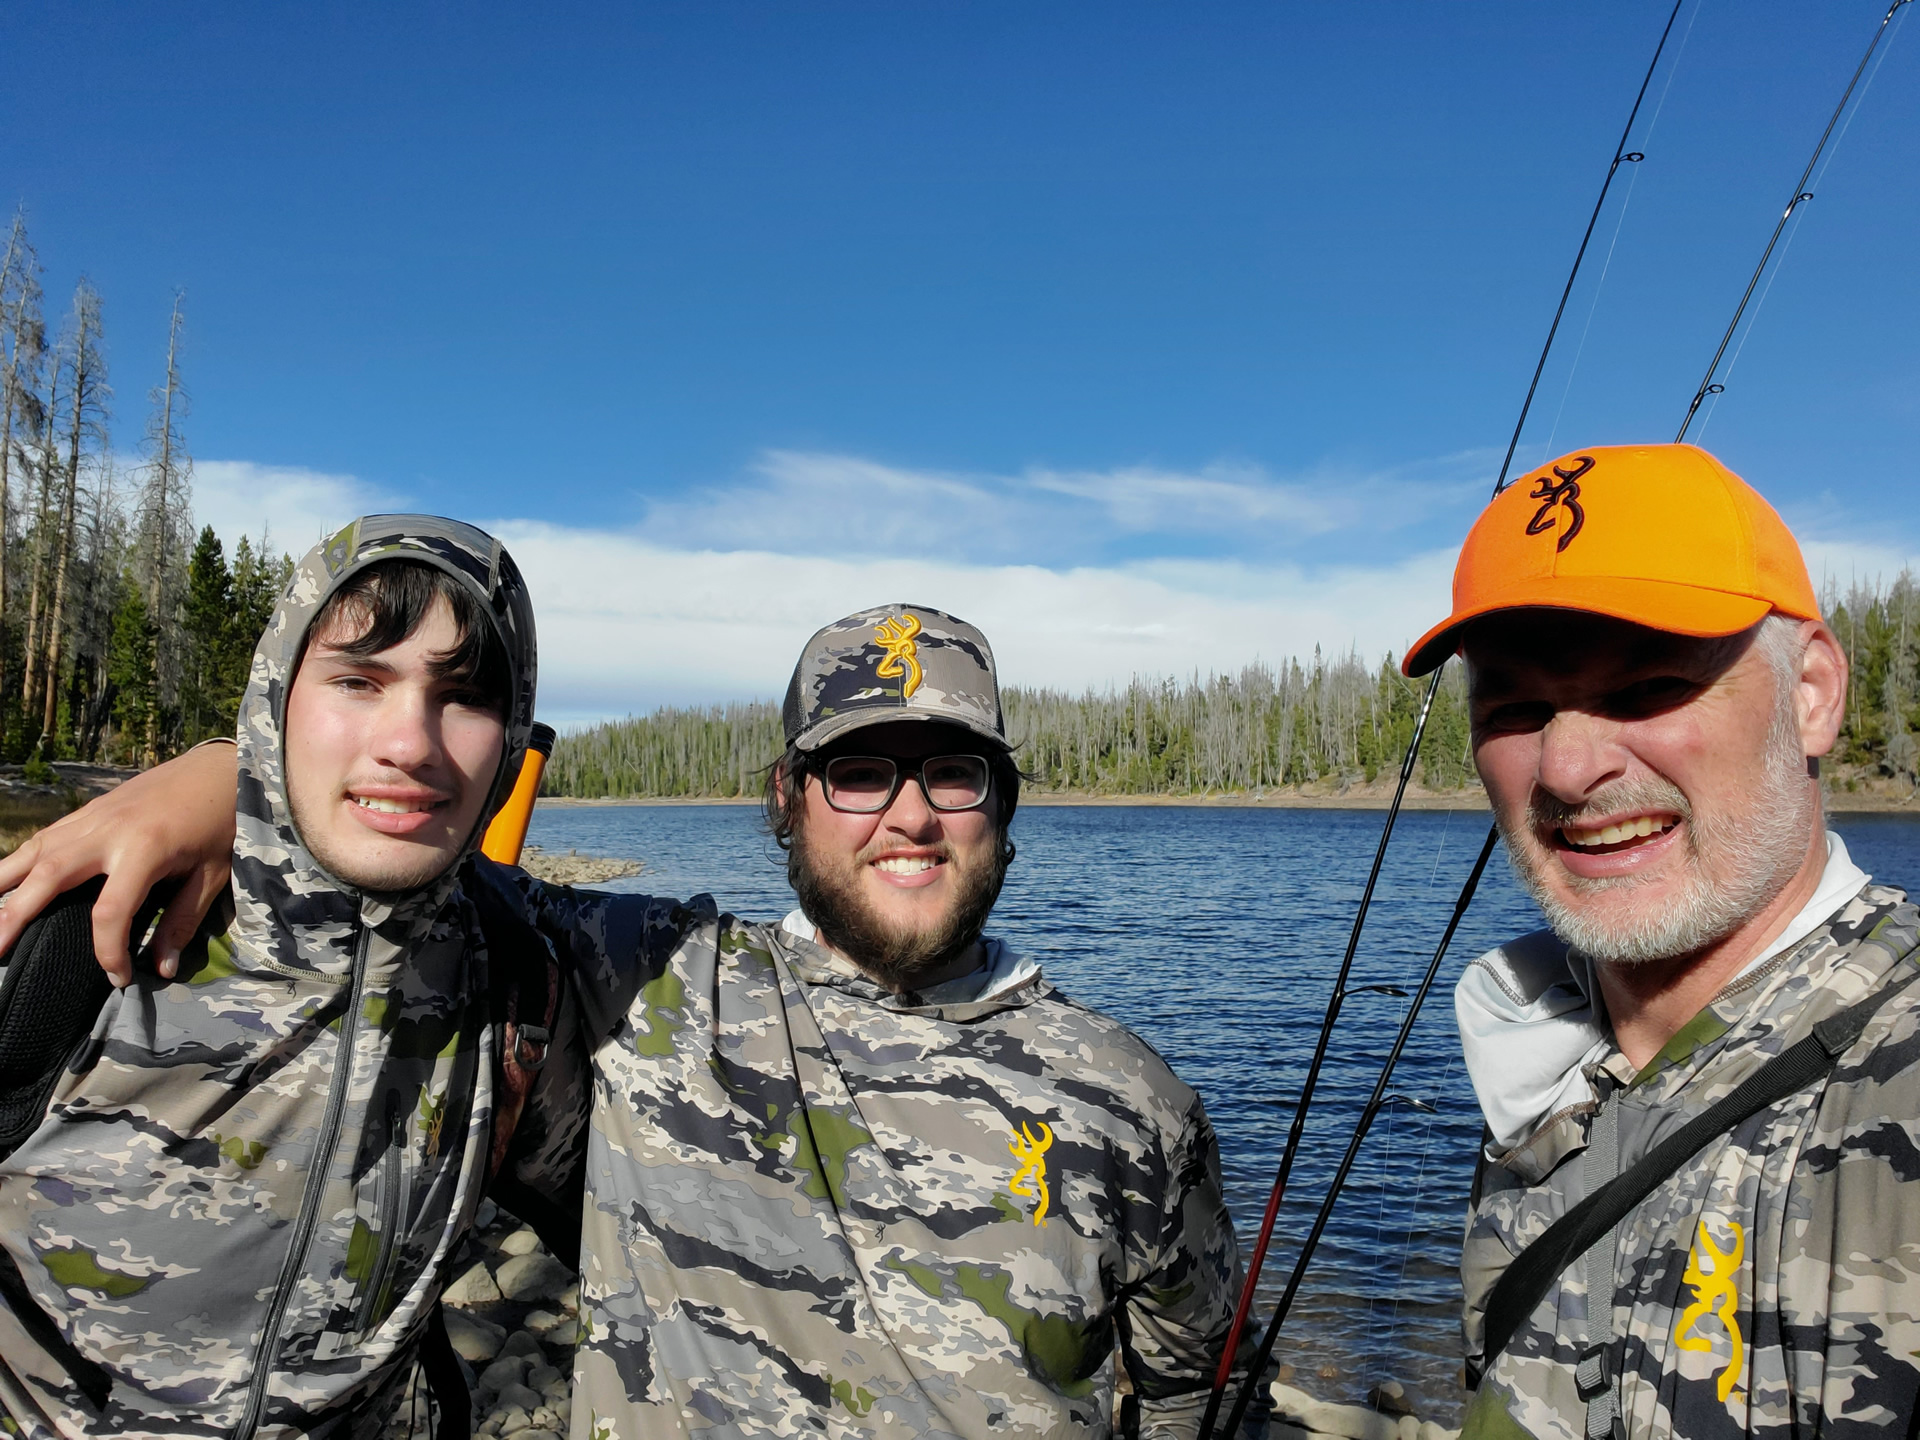
Photo of me and Dallen glassing the last night of the hunt.
This was because the range finder was on the wrong setting showing meters instead of yards. This was annoying news but was nice to clear up why he was missing. We sat there the rest of the night seeing deer in the canyon. Unfortunately, we couldn't get any bucks on this hunting trip but we had some good tries. After this hunt, we again went to the shooting range to test our muzzleloaders. We set out a target at the exact range of the buck I missed and immediately after shooting at it, we noticed it was way too high missing the target by several feet. This explained how the buck reacted when I shot at it, it had gone way over his back into the trees. I didn't see dust kicking up on the ground near him. Dad just mentioned we needed to get a new scope for the muzzleloader. Dallen then shot his Muzzleloader with the Leupold Freedom RDS with this scope he can dial the yardage. After shooting his he figured out the yardage listed on the sticker was wrong so we adjusted accordingly.
Dad decided to order the same scope on his muzzleloader, which has a chevron aiming point and the option to illuminate the reticle when twisting the dial on the side. It is a Primary Arms SLX 1X MicroPrism. I liked that it had two options and went well after shooting it at the range. The color matched the Muzzleloader quite nicely as well it is an FDE color like a beige. Hunting with a Muzzleloader I've learned that it requires great patience and being in the right spot at the right time. It would be best if you almost predicted where the deer will go. It is more challenging than regular rifle hunting, but it is something I'll get used to as I continue hunting with Muzzleloaders.
Some related articles

- Details
- Written by: The DIY Hunter
- Category: Hunting
- Hits: 6500
The winter of 2022-23 just wiped out the deer in the area where I like to hunt deer the most. We hunted it for a few days in the fall of 2023 and never saw a deer. We only found a few old deer tracks near the fence of the neighboring CWMU. With that knowledge, I switched to my second string area for deer hunting in 2024. My second string mountain lost a lot of deer in the Spring of 2023 but not all. On this hunt, I saw around 20 deer daily in the canyons I hunted.

My 300 WSM X-Bolt 2 Hunter Composite with 30mm low Browning Integrated Rings and a Vortex Viper 4-16x50 HSLR rifle scope.
Dallen and Kaden drew muzzleloader tags this year and I drew a rifle tag. I hunted with them for seven days of their 2024 Muzzleloader Deer Hunt. We found several smaller bucks and a couple of bucks on the three-year-old line that were the oldest that we could find. Kaden and I worked hard to try and get a large-bodied 3-point buck that in the end Kaden missed. We later found that his Bushnell HOLOsight red dot was somehow off by 4 inches at 100 yards. We found a 1x muzzleloader scope we like much better for his muzzleloader after the deer season that he would be using to hunt elk with this year.
I decided to pass on hunting the opener and head up the mountain to hunt during the week. I like hunting deer and not hunting around what I see other hunters doing so the middle of the week is far better for me than any opener. I spent my hunt doing day hikes out from my jeep early in the morning then returning after dark to sleep in and cook dinner in the front seat of my jeep.
During the muzzleloader deer season, Dallen and I spent three days packed several miles further up the mountain. We found few deer this far in but found a lot more deer within a day's hike of where we could drive the Jeep. Kaden, Dallen and I focused on this area and that is where we found the 3-point Kaden tried to get with his muzzleloader. With this knowledge, I focused my rifle hunt within day hikes of my Jeep.
For my rifle hunt I was hunting with a new to me rifle, an X-Bolt 2 Hunter Composite in 300 WSM. I purchased this rifle at this year's employee sale. The rifle had been shot some by R&D and had a pretty scuffed-up stock but I didn't mind because I wanted a workhorse 300 WSM primarily for a backcountry elk rifle.
I spent most of my time hiking down into a canyon and out on a point where I could glass below me and back into draws above and behind me. I would take my Vortex 11-33 spotting scope and my old reliable Nikon binos and spend the day glassing. Every day I would spot around 20 deer and around 4 bucks. One evening I found a small 4 point bedded down and moved to within 400 yards waiting for him to stand up for the evening. He ended up standing a good 10 minutes well after shooting light. I could just barely make out his figure through the spotting scope when he stood.

Killing time taking photos of spiders during the middle of the day.

Using my BigBlue 28w solar panel that I purchased for our Golden Trout Wind River trip and now have it in my pack on almost all of my adventures. This solar panel weighs just over a pound and produces plenty of power to charge my Galaxy S23 Ultra phone or top off my one-pound 20,000mAh power bank that I like to carry.
The deer were up and feeding on the evening of the third day. I digiscoped a small 2-point in one draw then a 16-inch wide 3-point in another. I texted images to my family saying I have option 1 or option 2 in sight. My wife texted back to shoot either because they all wanted meatloaf and deer steaks. I love deer meat and we could use some deer meat with the price of groceries out of control. However, I was hopeful for at least a 4-point this year. Not long after I sent images of these two bucks another buck emerged up in a different draw further away from me and he was encircled in nasty terrain. This 3rd option was the 3-point Kaden had missed during the muzzleloader season. I texted an image of him to the family with the question of "Or option 3?" Kaden quickly chimed in to get the buck for him. So option 3 it was.
The buck was currently at 812 yards from my position. I had been center punching my 12-inch 822-yard steel target with my X-Bolt 2 a week or so prior but... I felt I had enough light to make a move and get closer. Using my Vortex Optics Viper HD 3000 Laser Rangefinder I ranged the deer and then a ridgeline between us and roughly calculated if I could get to that ridge I would be sub 300 yards.
I quickly gathered my gear and off I went. I passed several does along the way but luckily they avoided running into the thick area I was headed towards. As I crested the ridgeline and set up on my homemade doublecross shooting sticks I had him broadside at 269 yards. A quick elevation dial on my Vortex Viper 4-16x50 HSLR scope and I settled in dropping the crosshairs down across the buck and I touched off just as I got to the top edge of his heart. After the shot, I watched for a minute and couldn't see the buck or any movement anywhere so I fought my way through the overgrown steep terrain over to where he was last standing. Yup, I drilled him right where I was aiming. Blood was where he was standing and the blood trail went 30 yards and there he was piled up. The 200 Gr ELD-X passed right through him around the top edge of his heart. I always do a gutless boning out of my deer and elk so I'm not quite sure if it took out the heart but it looked like it did from the amount of blood everywhere and the location of the shot.

My 2024 Utah mule deer buck taken with my X-Bolt 2 in 300 WSM with Vortex Viper 4-16x50 HSLR scope.

Coming out heavy. I should have taken two trips. This Browning Monroe backpack has been a great pack for me on multiple hunts and our 2024 Golden Trout Wind River trip backpacking trip.
I took a few photos and then started the boning-out process. I had all the gear I needed with me to tackle the task. Most importantly my Browning Monroe backpack and some meat bags. I decided to try and pack everything out in one trip. Looking back I should have taken a small load that night and come back in the morning for the rest. Anyhow, the scale at home showed that the deer meat weighed 72 pounds and the head was 9 pounds. Combined with all the rest of my gear I was packing 123 pounds up and out of that canyon. With the help of angels carrying the load, I made it back to my Jeep at 2:10am. I should have taken two trips. On a good note, all of my daily hikes I do early in the morning with my dog paid off. Even with such a grueling pack out my knees did great and were just fine afterward. Although I do feel I was pushing it a little too much on my total knee replacement. Next time I'll take multiple trips.
As I write this I haven't ground up any burger from this buck in my LEM 3/4 HP grinder yet but the steaks have been to die for yummy.

Mule deer option one on the evening I took my buck.

Mule deer option two on the evening I took my buck.

Mule deer option three and the buck I shoot not long after taking this digiscope image of him.

This is a bad photo of a smaller 4-point buck I located one evening. I setup at 400 yards from him but he never got out of his bed until after dark.

Some of the burrs around the base of the buck's antlers.

First blood right where the buck was standing.

Selfie with my 2024 mule deer buck and X-Bolt 2 rifle.
- Details
- Written by: The DIY Hunter
- Category: Hunting
- Hits: 5457
While I had a three-season elk tag in my pocket I was unable to start my elk hunting season out with the archery season due to getting my knee replaced in May. Learn more details about my knee replacement in my 2022 Utah General Deer Seasons article.
My knee this year has been taking a lot of time to heal and the most difficult struggle has been getting my knee to bend. Many years of scar tissue buildup from multiple surgeries have taken its toll on getting my knee to recover. My knee replacement recovery has been a struggle and a lot harder than I imagined it would be.
I really wanted to archery hunt but I would have been hunting by myself with a knee in constant pain and being very much out of shape from not being able to ride a bike because my knee wouldn't bend far enough. I just knew this was a perfect recipe for me to actually find an elk and shoot one and then what. How would I get off the mountain by myself in such rough shape? I had to call it off. :(
We had a good laugh finding this "bull elk" out in the middle of the day, near a main road, in the middle of the Utah elk season, just a little bit over the border in Wyoming. It's amazing how the elk know where to go to be safe. LOL!
I started my hunts with the muzzleloader deer season and my knee did well enough to make it into the backcountry and have a successful and fun hunt with my boys. This gave me the confidence to rifle elk hunt with my boys in the Unita mountains the following week.
The boys and I have been in a lengthy drought of finding any elk for the past several years. We were hoping to end that dry spell this year. For the past four years, we have been focusing on an area in the Unita mountains that we know has good numbers of elk. We continue to learn more and more about the area and the habits of the elk that live there. The more we learn the better our odds so back to the Unitas for the 2022 rifle season we headed.
Mid-season we made it to the trailhead late one evening and decided to camp at the trailhead and make day hikes in to hunt for elk. The next morning we were up early hiking further up the mountain in the dark. We found as always a lot of elk sign just didn't find any elk in their tracks. We decided to circle around into an area we have never been in for the evening as we worked our way back to the Jeep.
As we got deeper into this new area we found more and more fresh sign. At one point we found a fresh rub that extended over ten feet up the tree. The tree was smaller and more flexible so we guess that the bull had this small pine bent over when it was rubbing it. This was a really long day for my knee. We spent a good deal of time in steep rough terrain, going through tons of deadfall pines... my knee made it but I was pretty tired that evening.
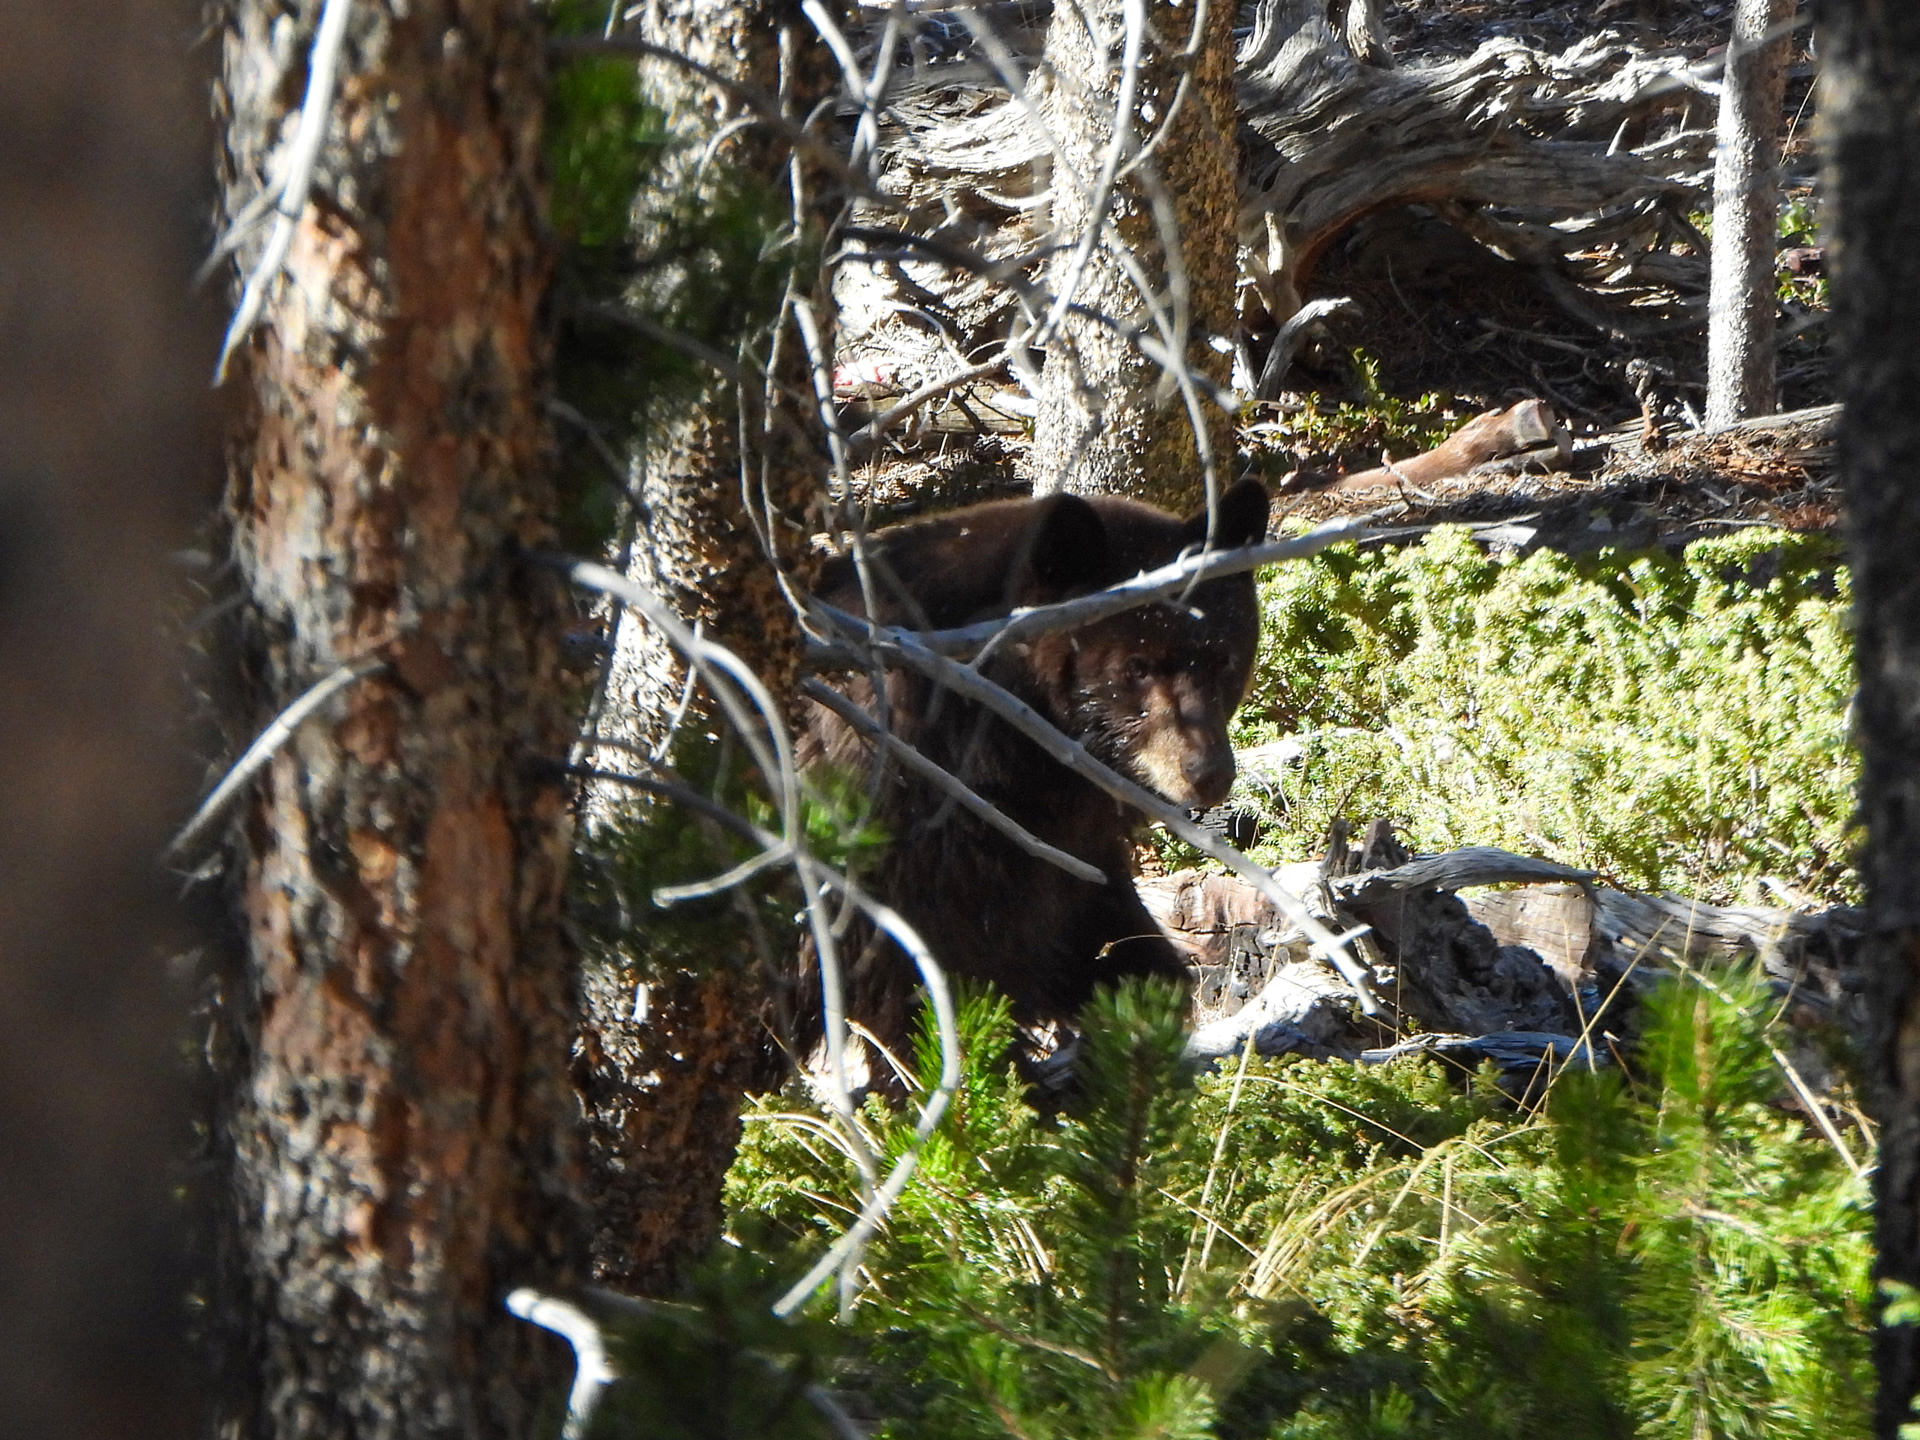
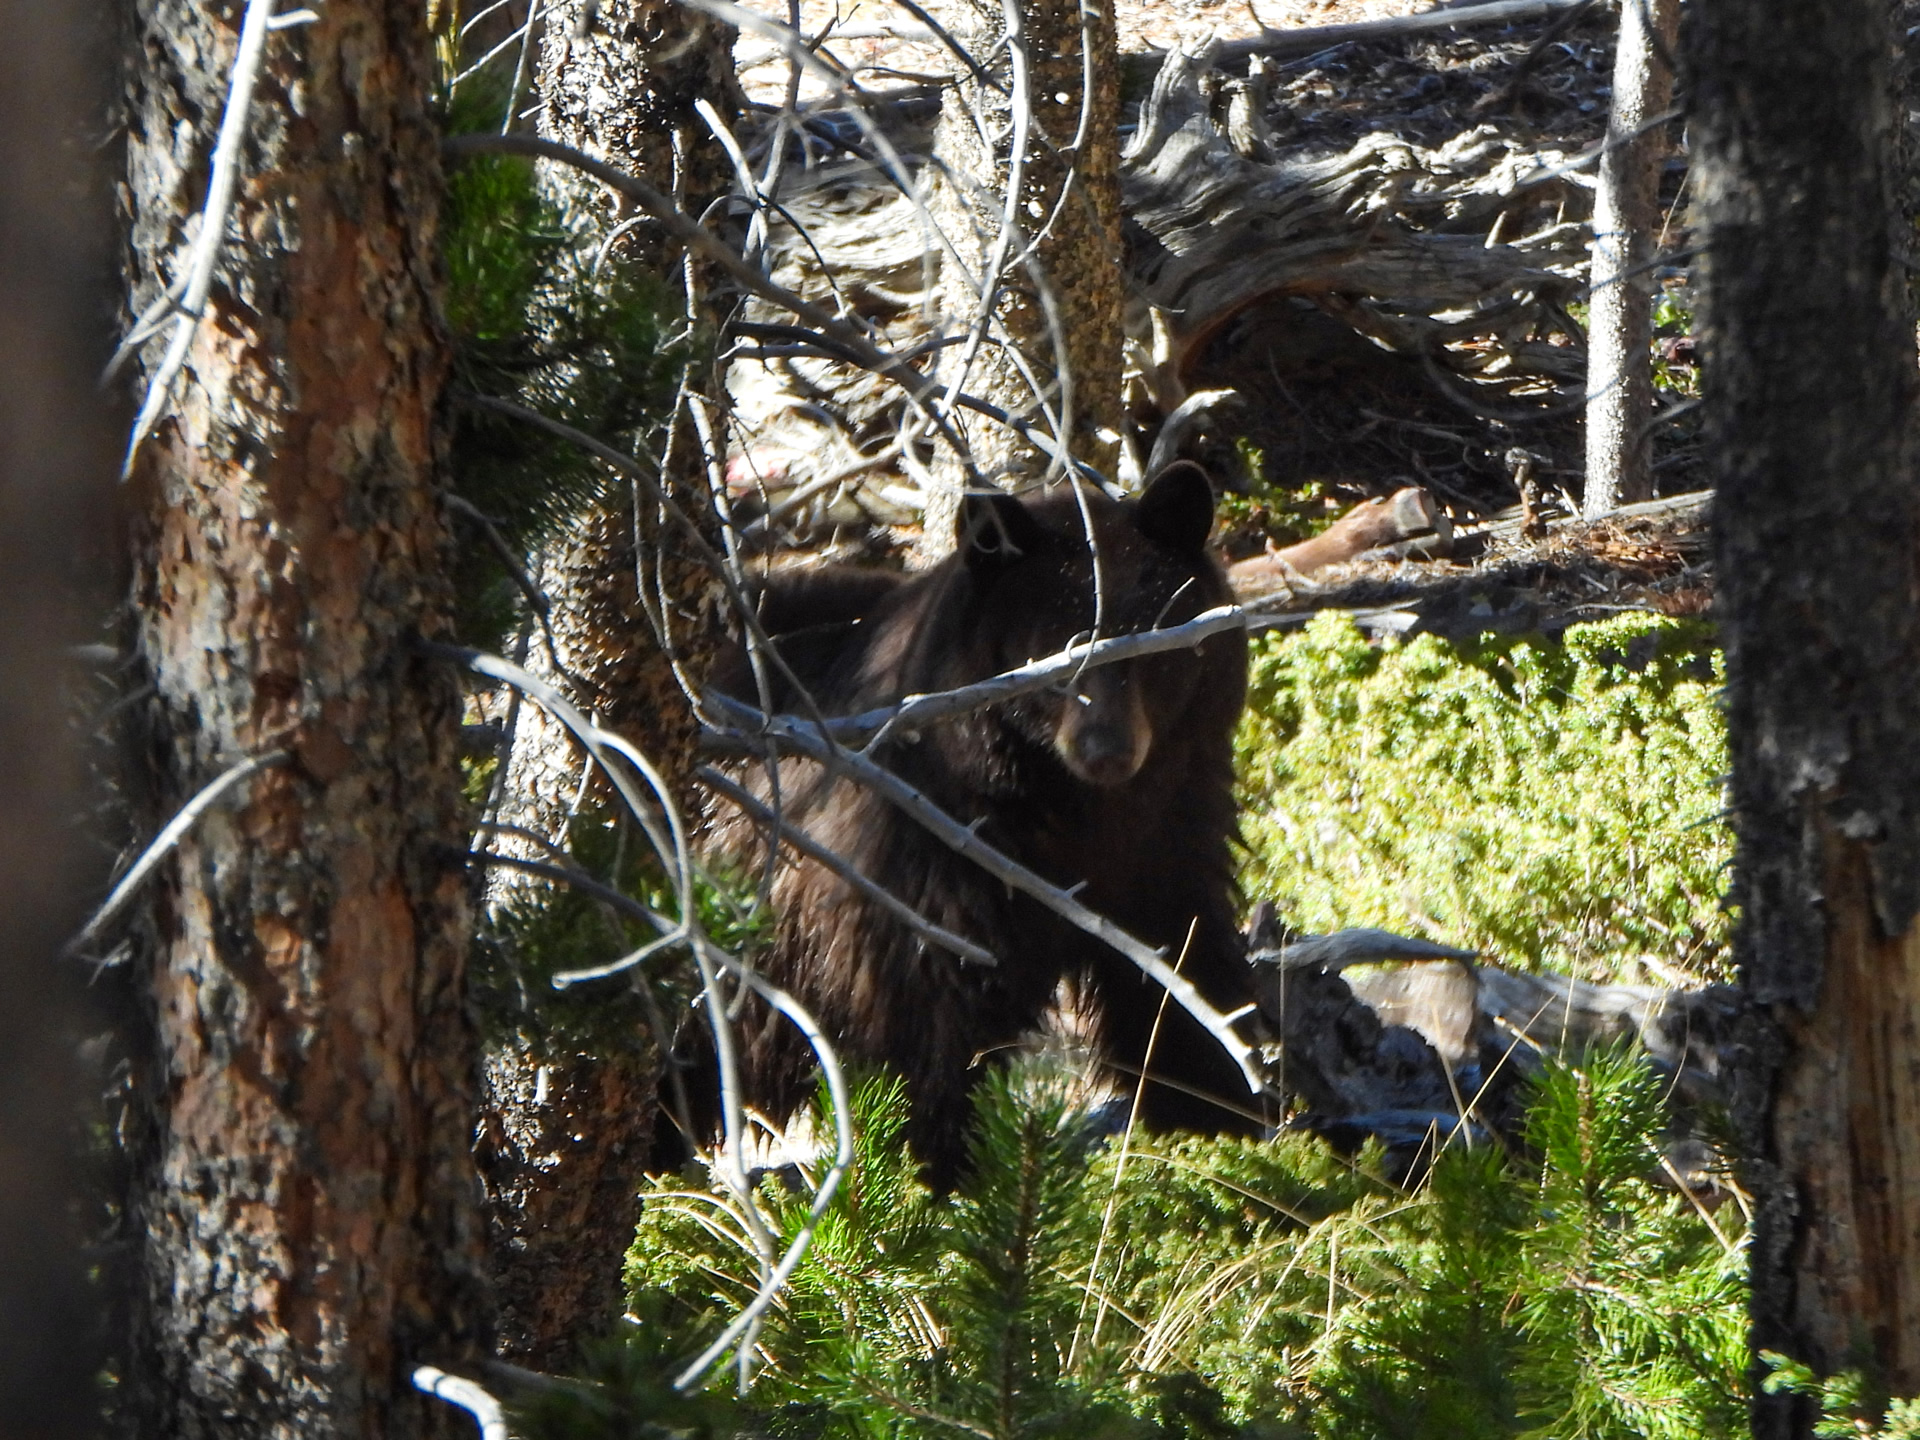
The next morning we headed back in further than we did the day before, heading deeper into the area we were in the day before. We found a lot more good elk sign but still were unable to locate any elk. As we were slowly working our way through a cool looking draw Kaden spotted a black bear about 100 yards below us sneaking around through the pines. This was pretty cool. I was able to snap a couple of photos before Dallen spooked the bear as he was moving to remove the cover off his rifle. Little scared were you Dallen? LOL
We hiked a good deal again this day again without finding a single elk. Boy, we sure aren't lucky at finding elk. We returned to camp earlier in the afternoon this day and decided to move camp and go explore another location. As we were starting to break camp my heart went into AFIB again as it had during my muzzleloader deer hunt. Darn it all. We loaded up camp in my Jeep and started heading to another drainage to explore. My AFIB subsided after a few hours but I was nervous about going for any more strenuous hikes so we went fishing that evening and the following day and then pulled out of the Uintas a day earlier than we could have stayed to hunt.
We had a lot of fun catching Brookies with my new Tenkara rods and flys I hand-tied. Initially, the boys started fishing with spinning rods but after I caught a handful of fish one after the other with my DRAGONtail MIZUCHI Tenkara rod (#ad) they switched over and used my two Tenkara rods to catch some Brookies. I likely caught my personal best Brookie. I didn't measure it but he looked to be 14-15 inches.
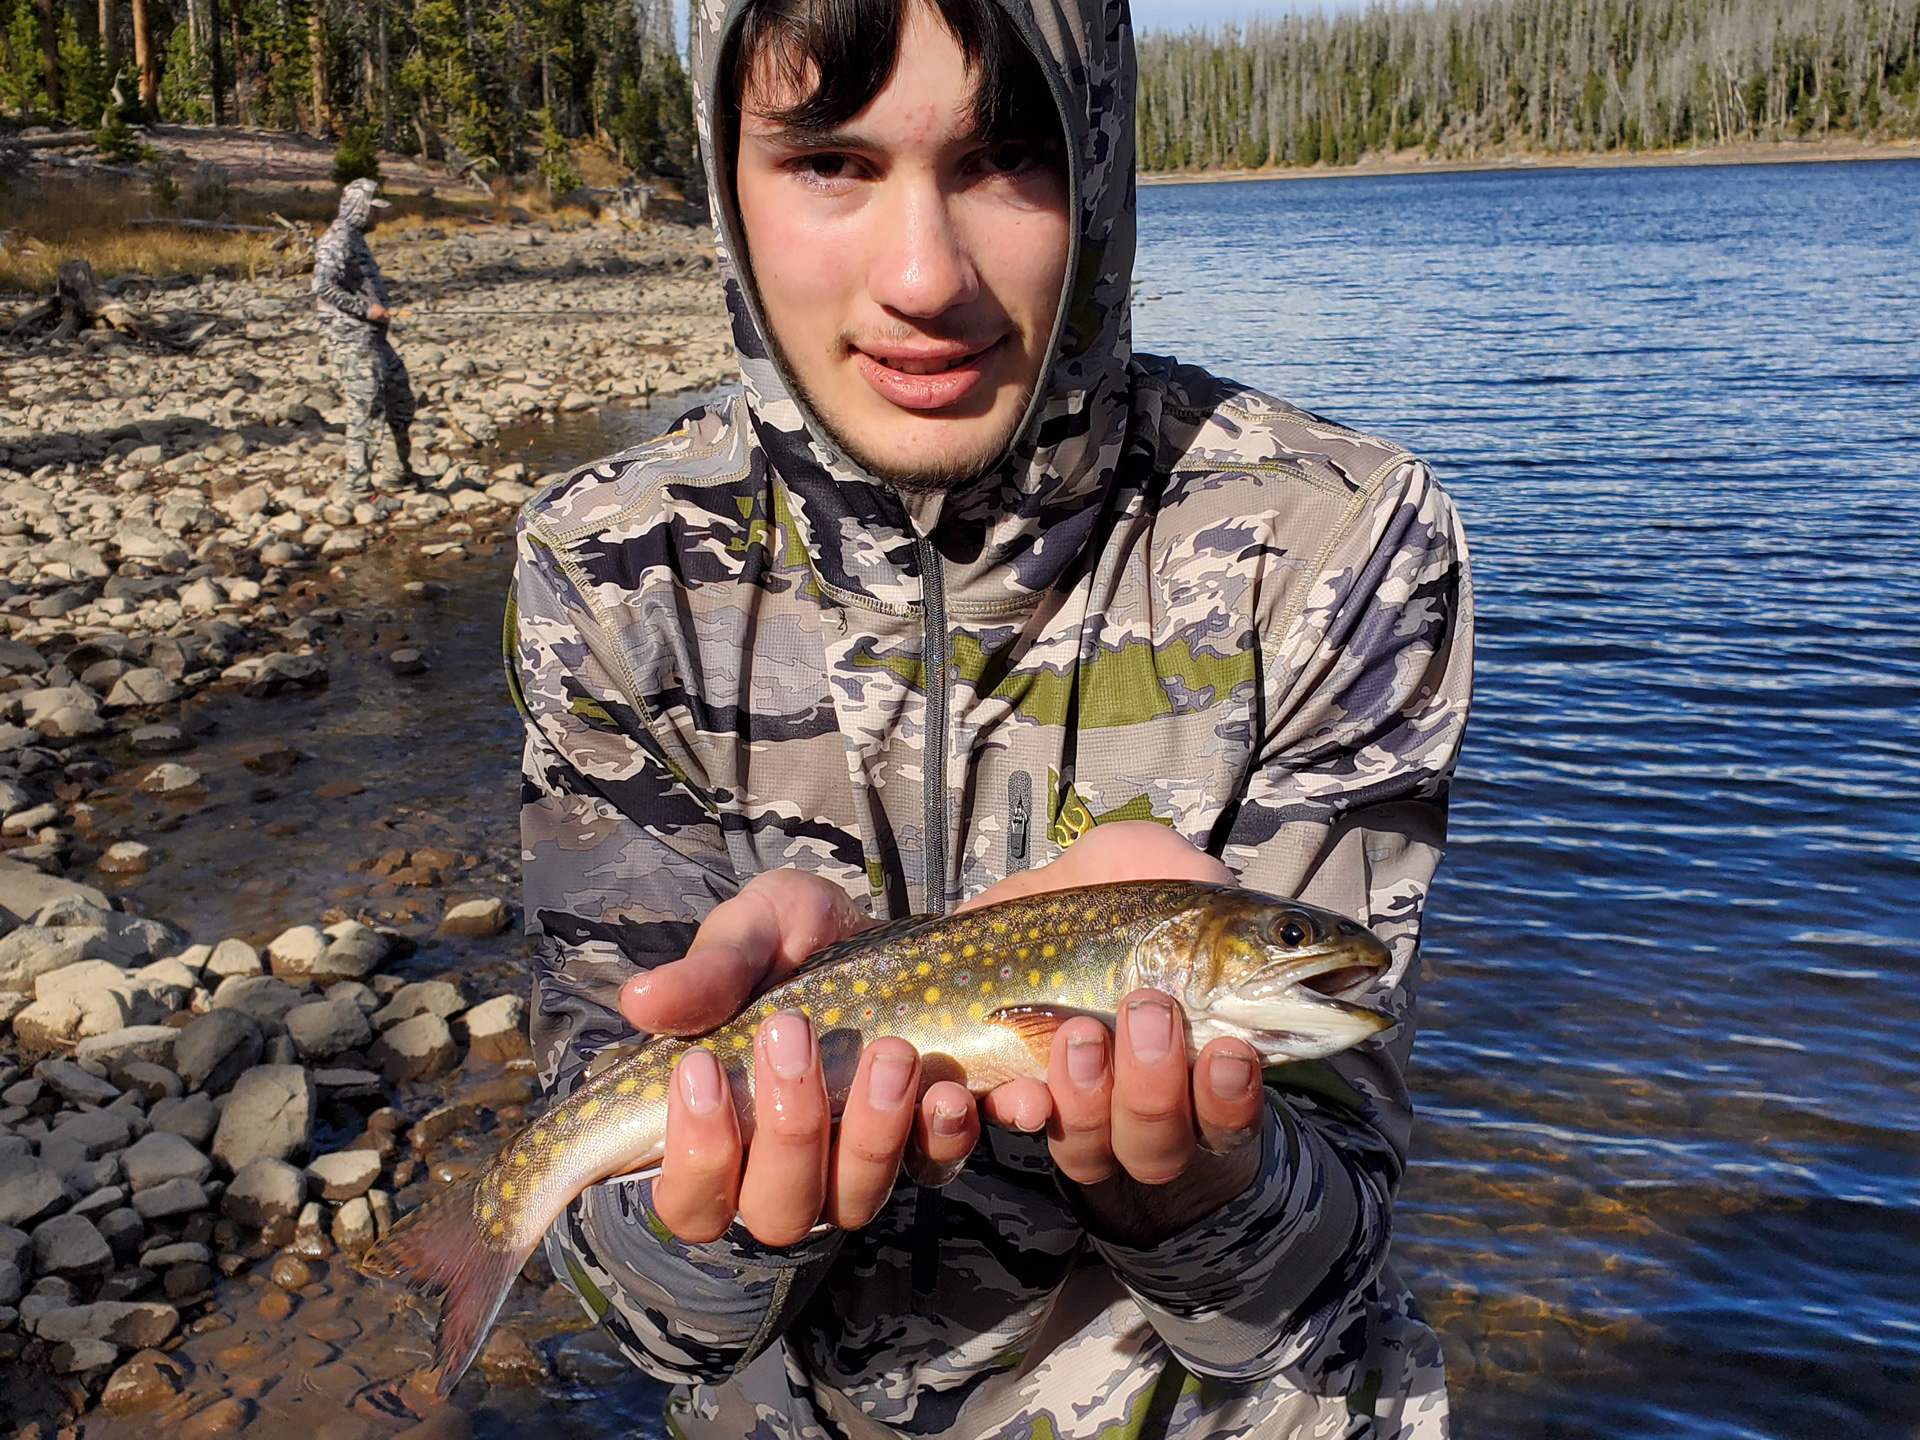
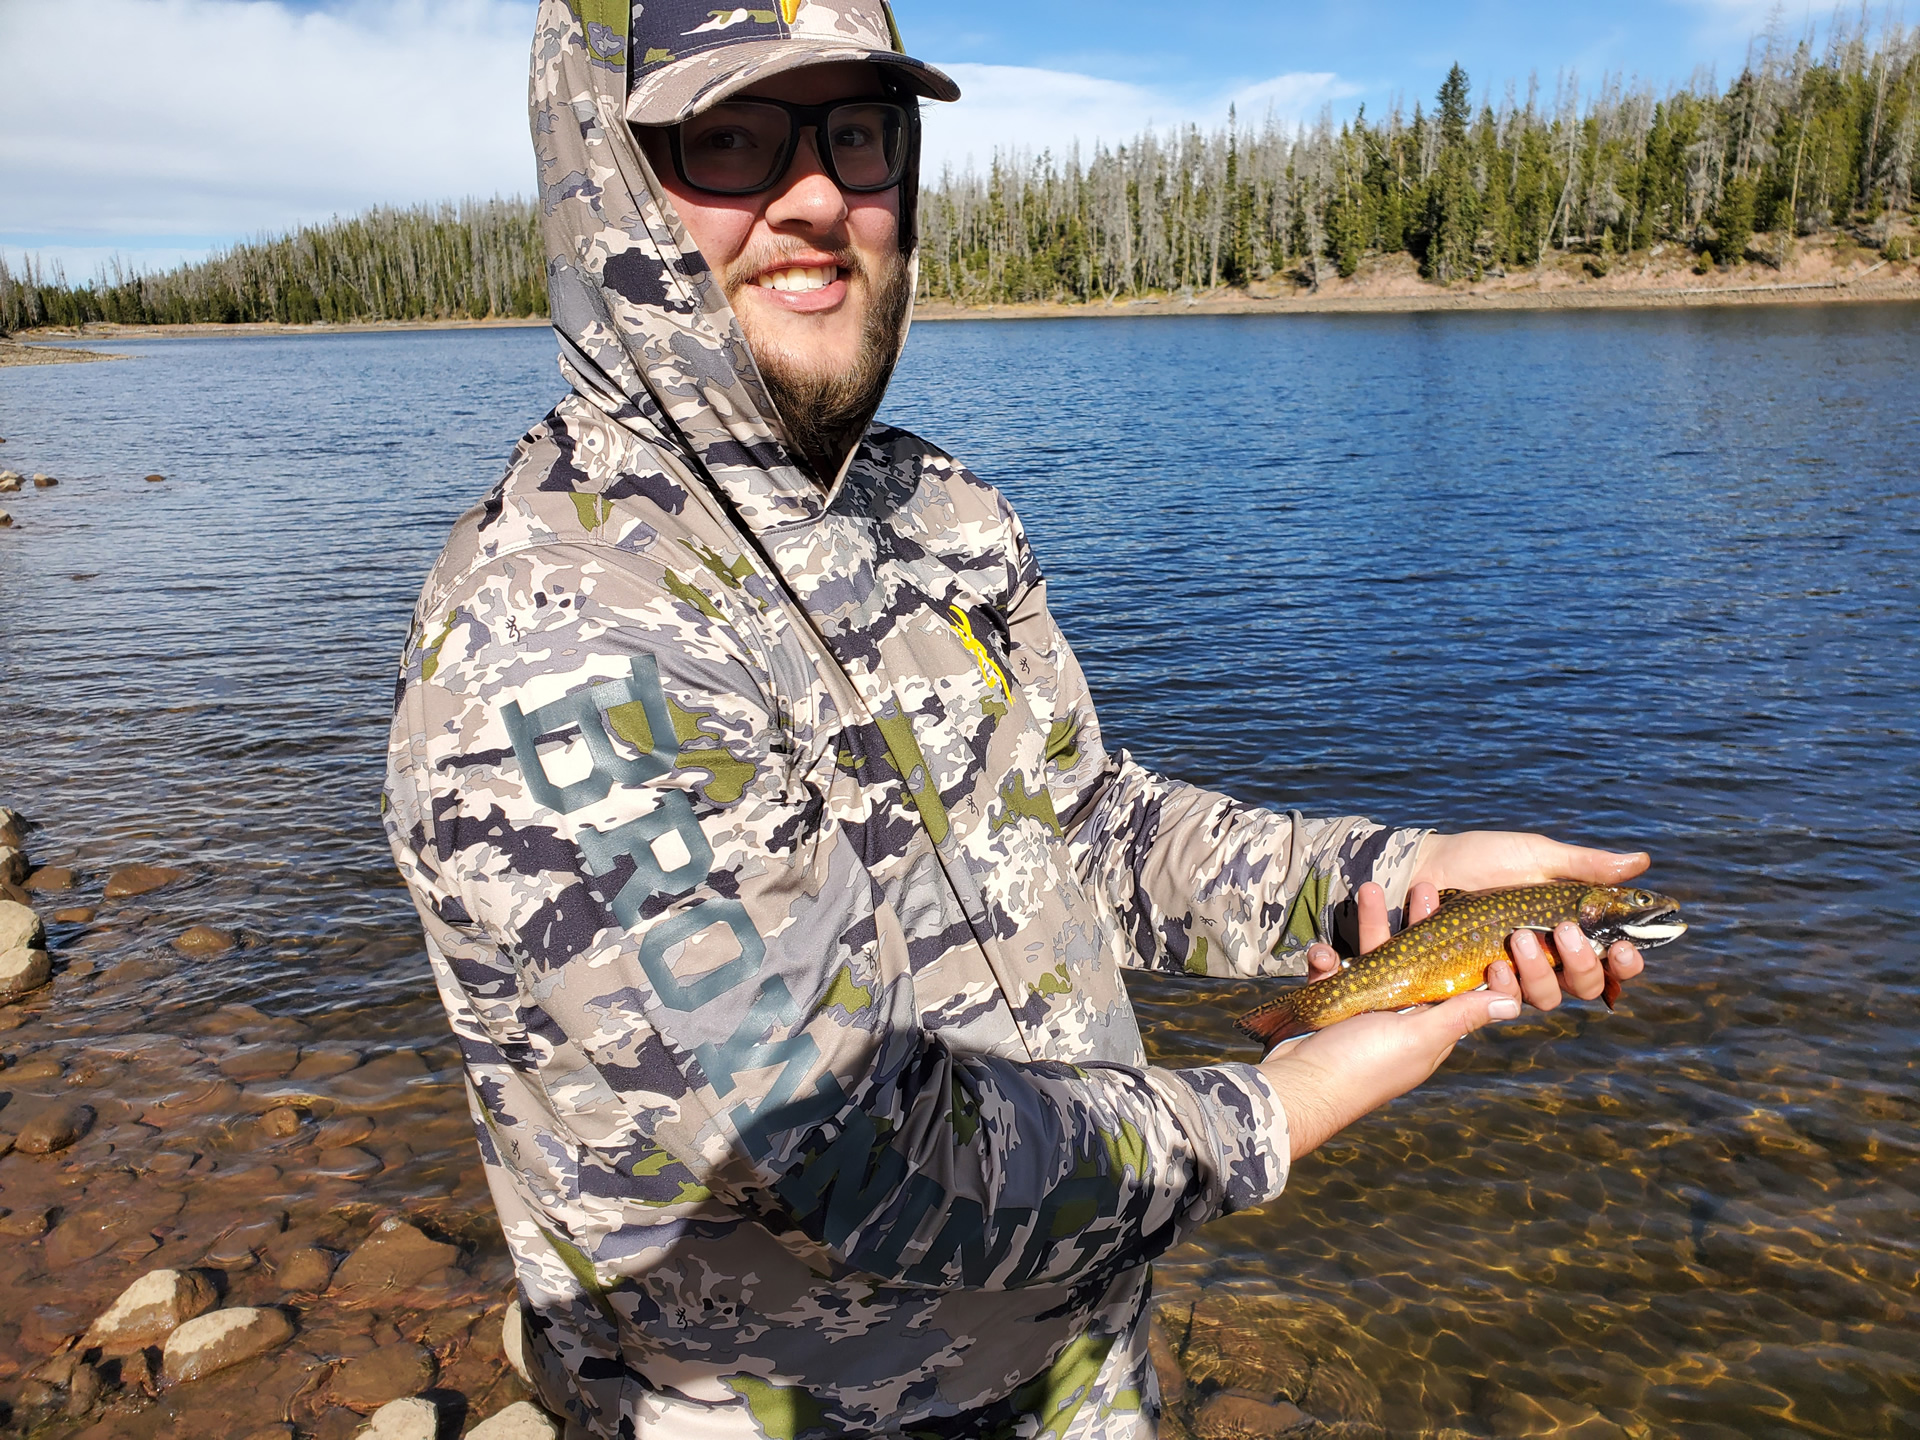
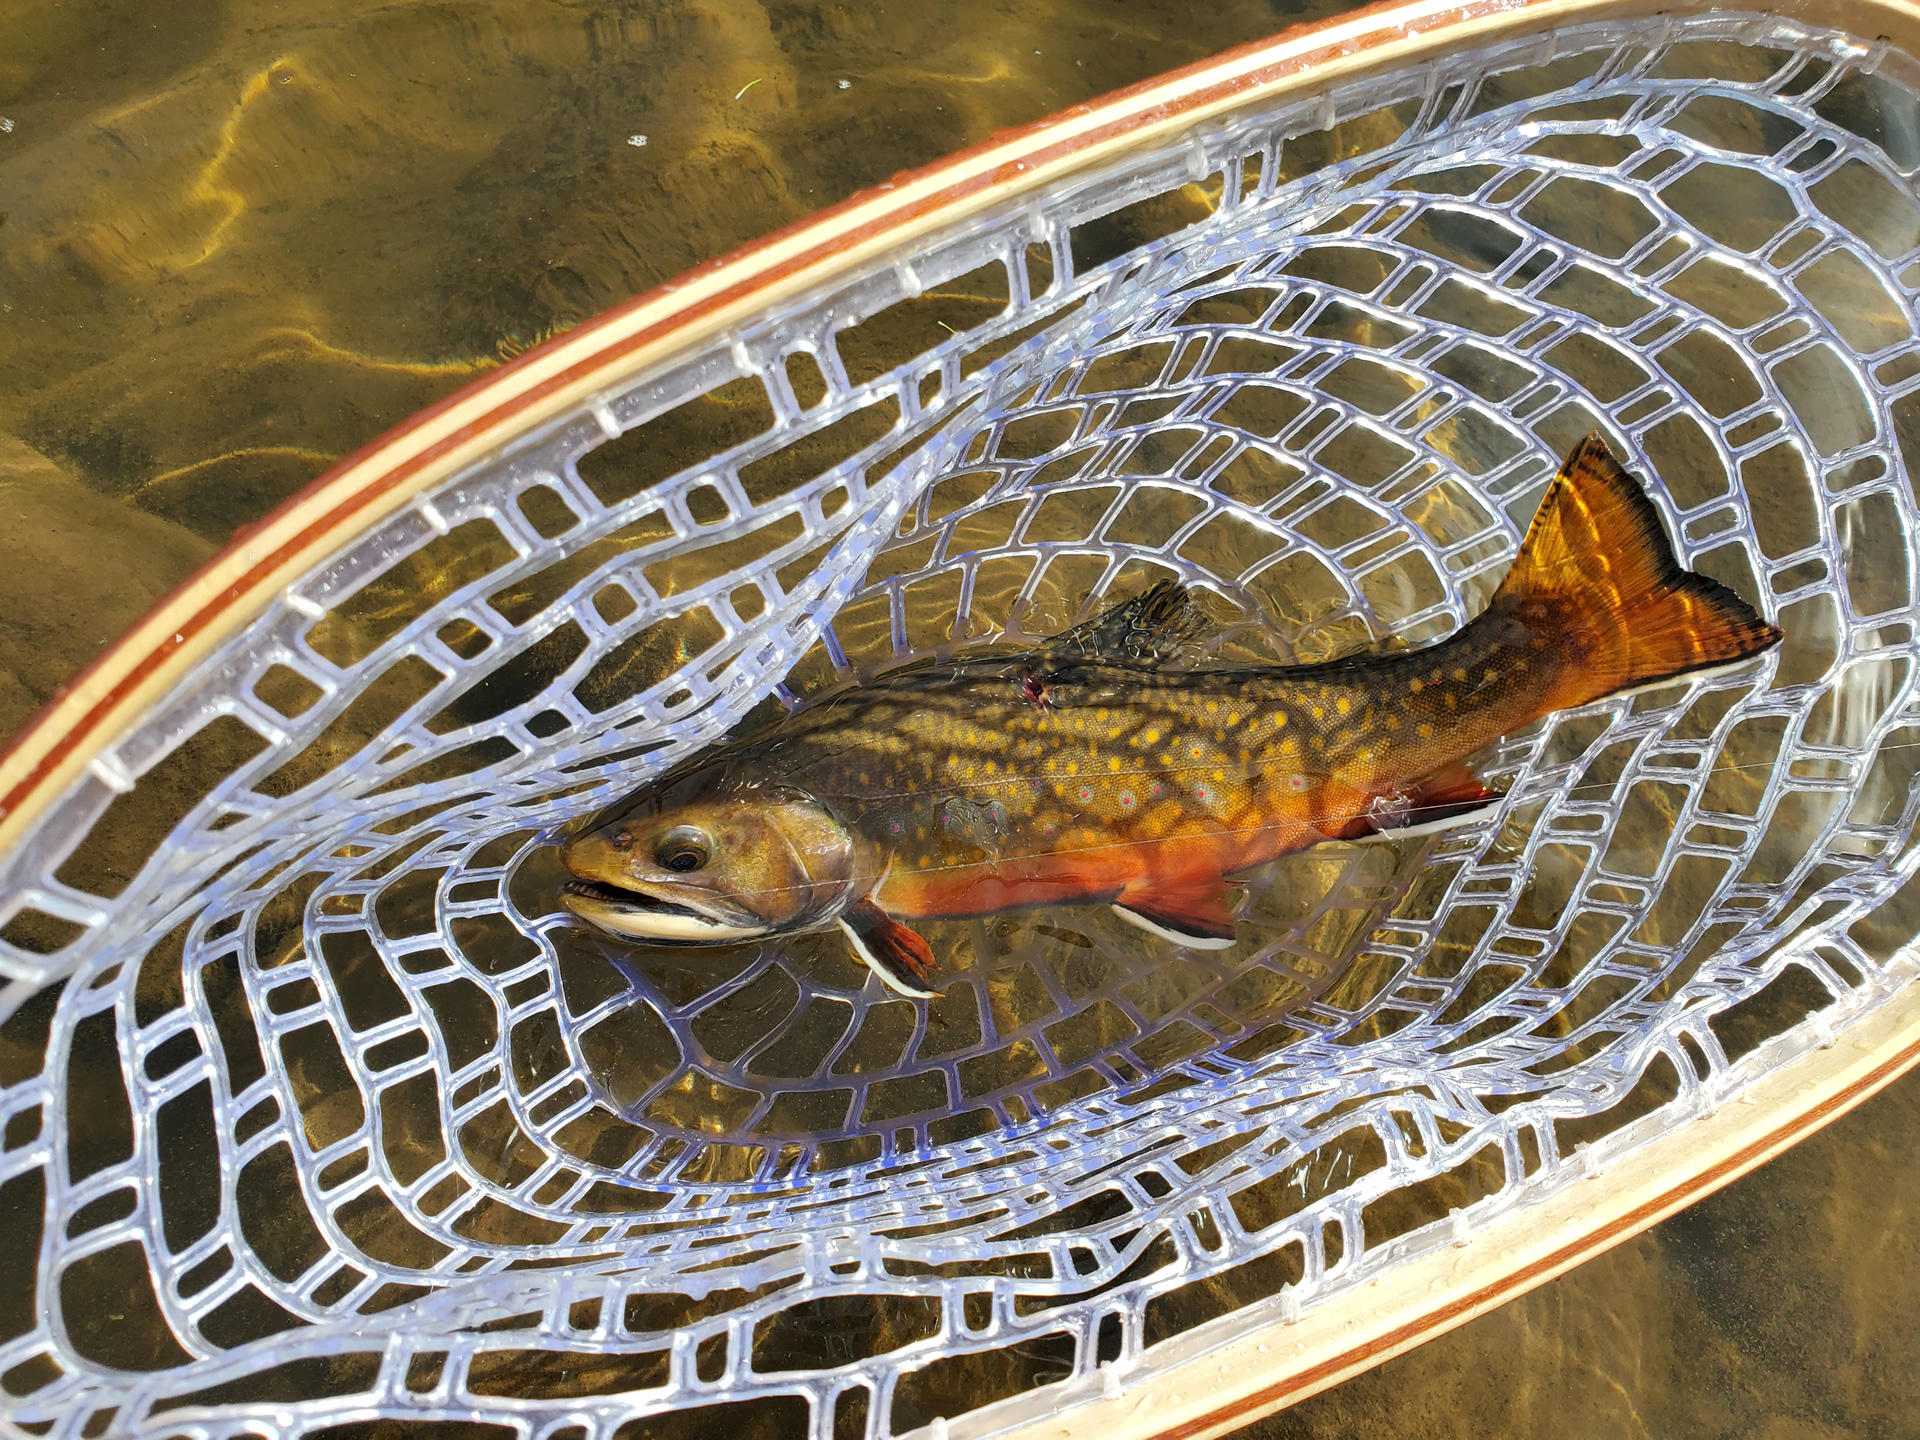
Tenkara fishing the Unita Mountains with likely my personal best Brook Trout in the net.

Tenkara fishing the Unita Mountains with DRAGONtail MIZUCHI Tenkara rod (#ad).
I had high hopes of getting out with my muzzleloader for elk in early November but a combination of a large amount of snow, my knee not it the best of shape, my heart going AFIB and an opportunity to help with a large video project at work had me staying home for the muzzleloader season.
Maybe next year we will see some elk.
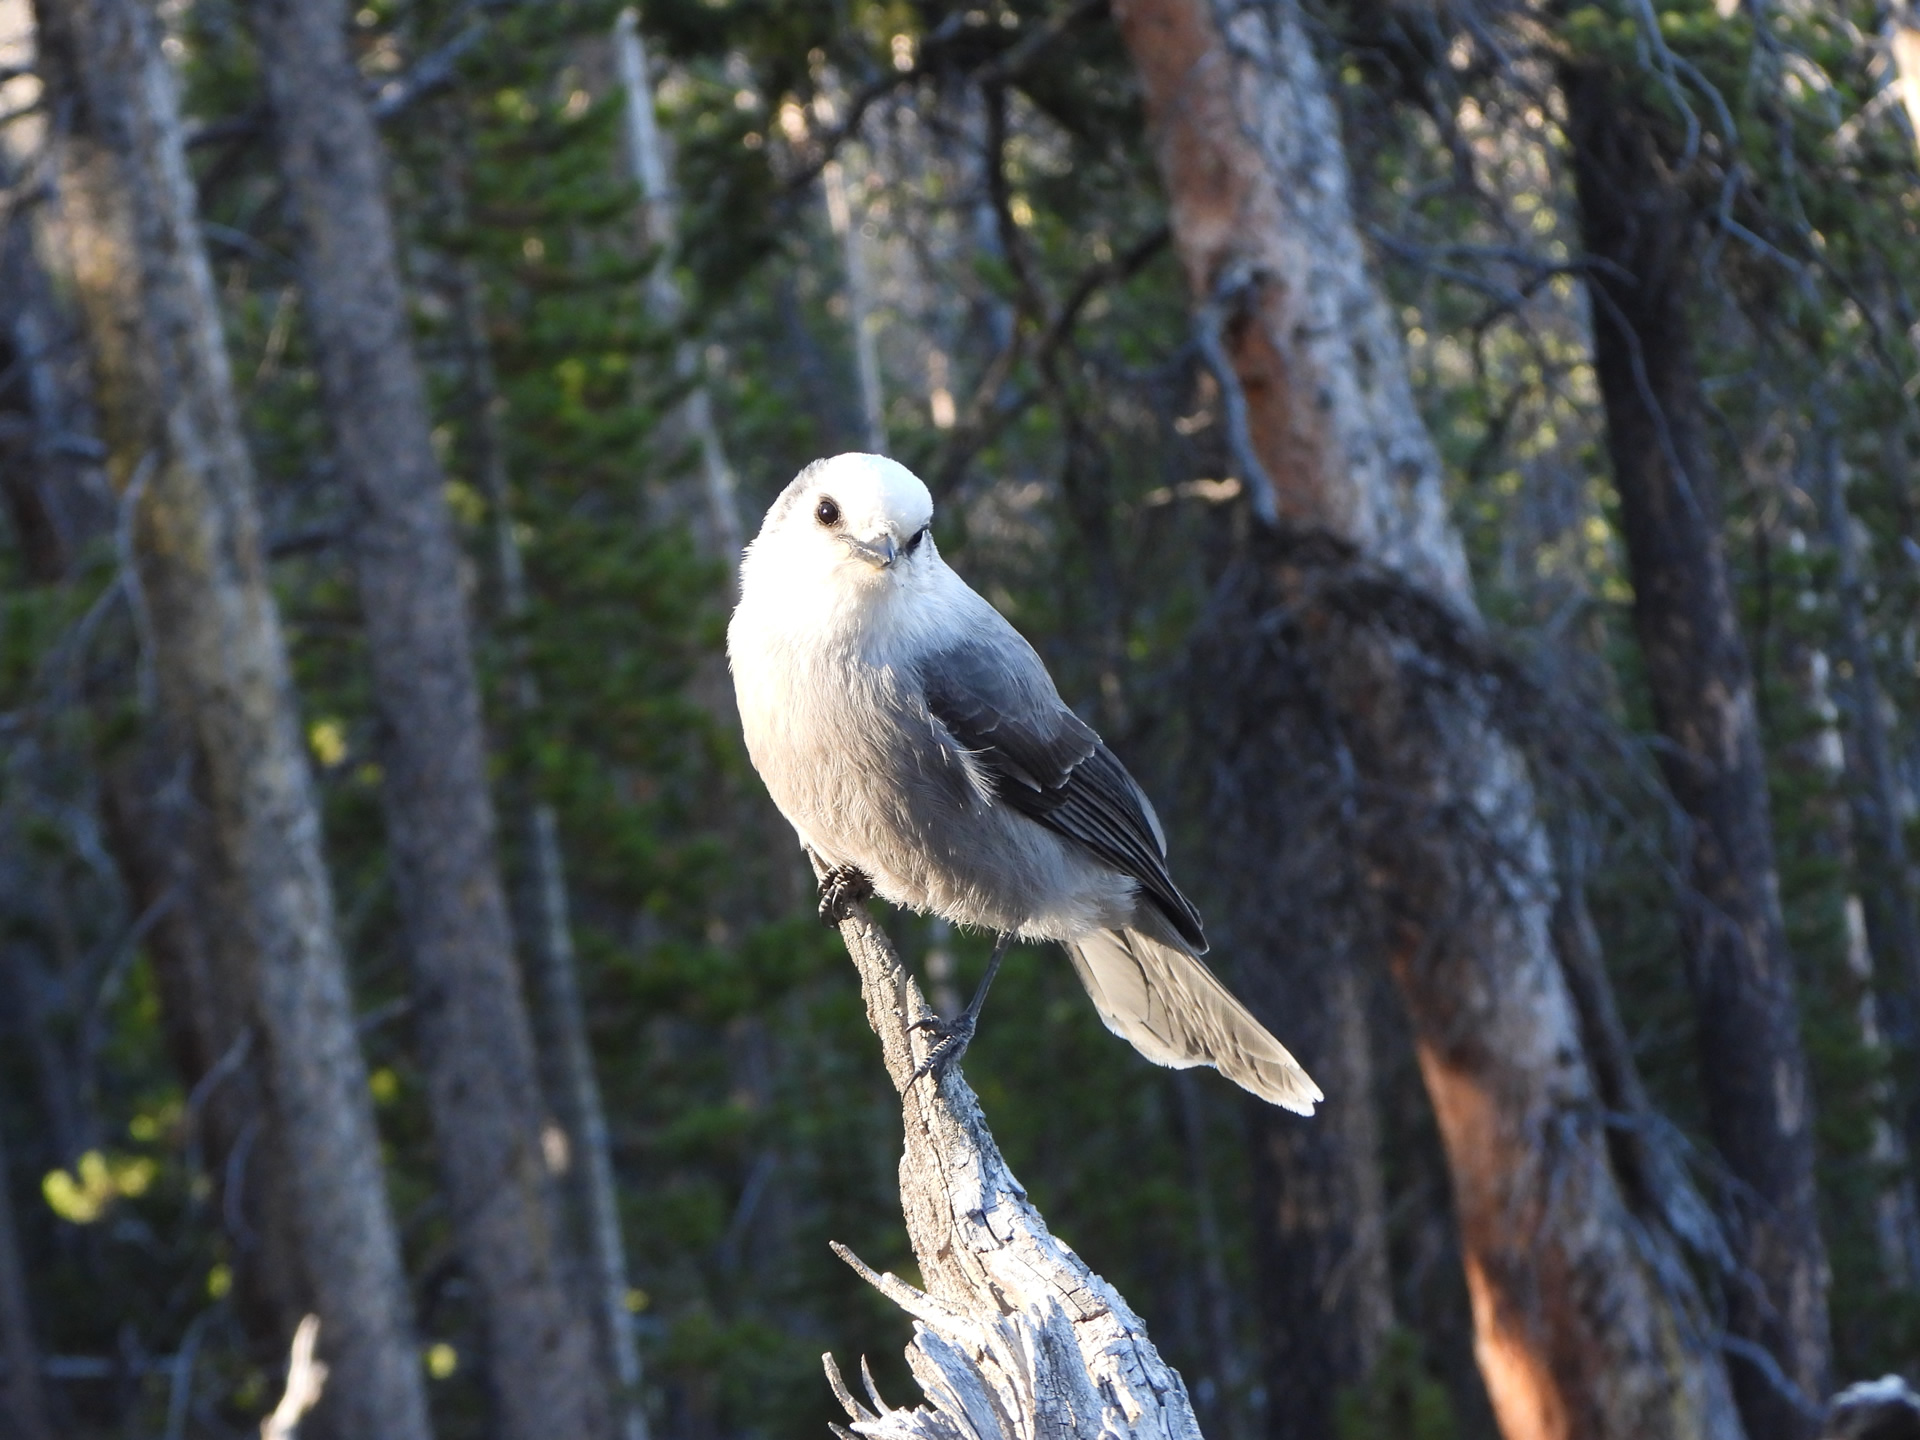
Always fun to have Gray Jays drop by for visits while elk hunting.