
- Details
- Written by: The DIY Hunter
- Category: Technical
- Hits: 3462

My 2018 Trek Roscoe 8 with 141 Boost Rear Hub.
I have a Trek mountain bike with a 141 boost QR rear axle. Where do I get a replacement hub for it? That's the question I had. Here is what I did to get a 141 boost rear hub for my rear wheel, break that hub and then build a wheel with a much stronger hub to handle my large size — that being 6'7" and 240-pounds.
In 2020, I purchased a 2018 Trek Roscoe 8 that had hardly been ridden. The frame is an XXL, which is a hard size to find but the size I needed to fit me. Two years later in April of 2022 the original rear hub was toast, with the hub's bearings locked up almost solid. At this time, I found out how hard it was to find a decent 141 boost hub to fit this Trek mountain bike.
Trek and maybe other manufacturers decided to go with an odd or should I say, different rear hub setup — the 141 Boost QR rear hub. Aside from cheap China hubs I have found, the only way to get a mainstream name-brand 141 Boost hub is to take a 148mm x 12mm thru-axle hub, remove the end caps and replace them with QR end caps. I did find that DT-Swiss offers some QR end caps for their hubs. I also found the much more affordable yet good quality Sun Ringle SRC 148x12 hub (281-32618-K003) and QR end caps (281-31519-K004) that work to make this a 141 boost hub.
In 2022, I purchased a 32-hole SRC 148x12 rear hub and a 32-hole Sun Ringle Duroc 40 rim. The bike originally came with 28-hole Duroc 40 rims and since I was rebuilding the wheel with a new hub I decided to beef up the strength with 4 additional spokes. While this SRC hub setup worked great, I was a little concerned about the strength of running a thru-axle hub without the thru-axle.
Three years later, my fears came true. The lack of a more robust axle going through the thin aluminum axle sleeve on the SRC hub led to the axle snapping in half on a climb in April of 2025. I believe it was cracked and starting to break for a couple of weeks, given it was starting to behave just a little odd when shifting gears. Anyhow, I was back to finding a solution and wanting to build something stronger.
What my broken axle Sun Ringle SRC rear hub looked like after its last ride.

My snapped axle on a Sun Ringle SRC rear hub.
As I had found a couple of years before, DT-Swiss has some options, but trying to figure out which hub matches with which QR caps was a little challenging and the pricing of their hubs is a little out of my budget, so I decided not to pursue a DT-Swiss.
That put me back to the one Sun Ringle hub option, the SRC 148x12. However, this time I worked out a way to greatly enhance the strength of the hub by using a piece of stainless steel 12mm round tubing, essentially putting a thru-axle through the middle of the hub as it was originally intended to have. After cutting the stainless steel tubing to 5.22" it fit perfectly through the hub and before the final assembly, I coated it with a little grease before inserting it through the hub.
I've ridden over 50 miles on this new beefed-up rear hub and so far, so good. As I get more time on this hub, I'll update this article.

The stainless steel 12mm round tubing I then cut to 5.22 inches long to make an axle for my 141 boost hub.

12mm Stainless Steel tubing cut to length ready for installation, Sun Ringle QR caps and Sun Ringle SRC 148x12 rear hub. The cap on the freehub side threads on with the hole of the QR machined to take an hex key to tighten this cap on. On the brake rotor side, the end cap just snaps on.

This shows the stainless steel 12mm round tubing inserted into my SRC 148x12 hub. I just need to place the brake rotor side QR end cap on and I now have an extra strong 141 boost hub.
- Details
- Written by: The DIY Hunter
- Category: Technical
- Hits: 22097

35x12.50r18 Hankook DynaPro MT2 tires on my 2008 JKU.
When I purchased my 2008 Jeep Wrangler in 2018 it came with a set of BFGoodrich All-Terrain T/A KO2 tires. I have liked the tires and felt they performed very well on the road and on the mountain. As the tread life wore down to two 32nds it was time for a new set of tires and I wanted to try something new.
I have been studying tires for my JK since the day I bought it. While I really like the look of the aggressive mud-terrain tires, the road noise and winter road traction had me a little nervous. While the Toyo MT tires have been my favorite to look at, price-wise and their reputation of not doing well on icy roads turned me away from them. Since my JK is my daily driver it was important for me to have some decent winter driving traction.
Given where I take my JK the primary function I wanted was better off-road traction than an all-terrain but near all-terrain road traction. One of the big reasons I bought my JK was because I spent two different nights on the mountain being stuck in my old Montero. So my Jeep needed to have some decent mud-clearing tires.
In the end, it came down to two tire choices, Milestar Patagonia MTs and Hankook DynaPro MT2 tires. As you can see the Hankooks won out. While the price, winter road traction and off-road traction were great for the Milestars I preferred the look and hopefully longer tread life of the Hankooks.
Finding the Hankook MT2 was a little harder and I ended up ordering 5 Hankook DynaPro MT2 tires off Amazon for $311 a piece and having my local mechanic mount and balance them.
Since my BFGoodrich KO2 spare had never been driven on I decided to do some comparisons.
- Measured Weight: MT2 = 75 lbs and KO2 = 68.4 lbs
- Measured Tread Depth: MT2 = 18.5 32nds and KO2 = 14 32nds
- Measured Diameter: MT2 = 34" and KO2 = 34" (at 29psi both tires run at 33" on my SuperChips tune to get the speedometer correct)
- Measured Tread Width: MT2 = 10 1/8" and KO2 = 10 1/2"
I only have a few thousand miles or so on my new Hankooks so far and so far I can only hear a little road noise. They have a more aggressive look than my KO2s but I am hopeful they will be fairly decent on winter roads with the siping in the tread blocks. We will see in a few months.
I will update this blog entry and let you know how they are working as I get more miles on these tires.
April 1, 2021 Update
I now have 10k miles on these tires and used them through hunting season with plenty of driving in the snow.
- The tire's tread depth ranges from 15 to 16 32nds. This is with a 5-tire rotation every 2K miles. (I rotate frequently because my camber is off by 1.6 and 1.9 degrees in the front. Long story...)
I have been very happy with these tires. While cow elk hunting, I made a half dozen trips up the mountain with amazing traction in snow that was over a foot deep in places. I didn't even air down and they climbed right up the steep sections of ATV trails cutting fresh tracks through foot-deep snow with ease.
I felt plenty of confidence on the snow-packed roads through winter. Not once did I feel like I was slipping on the snowy roads. Now I know they can't be as good as AT and heavily siped snow and road tires but I felt very comfortable in the snow with them.
They perform awesome on loose gravel trails and in the mud. I haven't gotten into rock crawling so I'm not sure how they would perform at Moab but for a hunting rig that is my daily driver, I love them.
May 7, 2021 UPDATE
I took the Jeep to Moab. These tires are great!
April 23, 2023 UPDATE
I'm coming up on almost three years of driving with the MT2s. The tires are at 28,000 miles (although a little less because of the 5 tire rotation). The tread depth is now between 11 and 12 32nds. The tread is wearing evenly. I'm still really liking the tires. In the past year, I have had the tires balanced again.
October 26, 2024 UPDATE
I now have 40,000 miles across these 5 tires. The tread depth is now between 8.5 and 10 32nds. The wear looks very even across all tires.
July 19, 2025 UPDATE
I have 45,000 miles on the tires and the tread depth is between 8 and 9 32nds on all five tires.

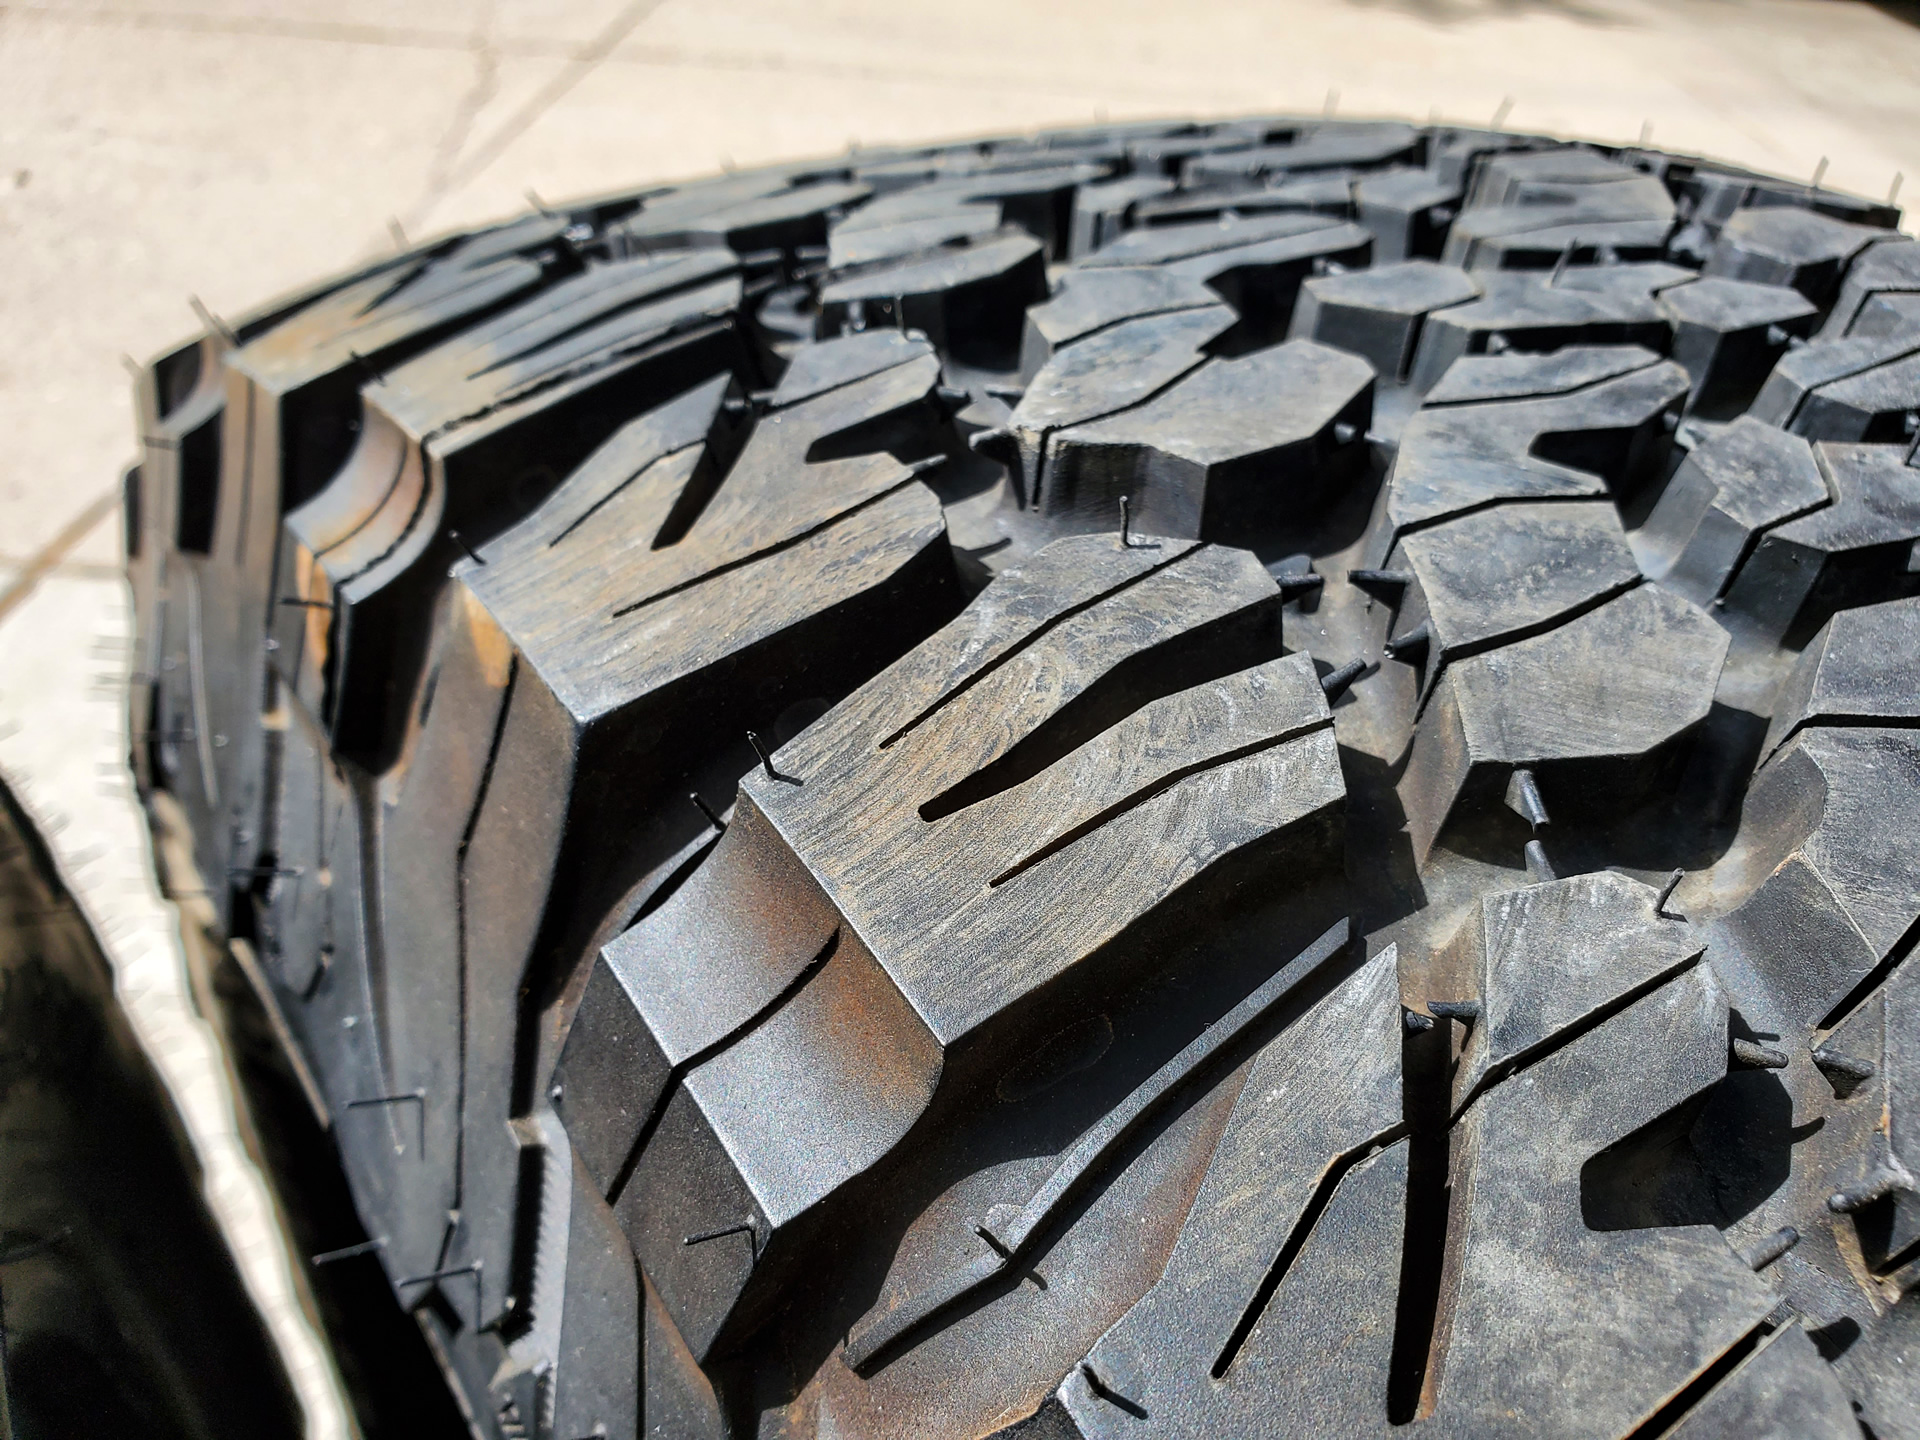
Side by side look at the tread pattern of a 35x12.50r18 BFGoodrich A/T KO2 on the left and a Hankook DynaPro MT2 on the right.
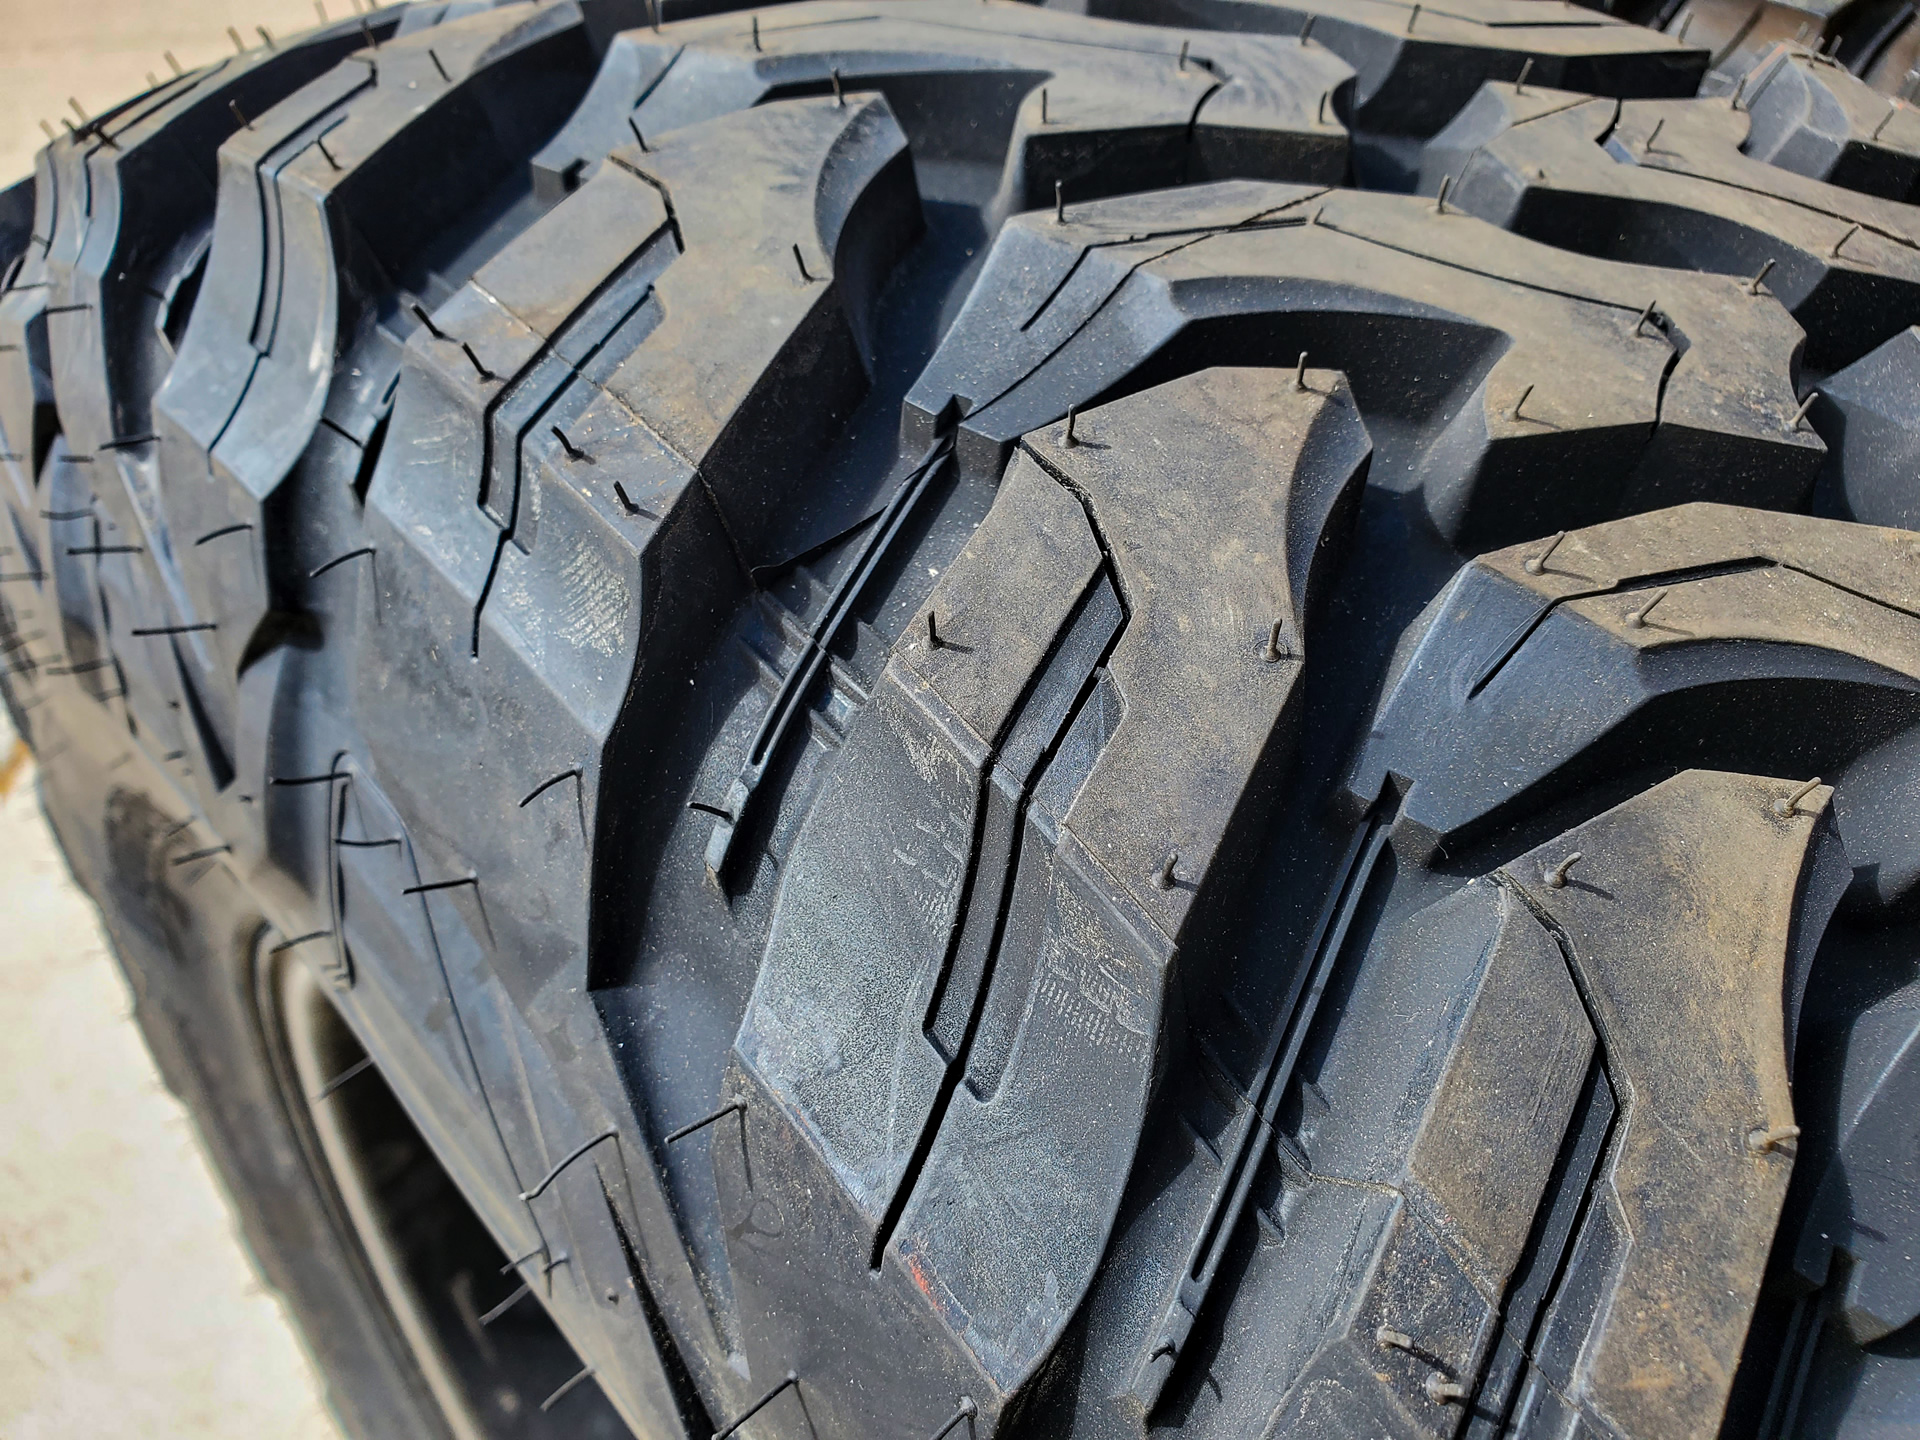
35x12.50r18 Hankook DynaPro MT2 tires.
35x12.50r18 BFGoodrich All-Terrain T/A KO2.
- Details
- Written by: The DIY Hunter
- Category: Technical
- Hits: 13043
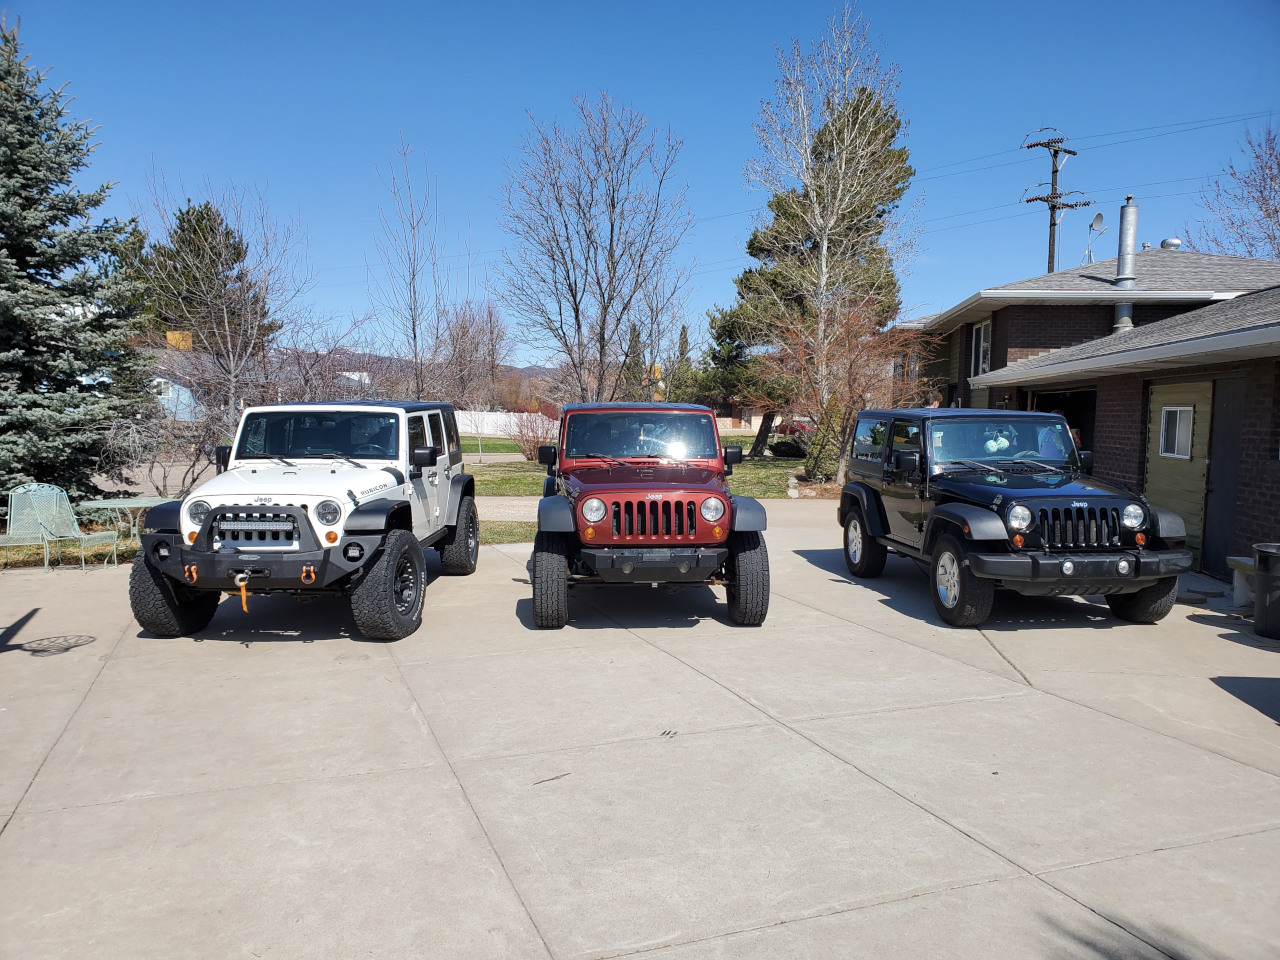
2008 JK Rubicon, 2007 2 Dr JK Rubicon and 2011 2 Dr JK Sport.
In this article, I discuss using the Misch BigBoy seat bracket to get 2 extra inches of legroom in my son's JK and I drill holes in stock JK seat brackets to get an extra inch of legroom for my JKU.
In 2020 we added two more JKs to our family. My daughter bought her first vehicle a cute black 2011 two-door Jeep Wrangler Sport and I purchased a 2007 two-door Rubicon for my 7' tall teenage son.
Aside from just how cool and functional Jeep Wranglers are they offer decent headroom and pretty good legroom for taller drivers. However, not the most optimal legroom for really tall drivers.
I am 6' 7" and have been driving my 2008 four-door JK for a couple of years now and have found that often my right leg is getting cramps as I have to rotate my right foot at a 45-degree angle on the gas pedal with my right shin jammed up against the console. It's bearable but has bothered me to the point that I wanted to spend $175 for a Misch BigBoy 4x4 seat brackets.
With my 7' tall son, there was no question, it was time to get the extra legroom in his 2007 JK, so we ordered the Misch BigBoy bracket.

Misch BigBoy JK driver's seat bracket on the left and the stock JK seat brackets on the right, Notice the three small mounting holes on the Misch brackets are two inches farther back than the stock brackets.
The process of unbolting and bolting in the new Misch bracket was fairly easy and quick. The only thing that I had to do was place large washers under the front of the bracket and the floor. The side closest to the console would not bolt flush to the floorboard because the floorboard starts to curve upward to the console so I added the thick large washer to get the bracket to mount flush and not just dig into the console side.
In the process of removing the stock brackets and comparing them to the Misch brackets, I realized that the stock seat brackets have just enough room in them to add exactly one inch of legroom. To get this extra inch of legroom I drilled two 5/16" holes exactly one inch back from the two rear holes on each of the stock brackets. There is a larger hole already behind the front mounting hole on each of the brackets so no drilling is necessary for the front bolt. However, I used a washer on the two front holes when I mounted the seat onto the brackets. If you drill the holes back farther than an inch there is a slot on the console side bracket that a bar mounted on the seat will not fit within.
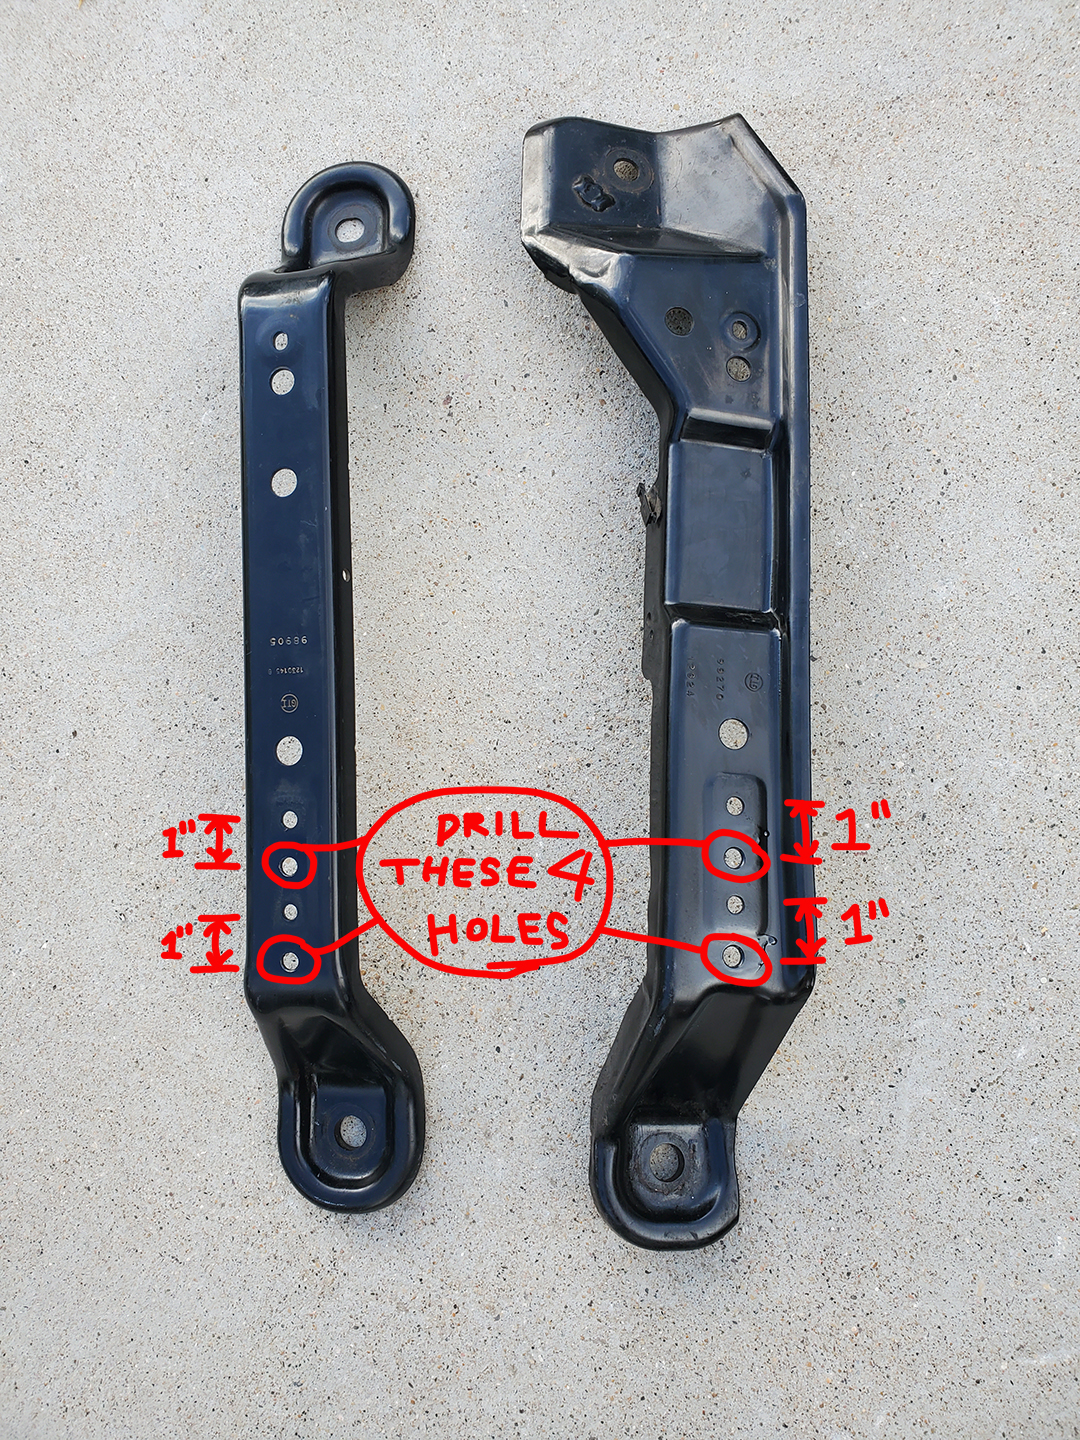
Stock JK driver seat brackets with hour holes drilled into them allowing the seat to mount one inch further back.

Stock JK driver seat brackets mounted one inch farther back on the brackets (top of this image is the rear of the seat). There are three bolts on each side that mount the seat to these rails. The stock holes for these bolts are an inch below all six of the bolts in this photo. Notice the washers with the two front mounting bolts.
So when I removed the brackets from the 2007 JK I cleaned up the brackets, drilled, deburred and painted the new mounting holes then I replaced these stock brackets into my personal 2008 JK and it works great. I now have an additional inch of legroom in my 2008 JK all for the cost of a little Rustoleum paint and an hour of work.
I do really like the Misch brackets and my 7' tall son needs all the room he can get but for really no cost at all the extra inch I am getting out of stock brackets feels great in my 2008 JK.
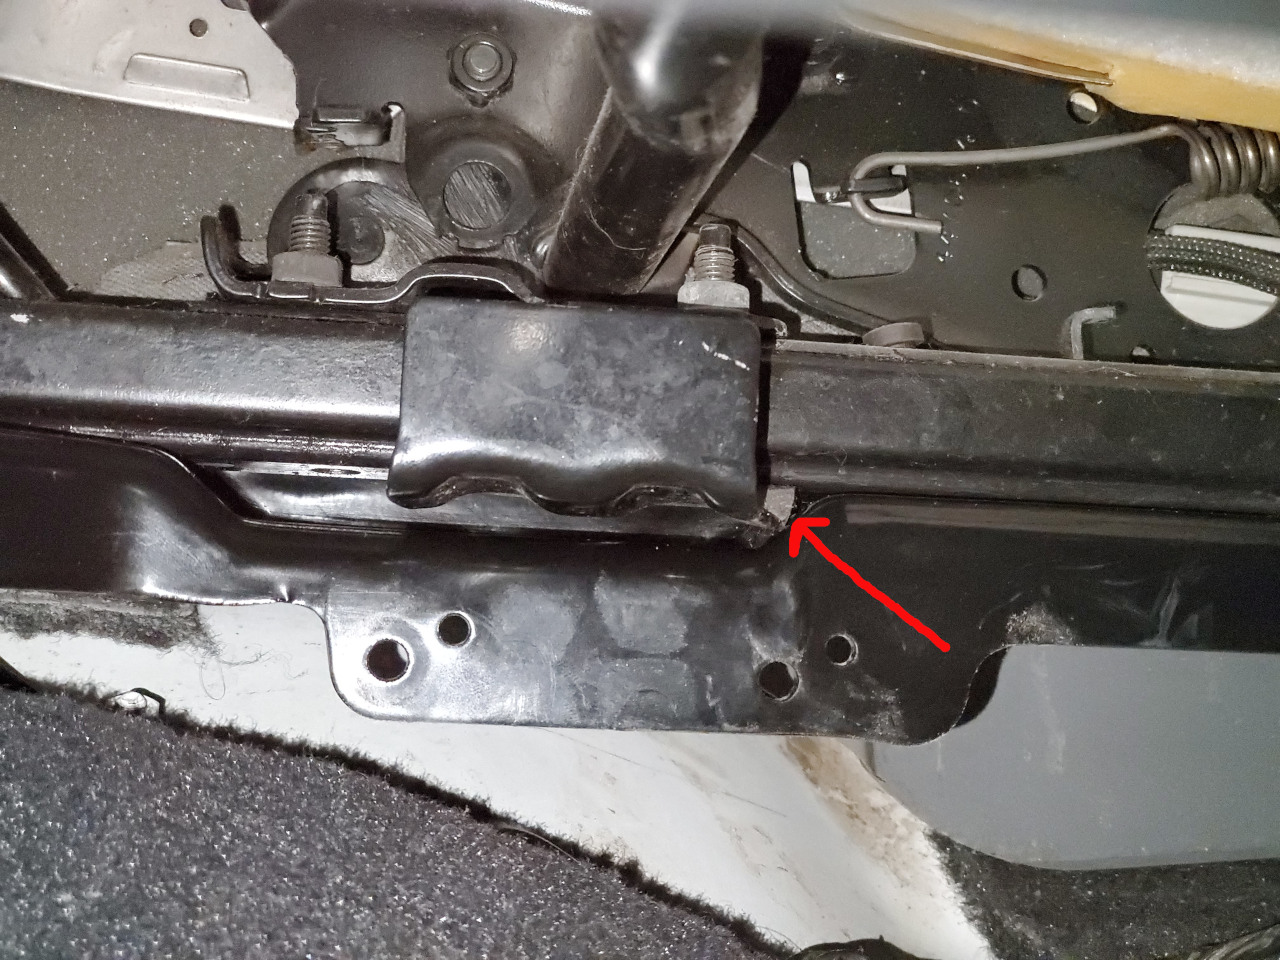
Stock JK driver seat brackets mounted one inch farther back on the brackets. Notice a bar from on the seat just touches the bracket right where the arrow is at. This is as far back as you can mount the seat.
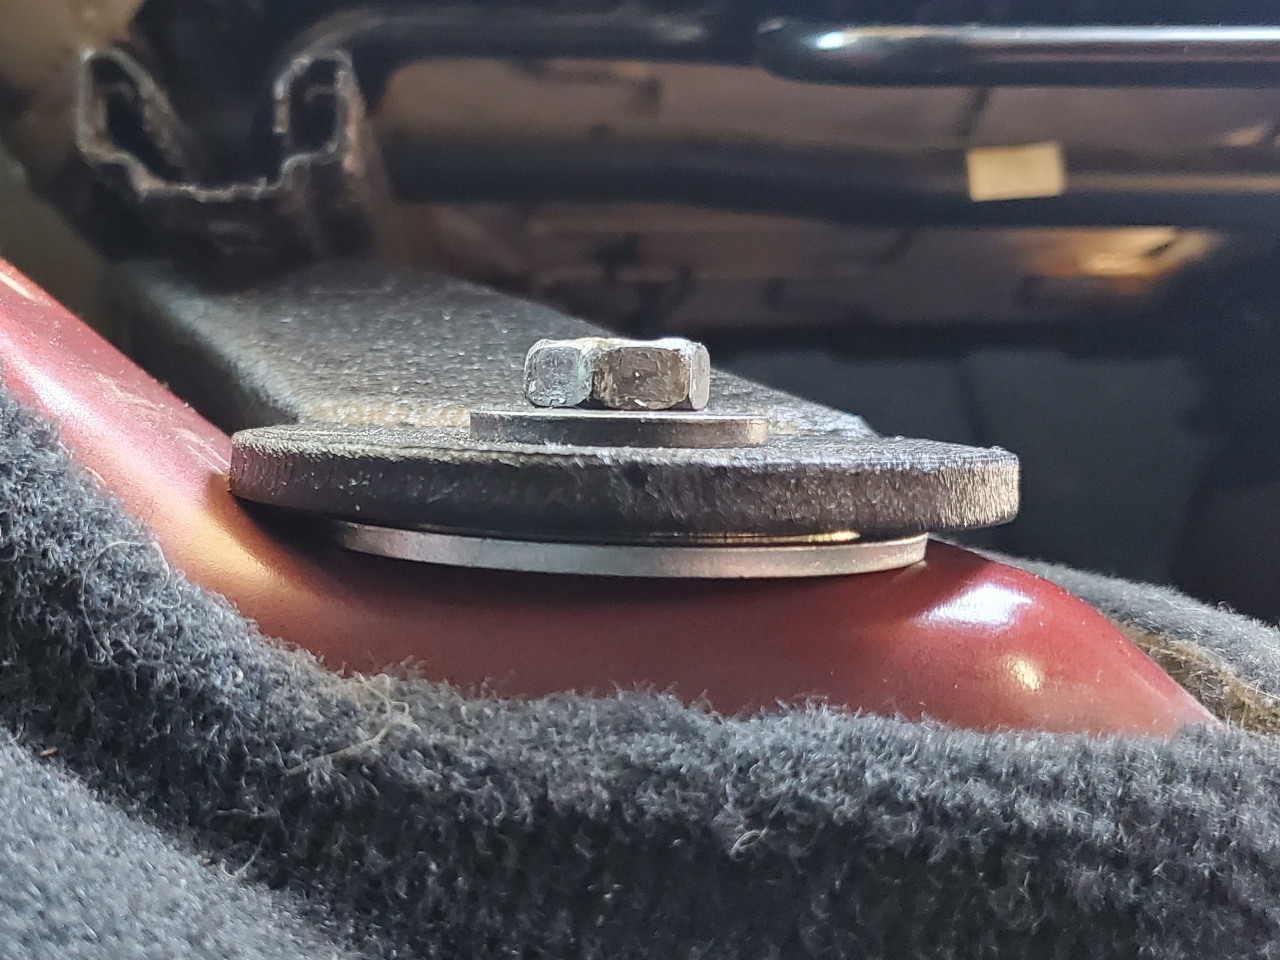
To get the Misch bracket to work I had to place large washers under the front of the Misch BigBoy brackets.
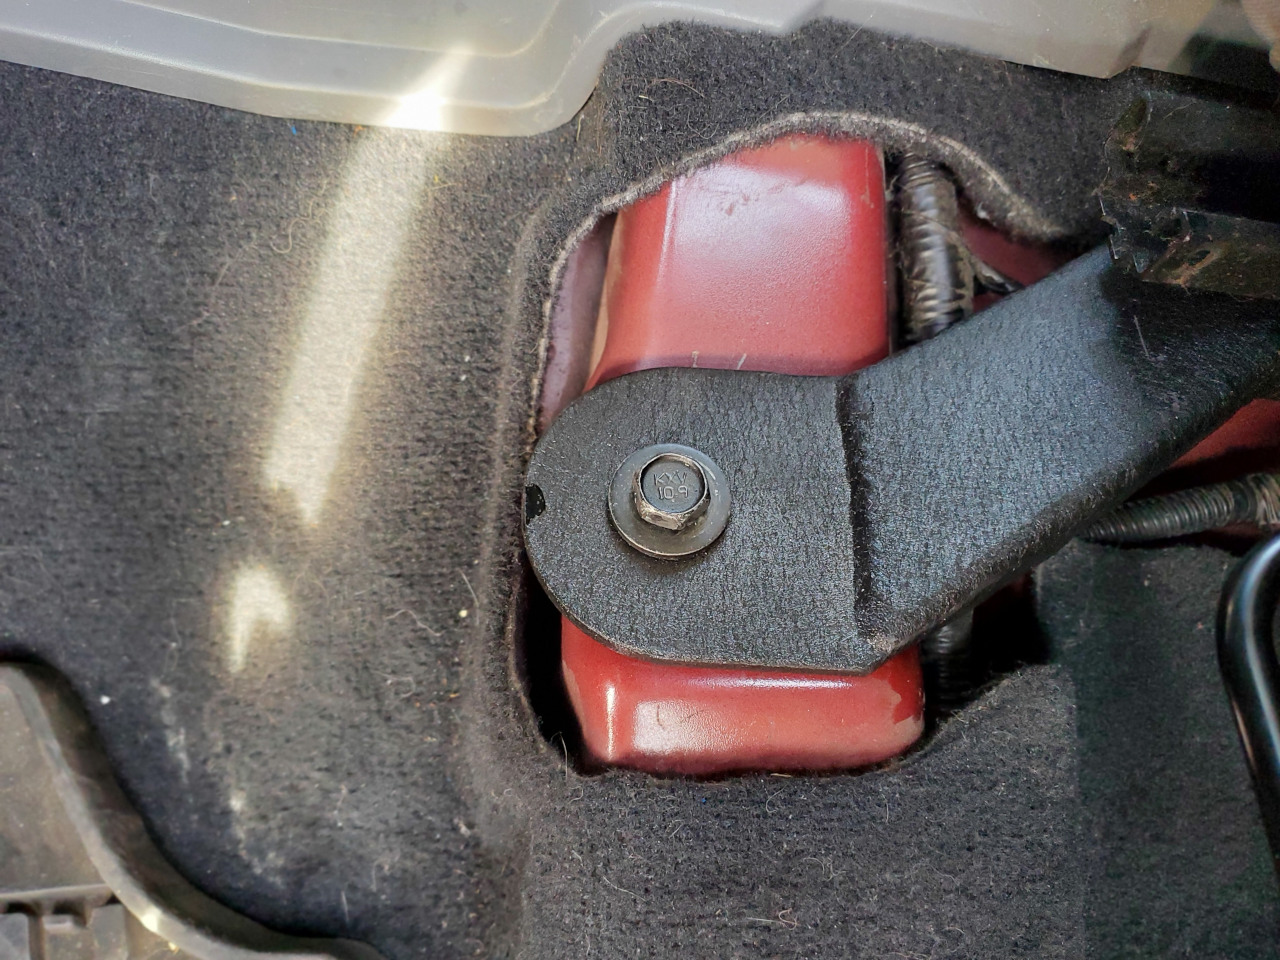
Misch BigBoy bracket has a smaller footprint so there is a portion of the exposed Jeep body showing but it's fine, it's a Jeep.