- Details
- Written by: Kaden Smith
- Category: Outdoor
- Hits: 1725
The big, beautiful trout flashed its spotted gray body as it tossed and turned in the water; the fishing rod was bent to confirm its big size. That's right, my dad and I, as well as our Golden Doodle Dog, Biscuit, took another trip to the Wind Rivers. What made it extra special was that we got to bring my brother, Dallen, who brought his Basset Hound dog, Roscoe, along. I've mentioned this before, but Dallen hasn't caught a golden trout, so the route planned was the same as last year. Considering that we would be primarily targeting the golden trout.
This video shows highlights from the trip!
We visited many lakes that held golden trout on the previous trip. At one lake, my dad and I probably caught around thirty golden trout each. The previous year, we went at the end of July, but this time, we went at the end of June instead. Going earlier to the Wind Rivers, the weather is much cooler, which should make the golden trout more active, was the thought process. We were also recommended by various fishermen who have gone to the Wind Rivers that going a month earlier was more optimal.
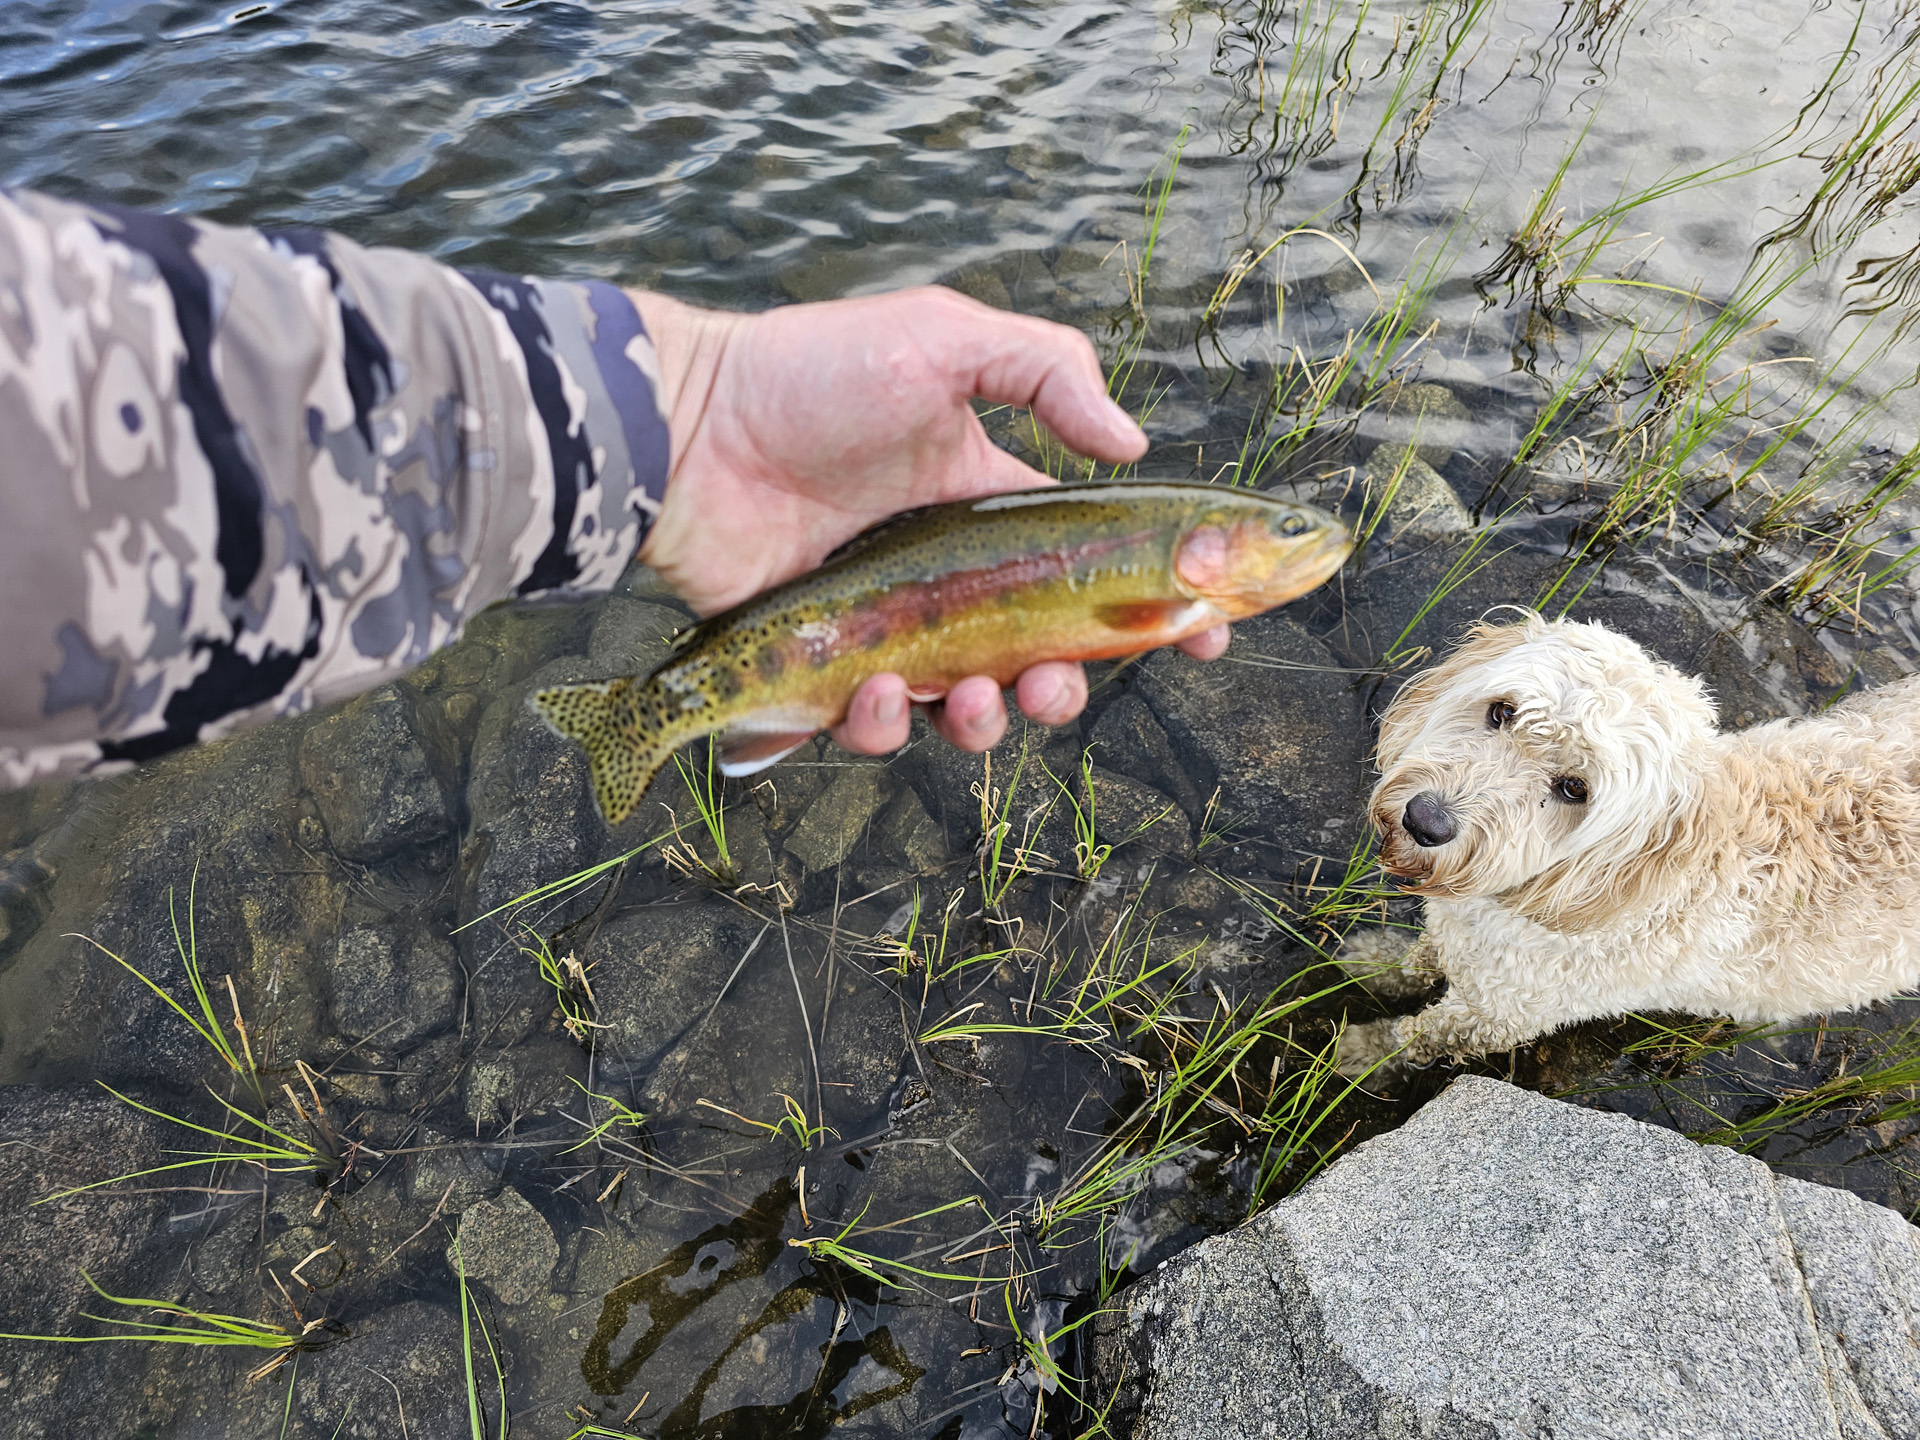
Biscuit from the last Wind River trip staring at a golden trout.
Preparations for the trip included reducing the backpacks' final weight. Dad found a lot of lighter gear options on Amazon to help us lighten our packs. He got a lighter, solar-powered battery, and gave his older, bigger one to Dallen. He also found new lightweight titanium pots, a 750 ml, and a 450 ml, as well as some small stoves to heat and hold the pots. Dad bought me a new spinner rod since I broke the end of my rod on our previous trip to the Wind Rivers. My lure on the rod got snagged on a branch while we were hiking out, causing the tip of the fishing rod to snap off. I went into this trip planning to remove the lure from the fishing rod every time we weren't fishing and were hiking.
What was nice was that a few weeks before the trip, we were able to get a lot of good camping supplies from a nice camping yard sale. Everything at the yard sale was going for like fifty to sixty percent off. So my brother and Dad took full advantage of getting a bunch of flies as well as bright lures that would work well for golden trout. Things bought from the yard sale that weren't fishing related were some shovels, hot dog sticks, and some cast-iron pans. All in all, it was very convenient that this yard sale happened right before the trip.
We did do a trial run at one of our favorite lakes to fish at in the Uintas again. Dallen was able to come along on that short weekend trip. During that trip, we were able to catch some tiger trout, and I caught a cutthroat trout. We figured out that adding freeze-dried fruit to our oatmeal for breakfast was a nice combination, so we added that to our list of food supplies for the big Wind River Trip. For the Wind River trip, our food consisted of oatmeal and fruit for breakfasts, protein bars, jerky, and trail mix as snacks, and for dinners, we ate mashed potatoes and stuffing for the first couple of days, and then switched to eating Mountain House food. Dad worked on making jerky to have for the trip.
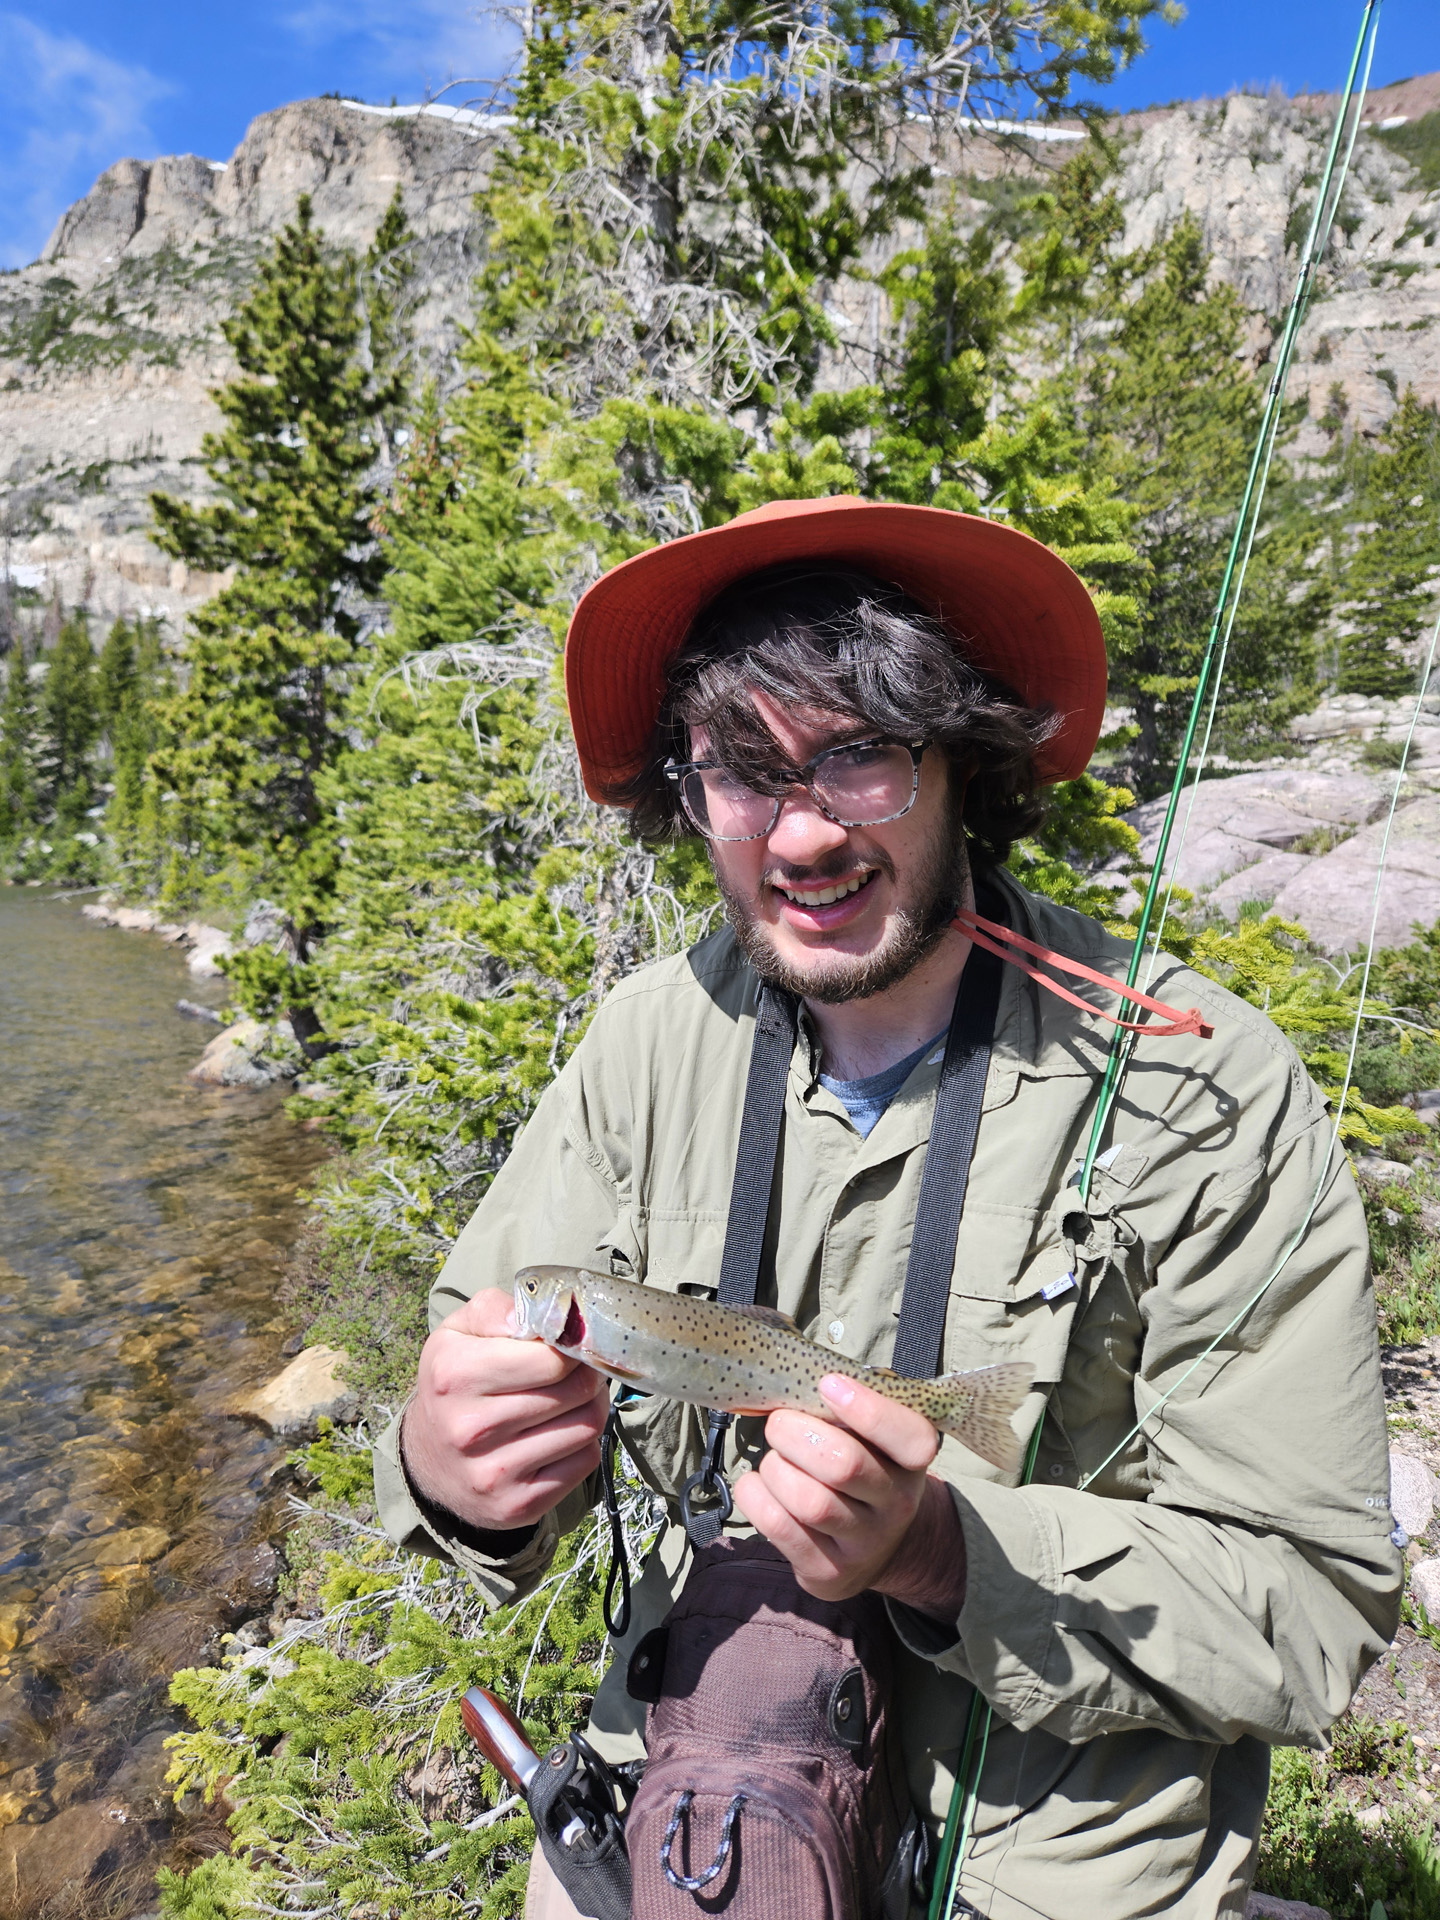
Me with a cutthroat I caught from a lake in the Uintas.
At last, the day had arrived to set out for the Wind Rivers again. When we did the final weigh-ins of our packs, mine and Dallen's were between fifty and fifty-five pounds. Dad's pack was a little heavier. What was nice was that my dad and I's Wyoming fishing license was for a year, and so we didn't have to buy new licenses. Dallen, however, had to buy a Wyoming fishing license as a last-minute thing.
Our clothes we were going to wear for the trip we sprayed with mosquito repellent, including our socks. We were able to leave at around seven in the morning. It took about four hours to drive to the Wind Rivers. But we arrived at the Wind Rivers around 11:00 with no delays. The trail we were hiking on was the Elkhart Long Lake Trail
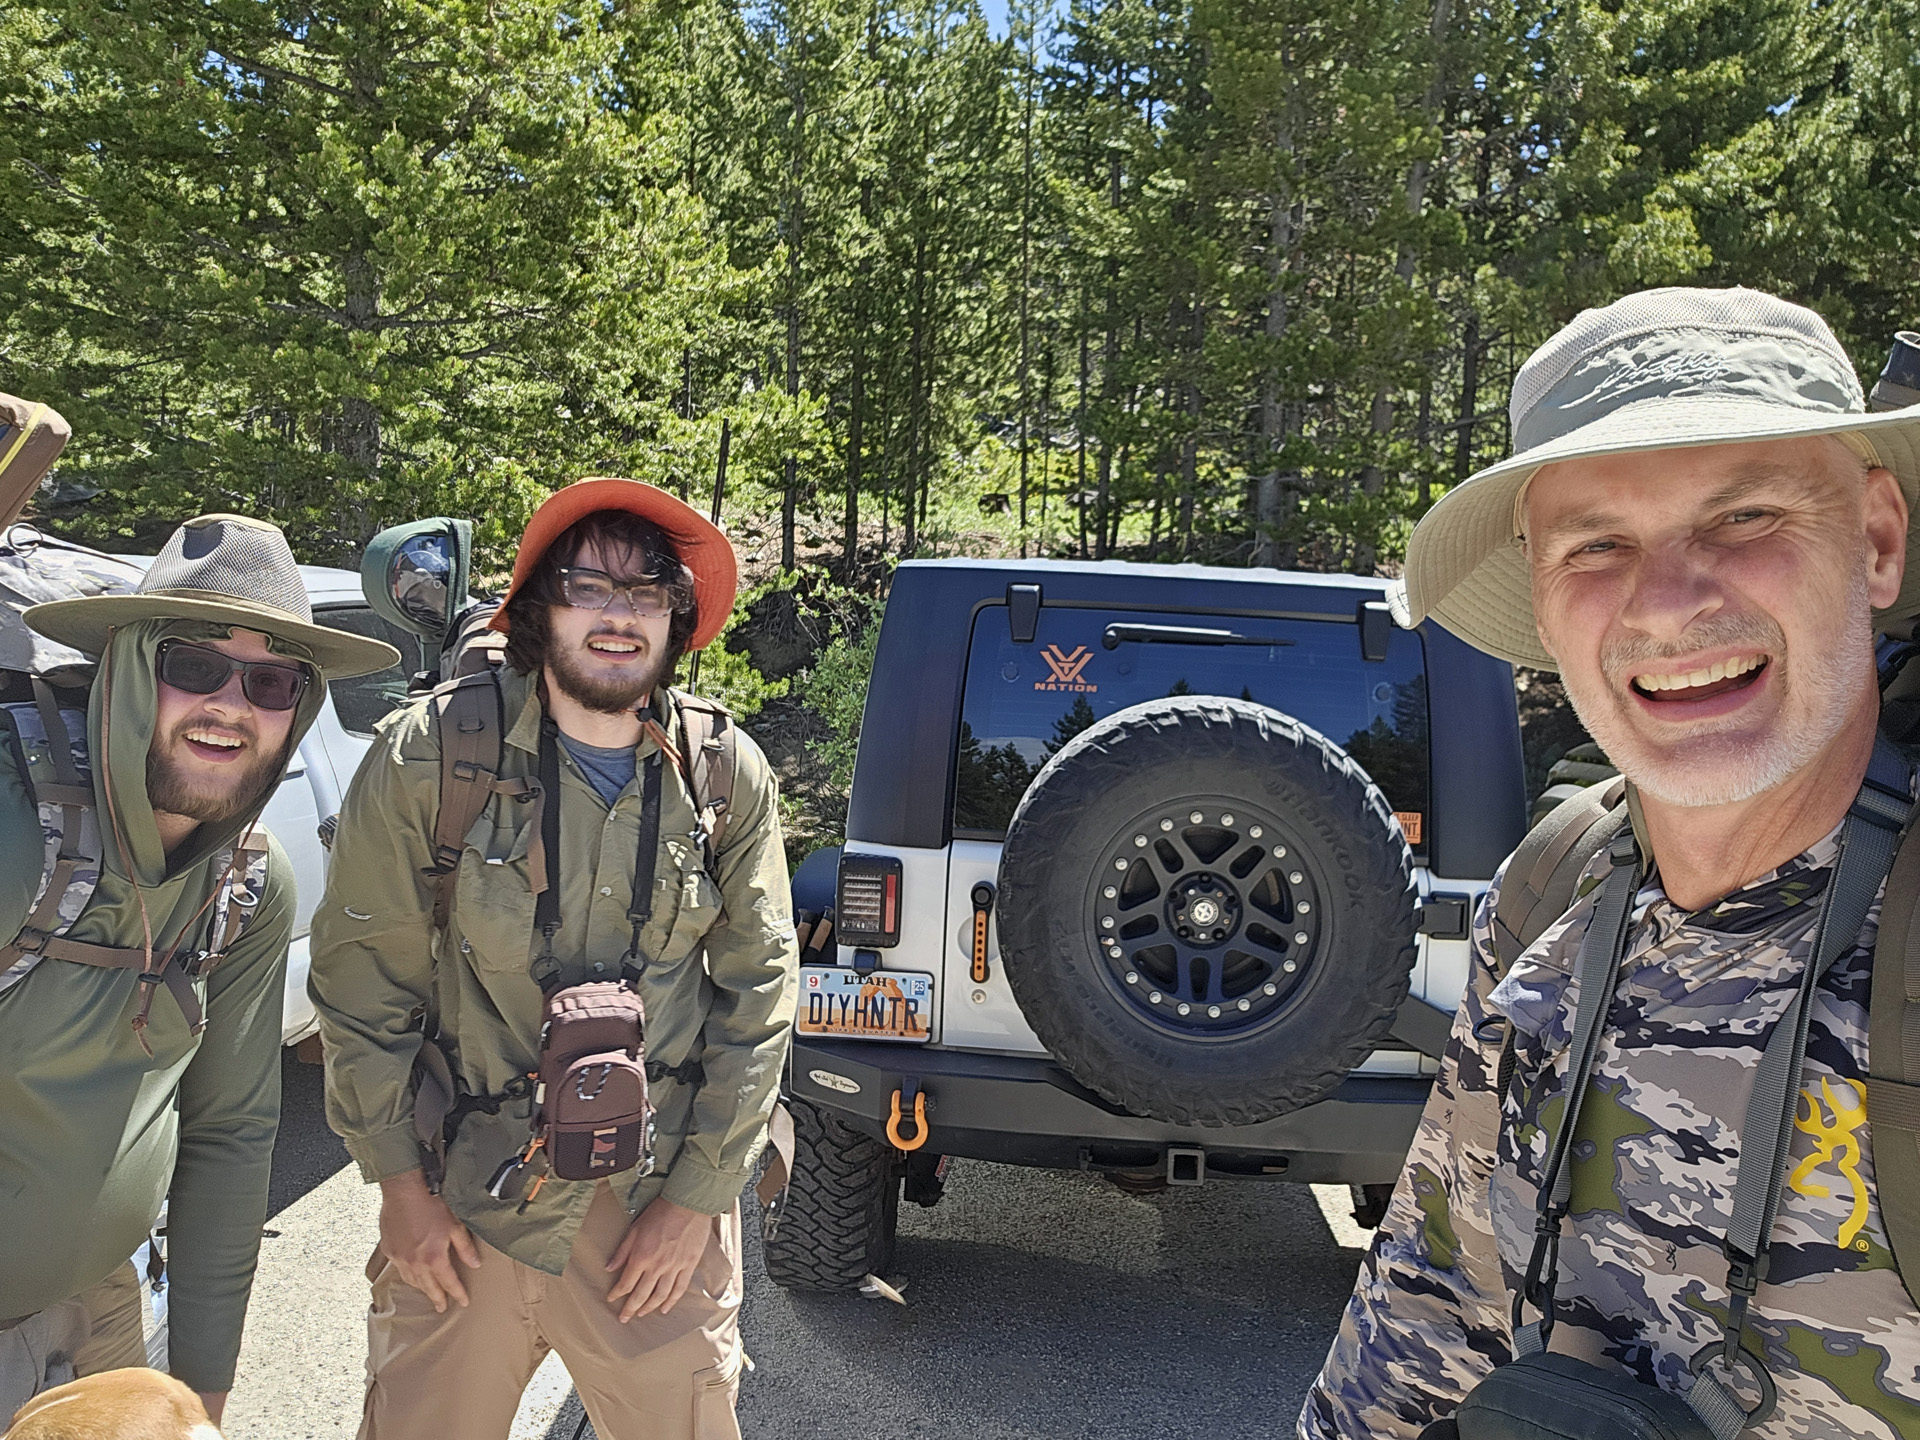
Arrival at the Wind Rivers, us before starting hiking.
Our first day of the trip was mainly spent hiking and getting far enough in to reach the lakes that held golden trout. It was nice that the weather was cooler, for it made the hiking easier on me and Dad. We didn't have to spend as much time taking breaks to drink some water and cool down. Our new socks and shoes were working well; they were comfy and not too warm for our feet. We skipped the first lake that we could have possibly fished at; it just had small brook trout in it. After three hours of hiking or so, we made it to a golden trout lake. We stopped to fish at it for a while, I tried every lure in my tackle box and various flies on my fly rod, but wasn't able to get even a single bite.
Dad tried every fly in his inventory as well, and Dallen tried a ton of spinners. With the lack of fish at that lake, we decided to hike half a mile to try fishing at a different lake. Around this time, there wasn't much light left. Dad said he would pump some water and work on setting up the tent while Dallen and I fished at the lake. I tried a bunch of different flies at some fish I saw jumping, but didn't get any bites. Eventually, I moved over to where Dallen was fishing.
After about forty minutes of fishing next to Dallen, I decided to try my luck with using some brighter colors. I didn't get any bites, but Dallen was able to get his first golden trout on a bright pink spinner. The golden trout Dallen caught was a pretty decent-sized one, too. The golden trout was probably eleven or so inches long. Which is bigger than most of the golden trout my dad and I caught last year. After Dallen caught the fish, it was almost dark, so we went to find Dad, who set up the tent high away from the lake. It took some time for me and Dallen to find him, but eventually we did. It was thanks to our radios and the Meshtastic app that we were able to locate where he set up camp.
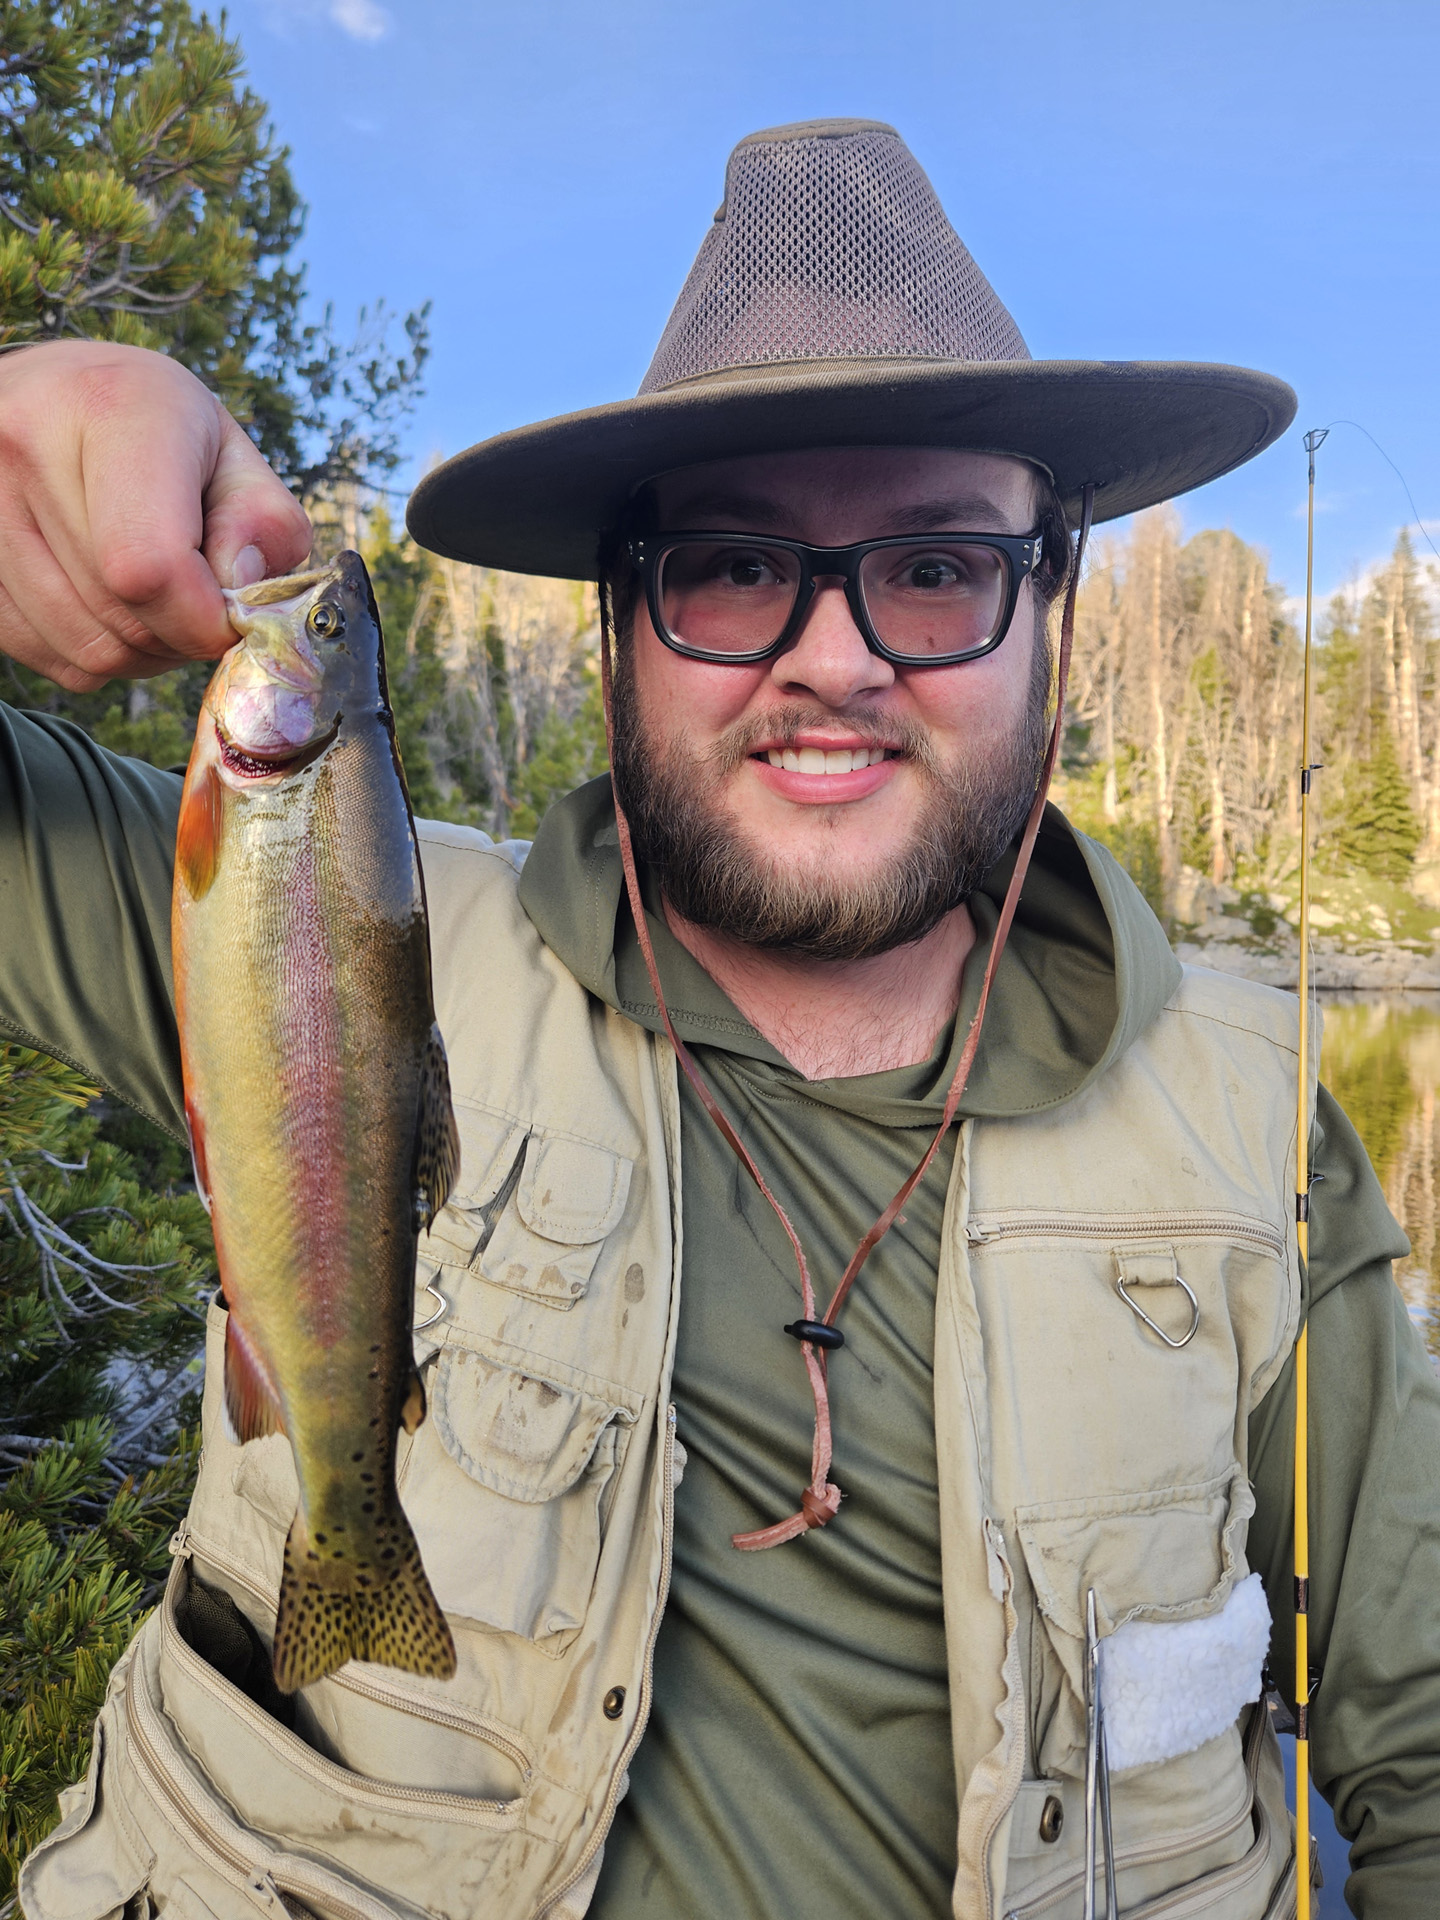
Dallen with his first golden trout he has ever caught!
Dad had been waiting a while and had our dinner prepared. For dinner, we had some stuffing and mashed potatoes that would help alleviate some weight from our packs quickly. The next morning, I woke up at around seven-thirty. I was anxious to try to catch a golden trout again, so I had some oatmeal for breakfast and then immediately started fishing the lake. But this time I tried the very right side of the lake, where there were lots of boulders. I hadn't tried the spot the previous year, but the water looked pretty deep. It seemed to be pretty deep over there at first glance of the lake. I brought my spinner rod with an orange spinner and my fly rod with a pink rubber squirmy tied on. Fifteen minutes into fishing with my fly rod, I got a few bites before landing two of my biggest golden trout ever. They weren't huge fish, probably both around just a foot long. But they were bigger than the golden trout I caught last year. At the same time that I caught my golden trout, Dad was fishing the spot that Dallen and I were at the previous night.
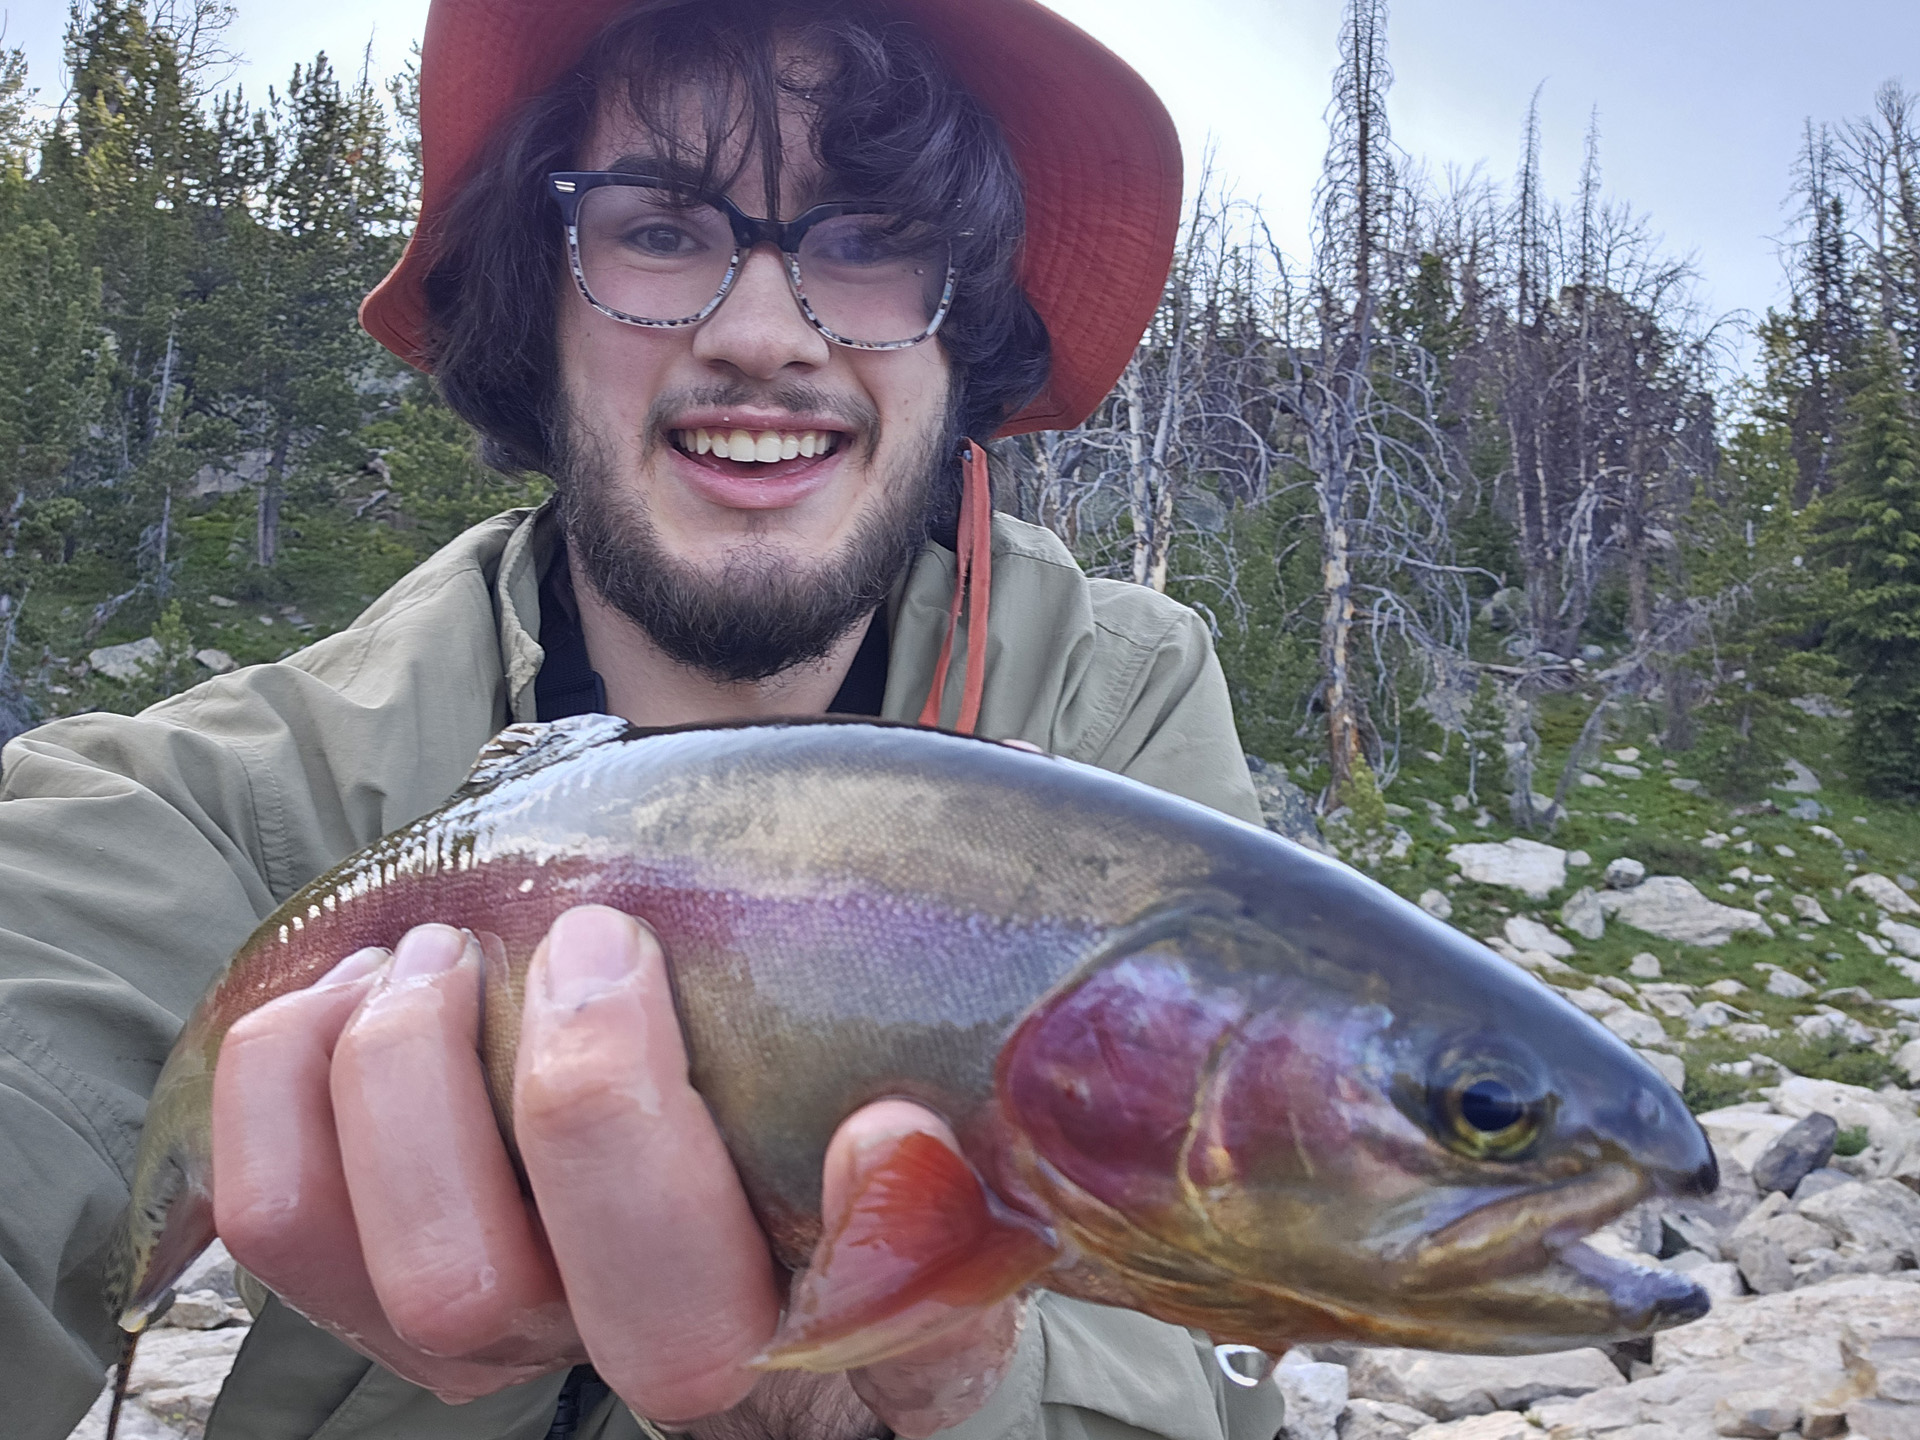
Me with my biggest golden trout I have ever caught!
Eventually, Dallen came to the lake and got some good practice with fly fishing. The fish weren't hitting any of the spinners we were throwing out, but I was able to catch one more golden trout with my fly rod. Around this time, it was getting close to noon, about eleven o'clock, when we decided to take down camp and get to the next lake. We just needed to hike a couple of miles. It only took us about two hours to reach the next lake. This lake was where my dad and I caught about thirty to forty fish each. So we were excited to try our luck at the lake again. We started fishing with some nymphs that worked well on the lake before. We found out that most of the fish were on the left side of the lake, but the fish were being extra picky with the flies. I did get a couple of bites before landing a couple of small fish. Dallen caught a couple with a spinner as well.
After we fished for a couple of hours, we needed to set up camp. Unfortunately, there were a lot of mosquitoes at this lake. We initially started setting up camp down lower while Dad was pumping water. But Dallen and I were getting tired of the mosquitoes attacking us in swarms. The number of mosquitoes we saw at that lake was the most we have ever seen. With that in mind, you can see why we chose to move the tent somewhere else. We moved higher up the hillside to the spot where Dallen said he saw fewer mosquitoes. Once we got to the spot, we realized the mosquito numbers were not much better. What was nice is I realized I had a face net in my backpack, so I threw that on and it prevented the mosquitoes from biting my face anymore.
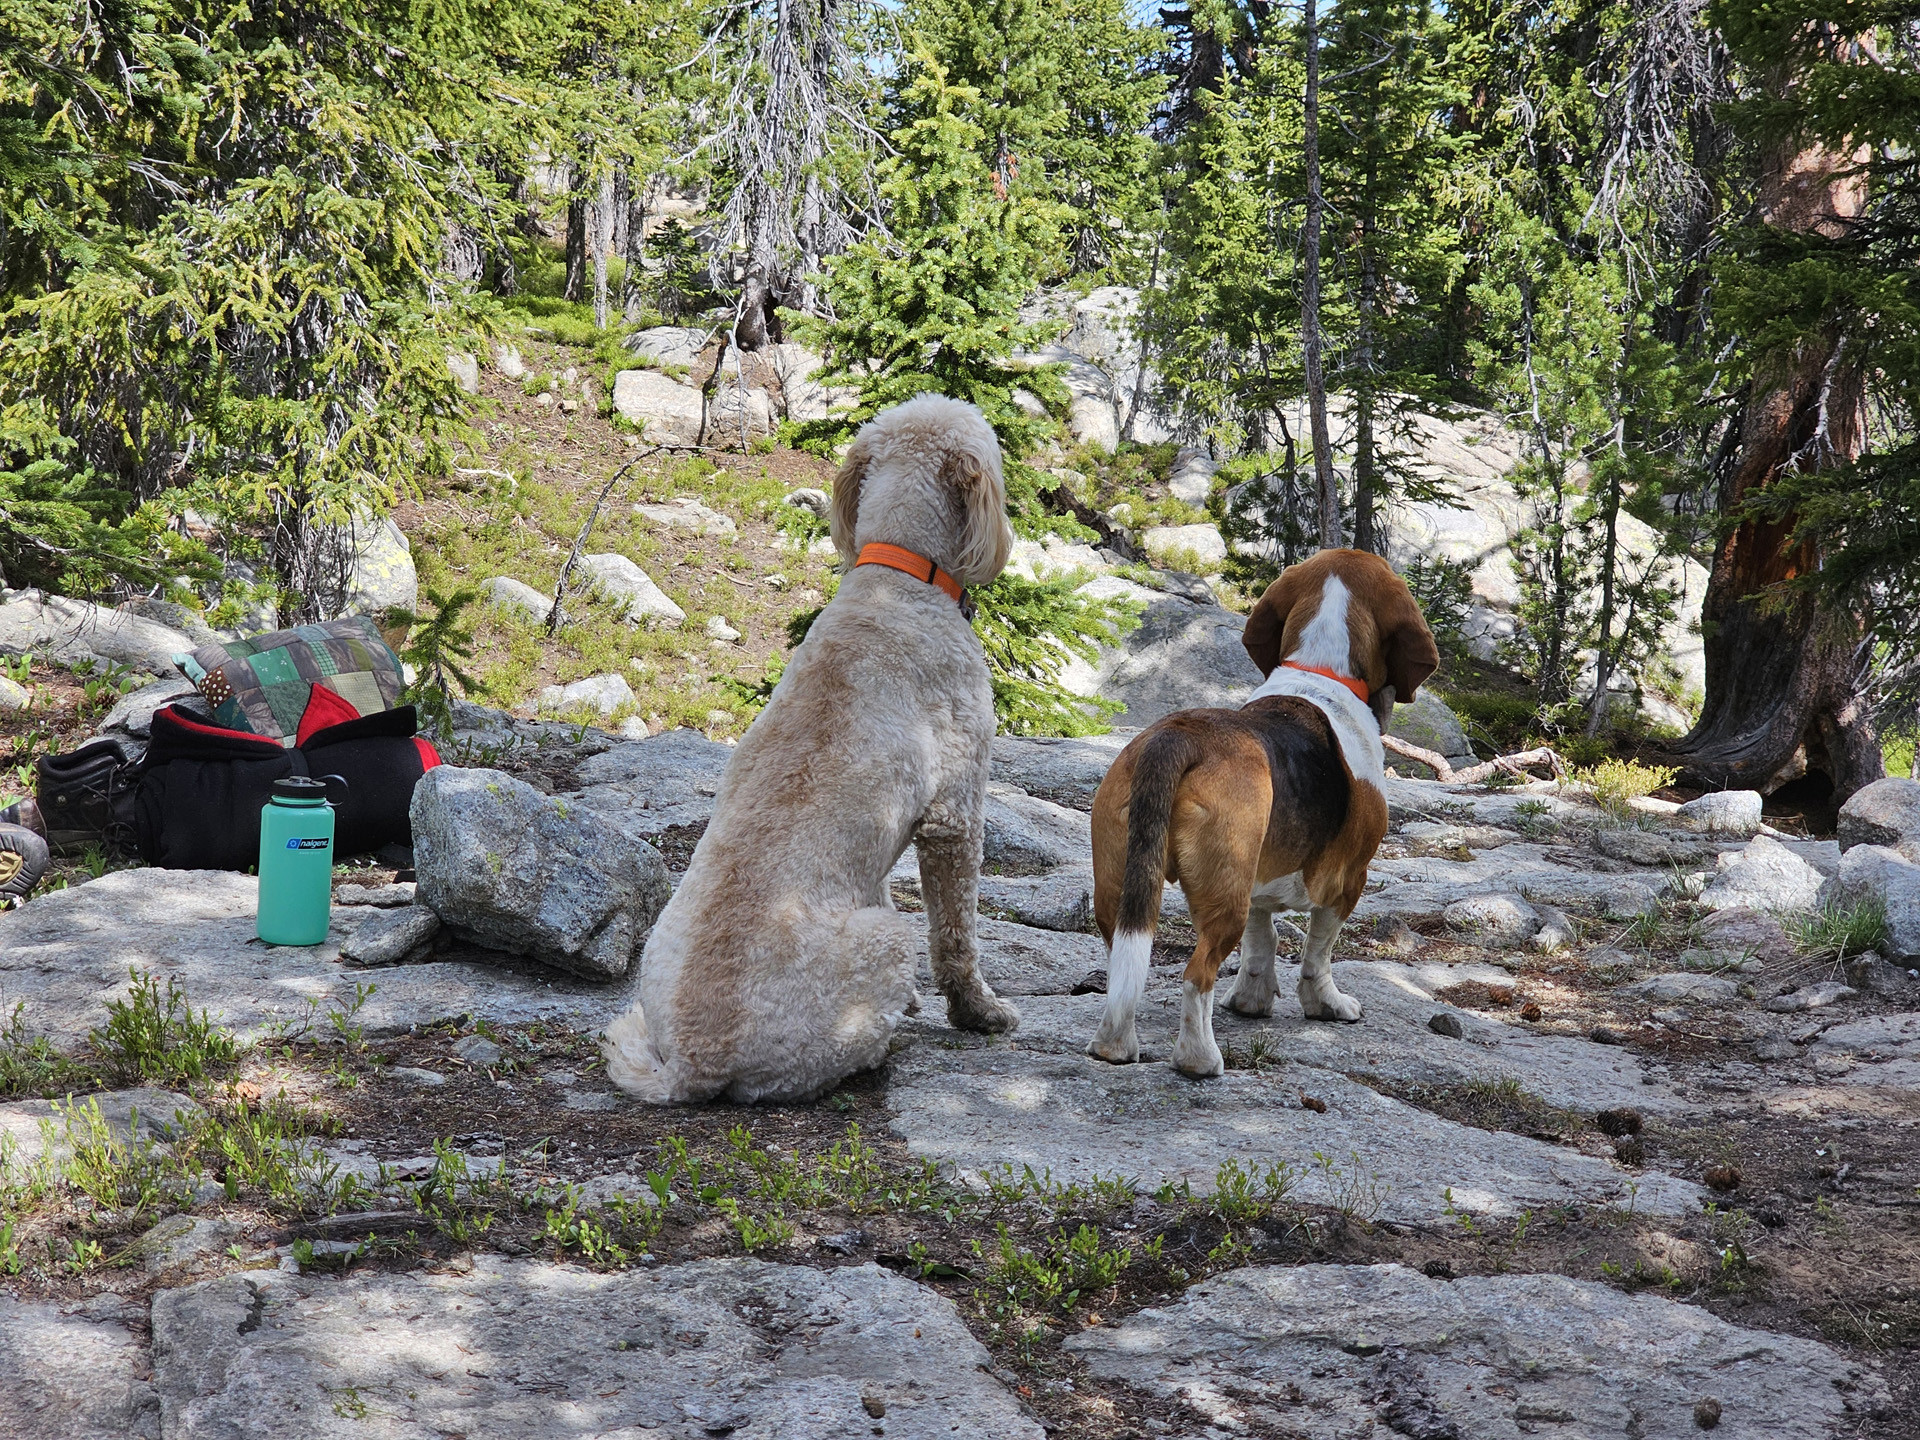
Biscuit and Roscoe at one of our campsites.
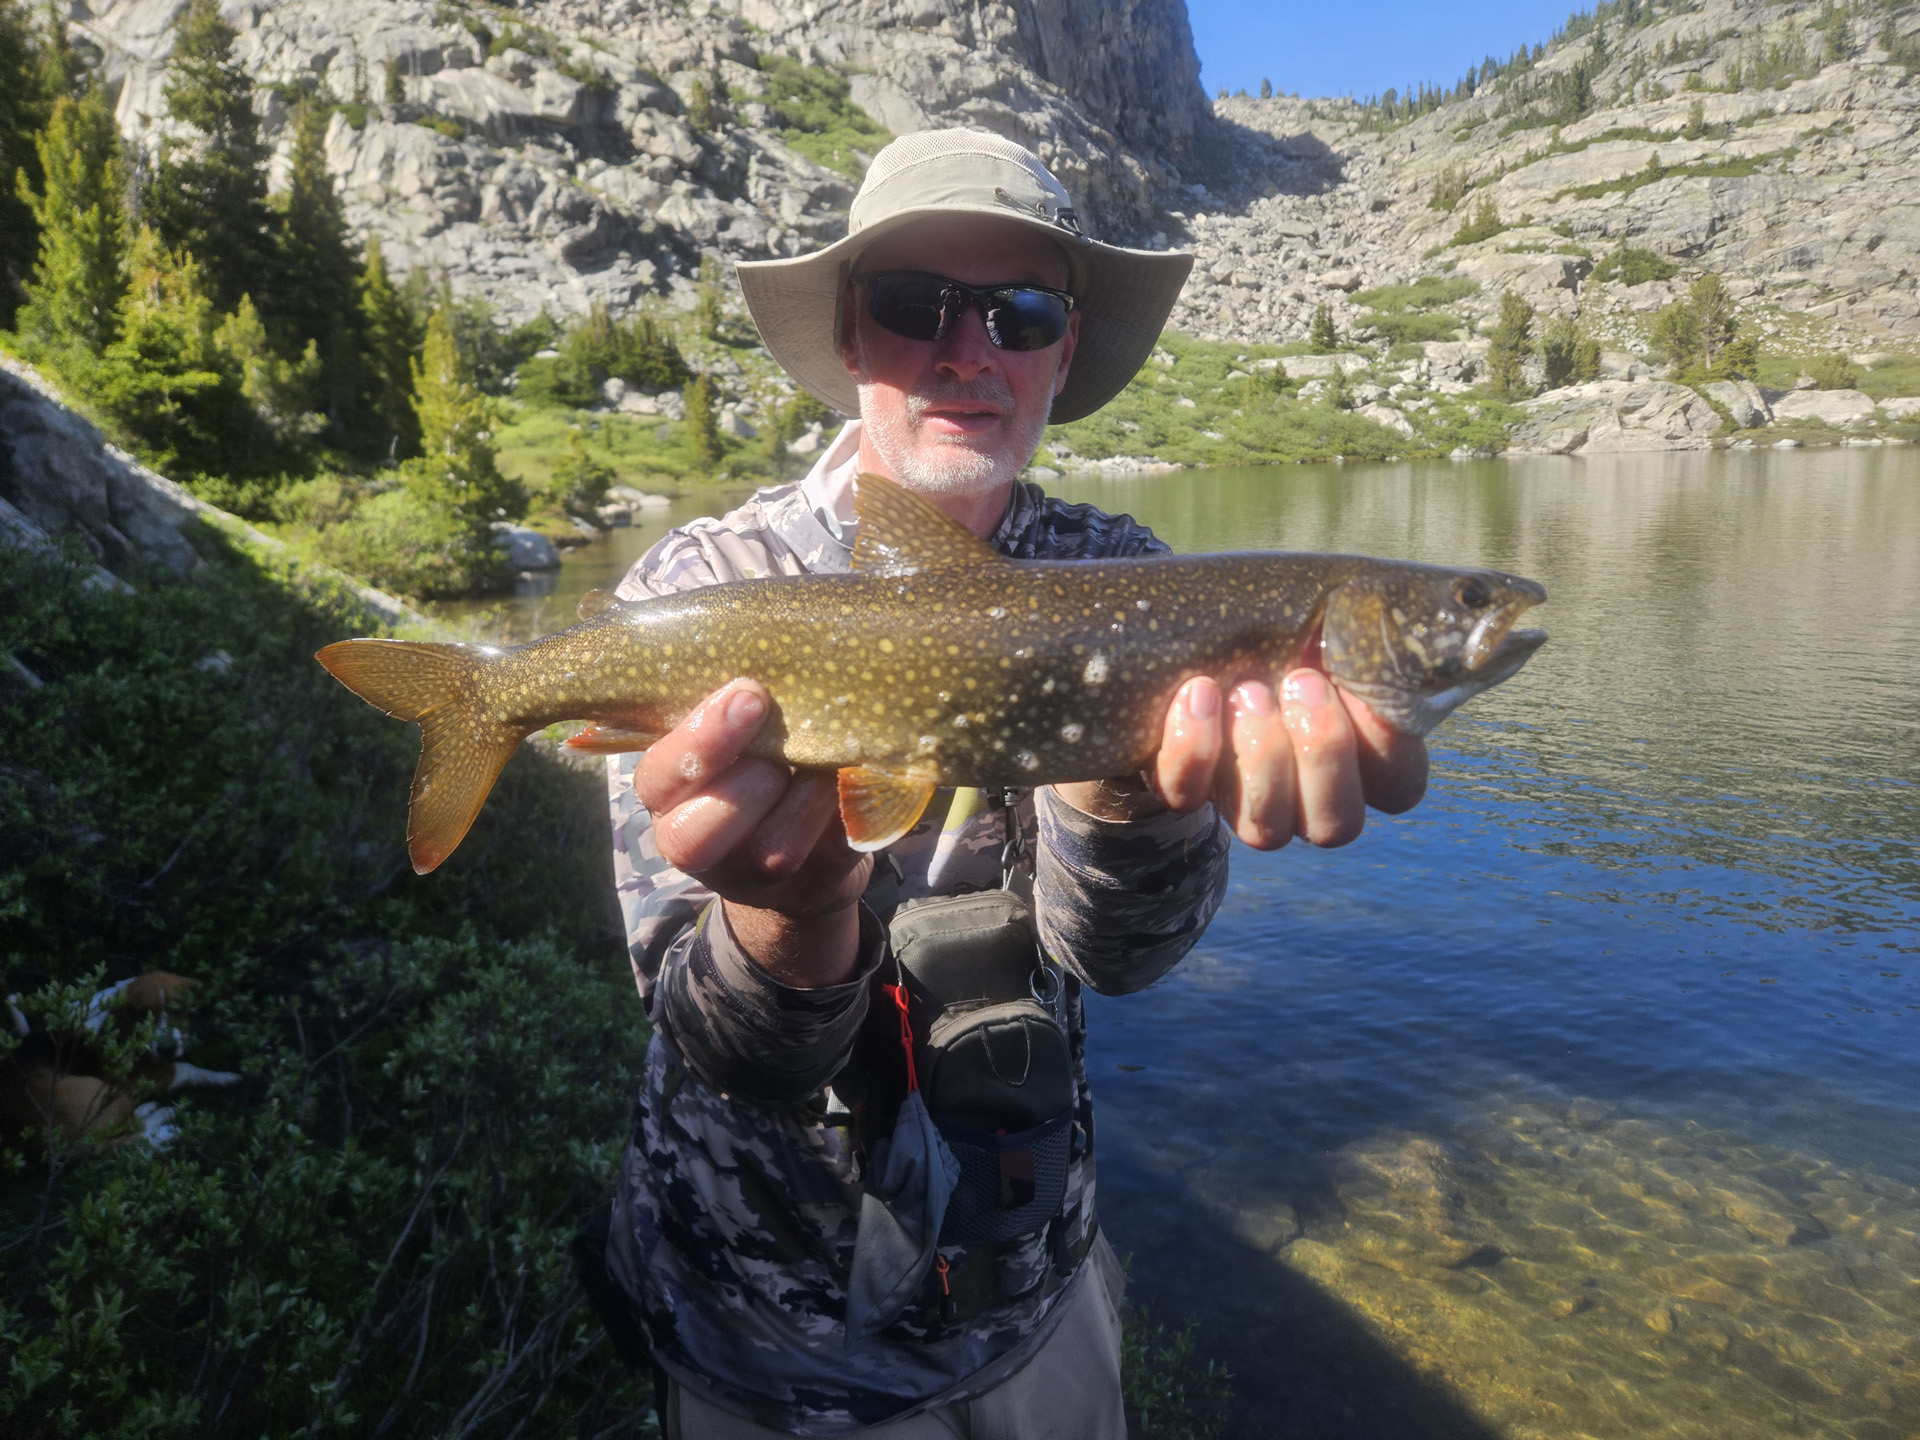
Just like the previous night, we had mashed potatoes and stuffing for dinner again. In the morning, Dad fished the lake a bit while Dallen took down camp. We then started hiking to the next lake, which was just half a mile away. We got there in just an hour or so. We fished the lake for not very long at all. There wasn't a lot of fish jumping, and we weren't seeing fish cruising by the shore. Dad was the only one able to catch fish on the lake. He caught a pretty nice-sized golden trout; it was at least fifteen inches long. The funny thing was that the body was not proportionate to the size of the head. It kind of tricked Dad when he initially saw the fish.
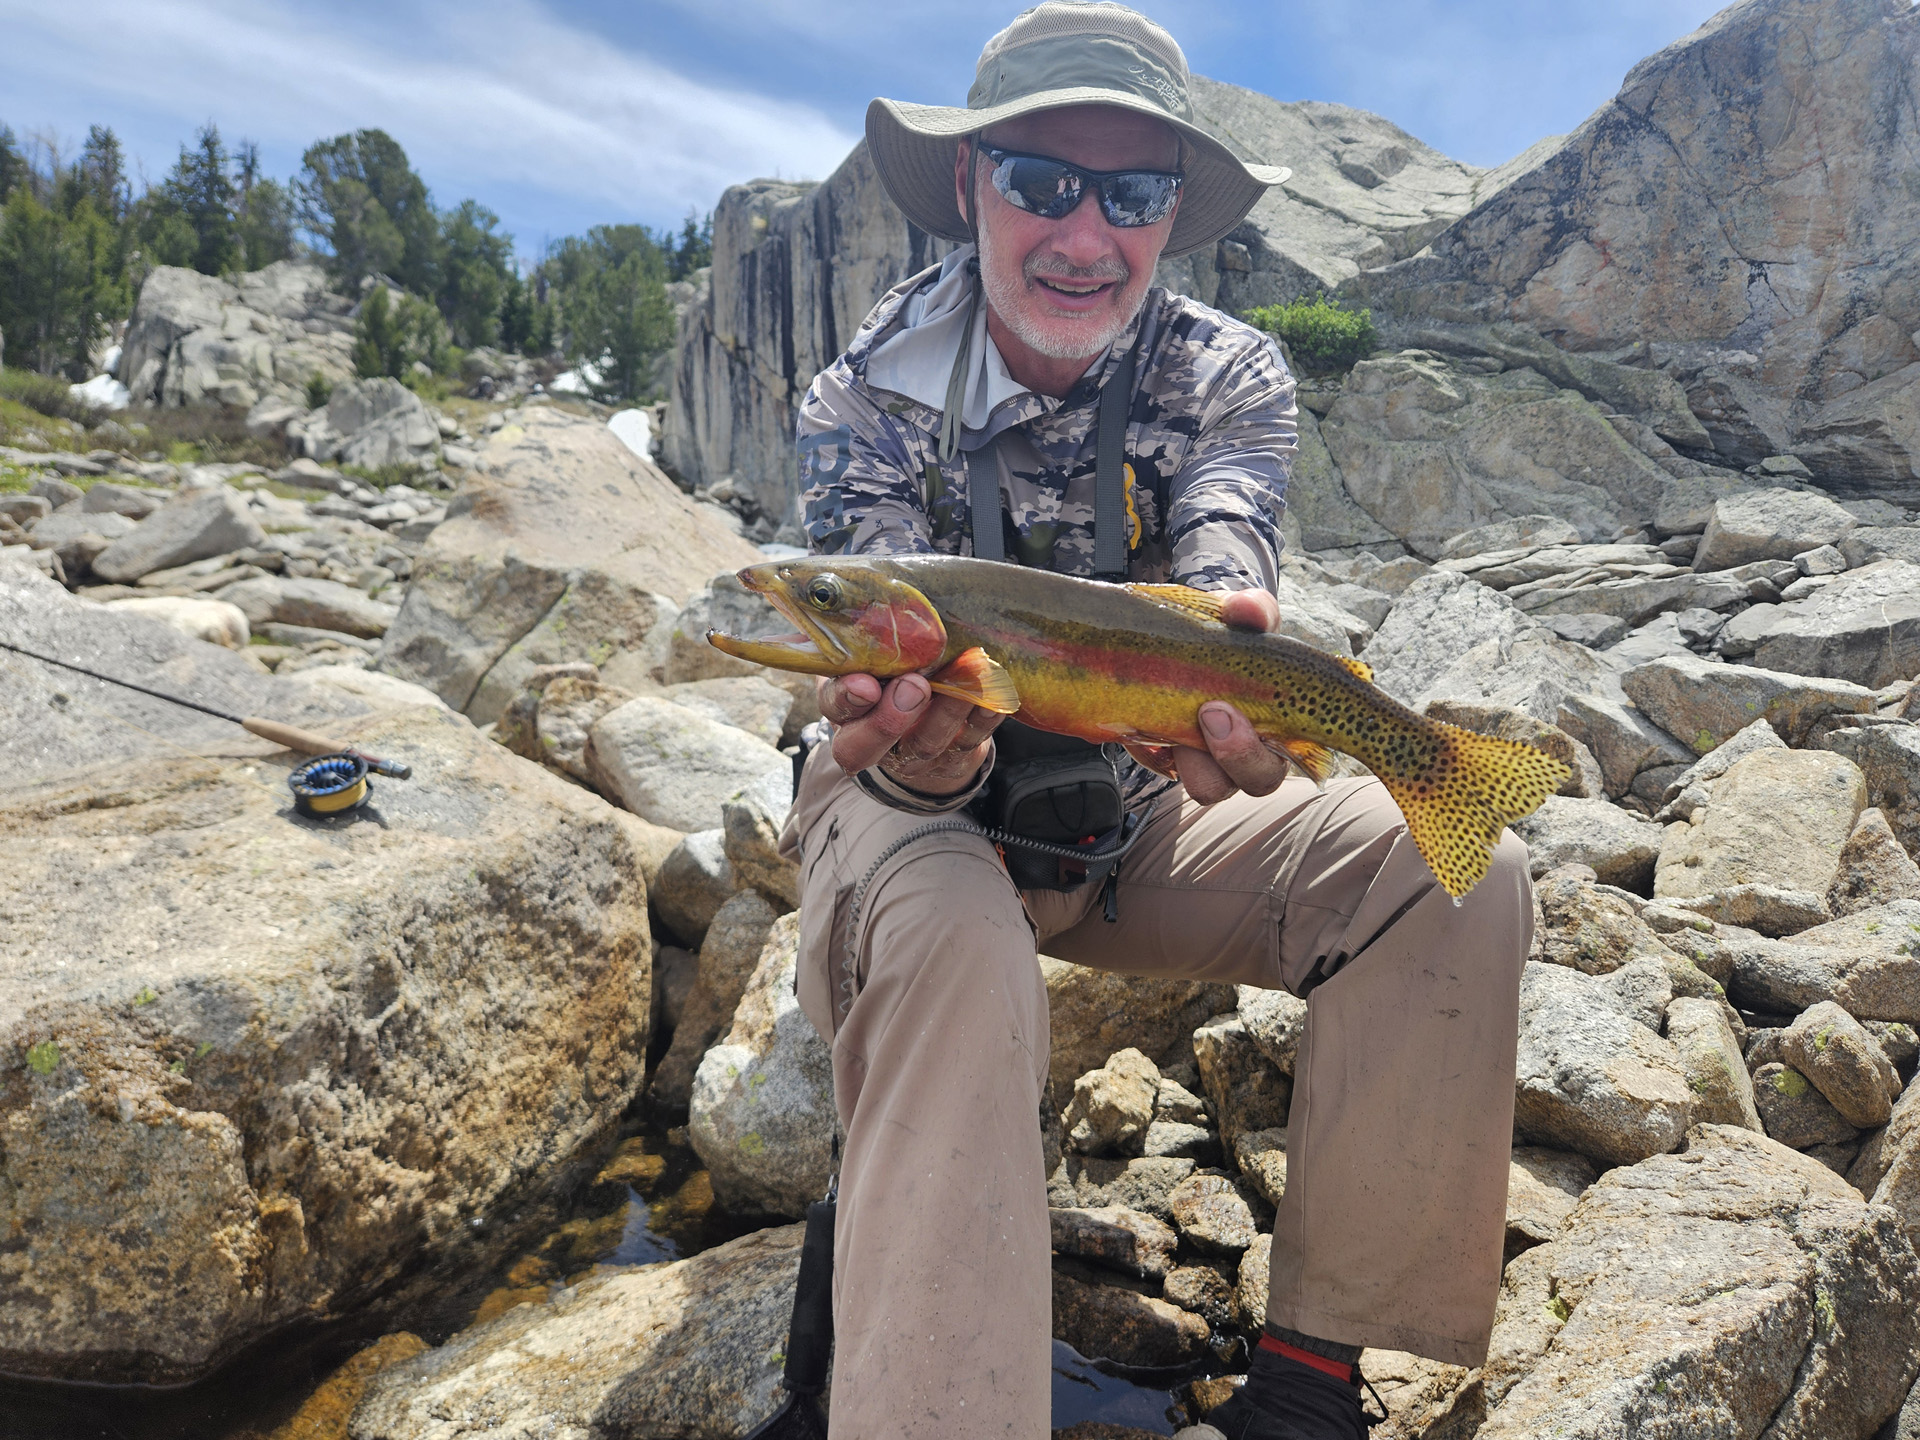
Dad's best golden trout!
While Dad and Dallen set up the camp, I made my way to the lake with my rods and began fishing. It was not long before I had a bite on my orange spinner. Unfortunately, the golden trout was small and shook off the hook easily. A little while later, Dallen and Dad made their way down to the lake. Dallen was the only one who caught a fish that night. The next morning, we planned to focus on fishing the right side of the lake, so that is what we spent our time doing till around lunchtime. Dad caught a few golden trout before we assembled our backpacks with our essentials and made our way down to a lake that held lake trout and brook trout. It took us about an hour of hiking before reaching the lake. For my fly rod, I set up a leech for the brook trout at the lake. For the lake trout, I had a big repala.
We made our way to the left side of the lake, where we saw some fish jumping about twenty to twenty-five feet out. Which is a pretty far cast with a fly rod. After casting out as far as I could with my fly rod, I saw a big fish swipe at my leech as I was retreating with the line. I cast back out to the same spot and was able to hook the fish this time. This was a nice brook trout that I hooked. When I pulled it in, I realized it might be the biggest brook trout I have ever caught. For sure, the biggest fish I have caught on a fly rod.
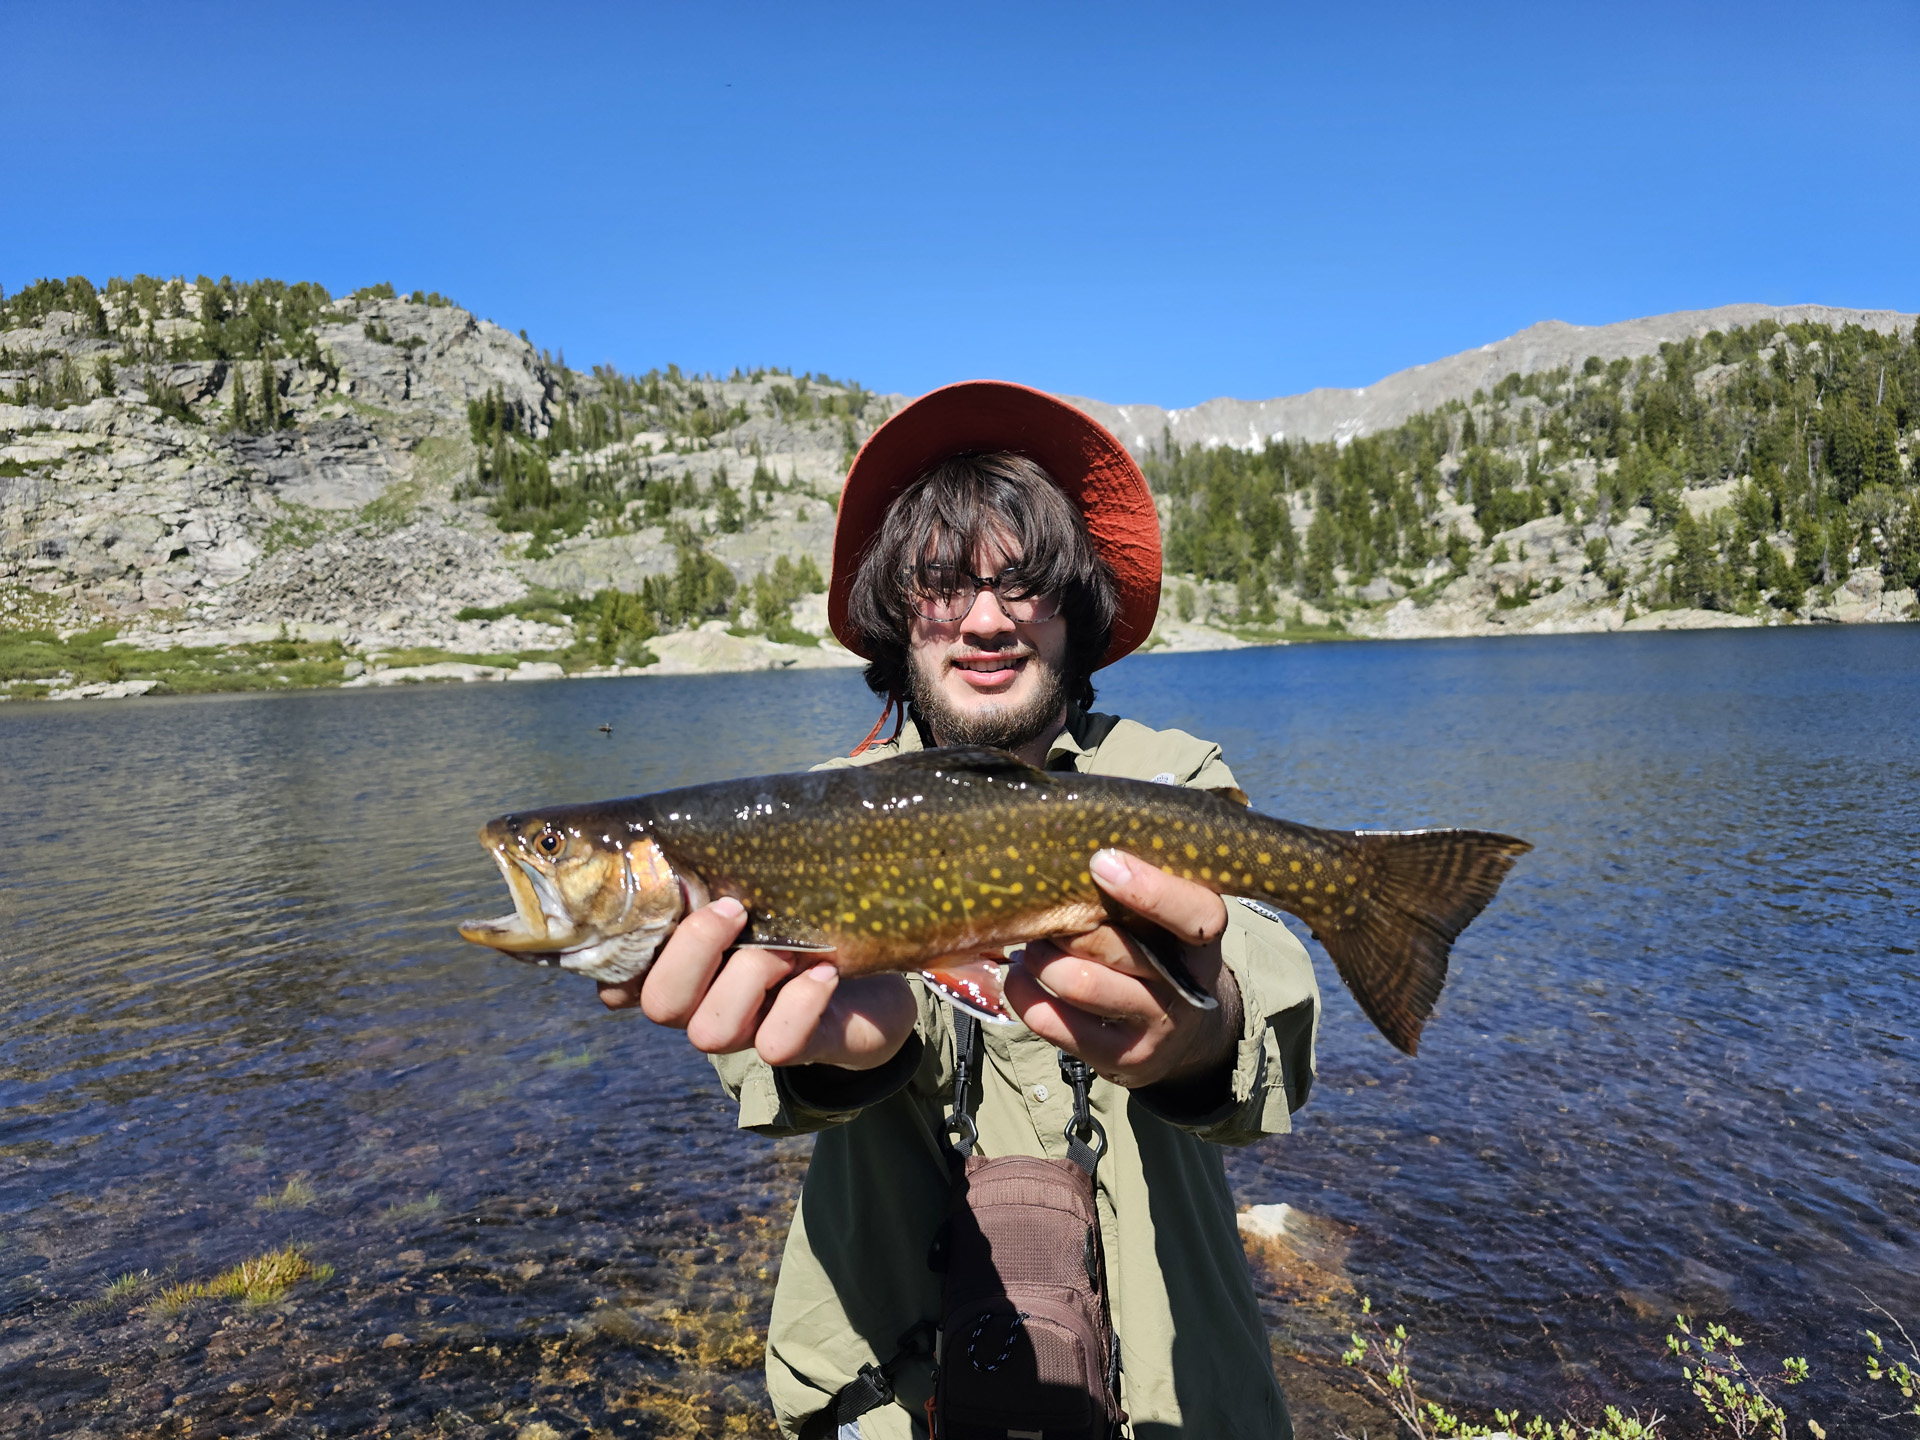
My big brook trout from the Trip.
After I pulled that in, Dad and Dallen started catching some brook trout. A little while later, Dallen hooked onto a lake trout. He was tossing out a big Jake lure. After fighting with it for a couple of minutes, Dallen was able to pull in the lake trout. The lake trout was around twenty inches long. Dad says that this was pretty small for a lake trout. The big ones can easily get up to thirty or even forty inches long.
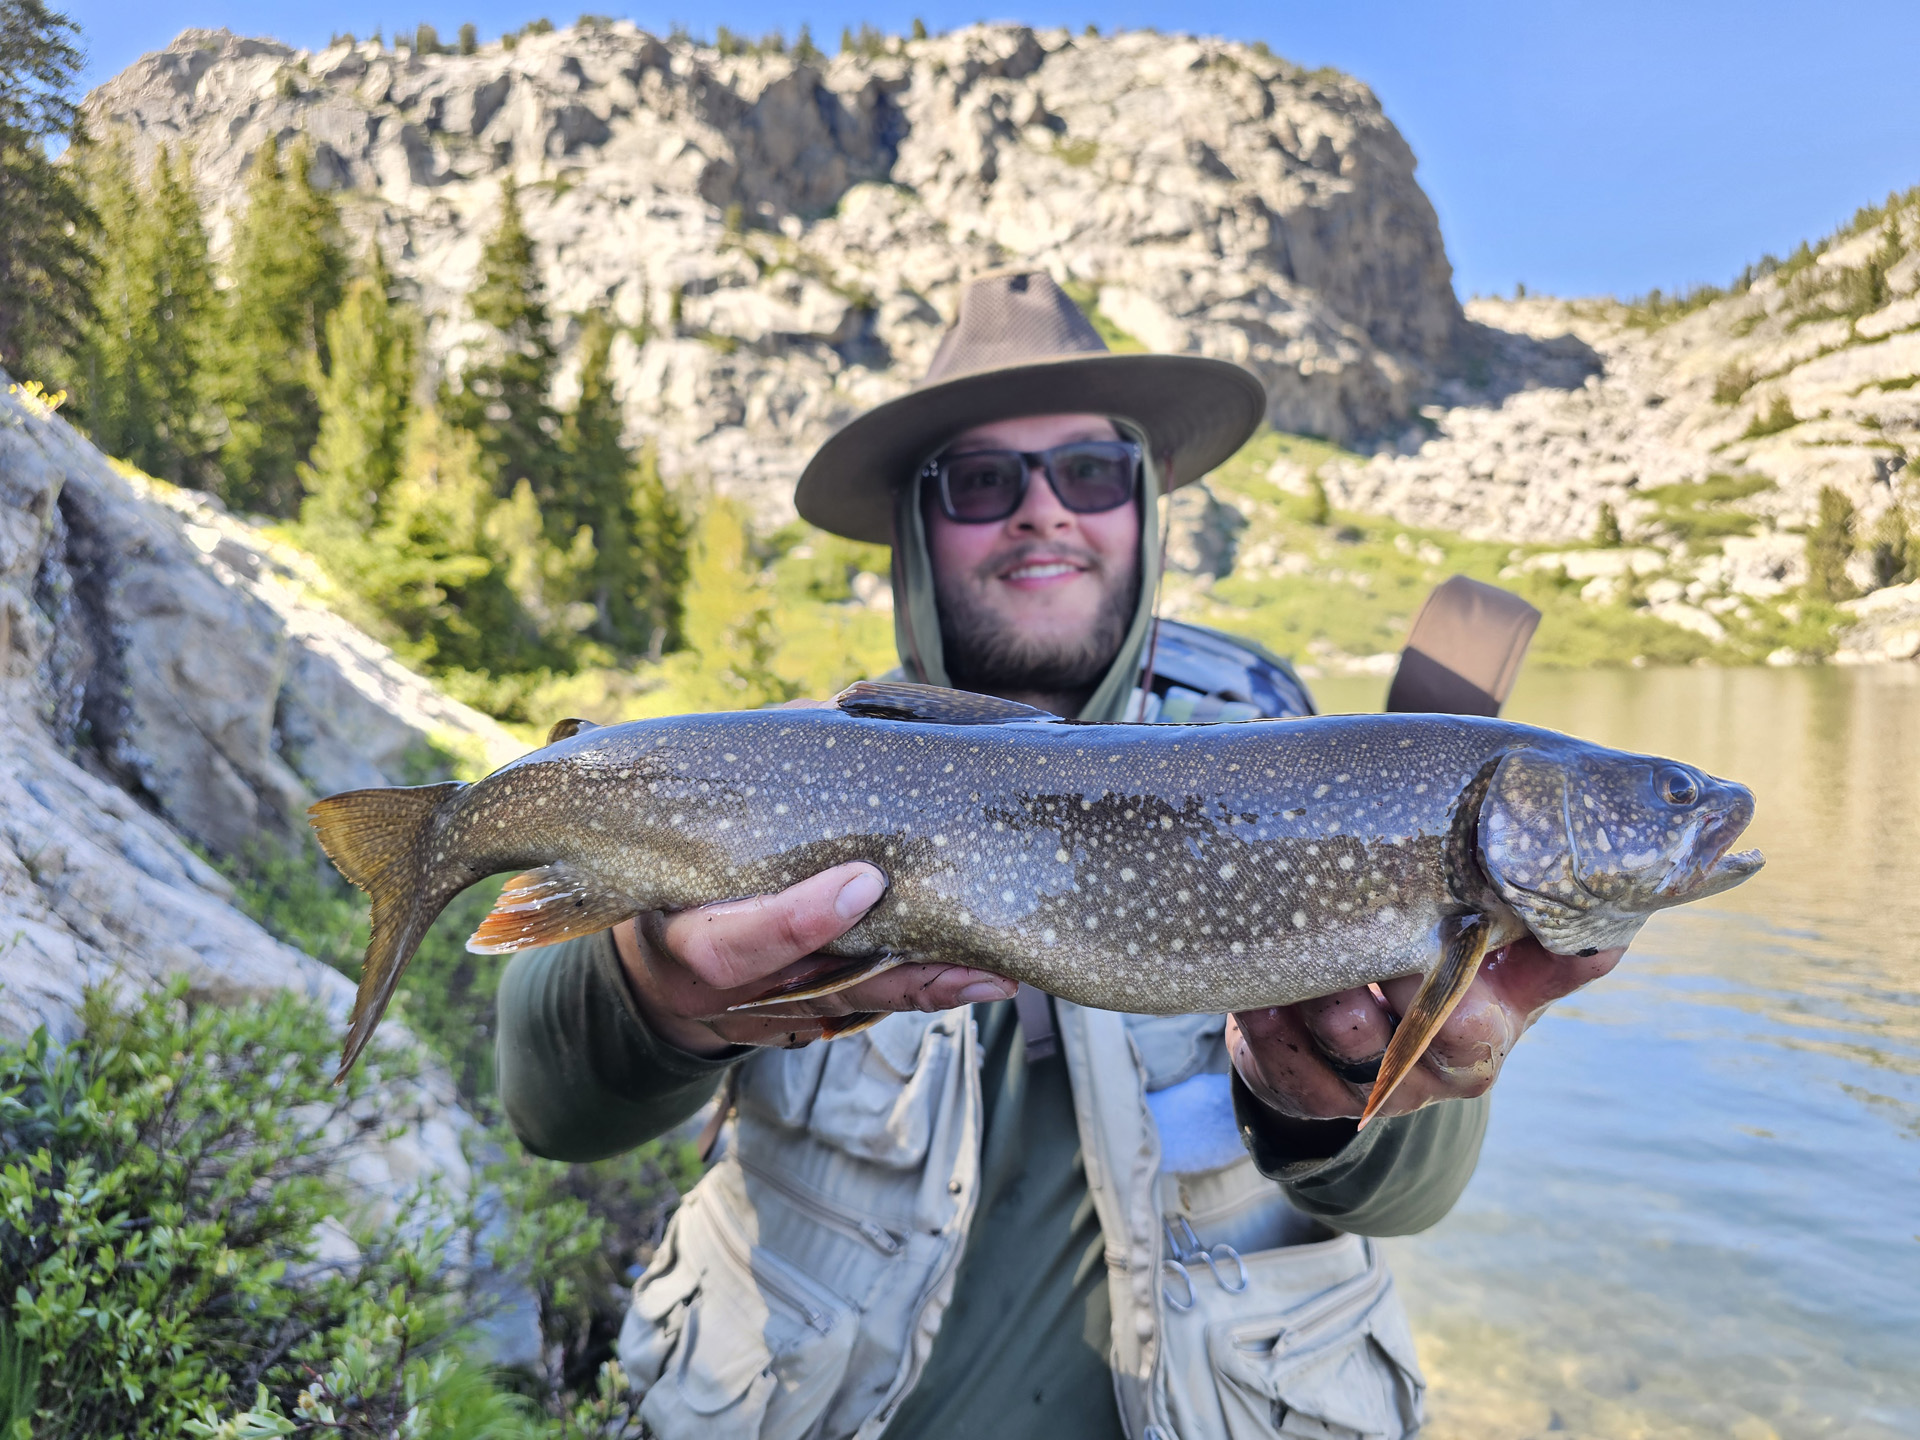
Dallen with his first lake trout he has ever caught!
After Dallen caught his lake trout, Dad and I tried our luck at catching some lake trout as well. Dad took Dallen's rod and cast it back out, and immediately hooked onto a lake trout with it. After I went back and put a big Repalla on my spinner rod, I returned. After about four to five casts, I hooked one and was able to bring in a lake trout a little smaller than the one Dallen caught. It was very cool that all of us were able to catch at least one lake trout, for none of us had caught that species of Trout before.
Dad with his lake trout.
The lake held some nice brook trout, mainly because there wasn't a ton of brook trout. The average brook trout we were pulling in was around eleven inches long. The lake trout consumes a lot of the brook trout in the lake, meaning the brook trout compete less with each other for food. We kept Dallen's lake trout and one of his brook trout, as well as my big brook trout, to eat for the night. Dallen assembled some chairs and a campfire made out of rocks. I gathered firewood and broke it into smaller pieces with my small saw. For the fish, we brought some garlic seasonings in baggies and some butter spray, which we coated the fish with. We then wrapped the fish in some tin foil and heated them in the coals left from the fire.
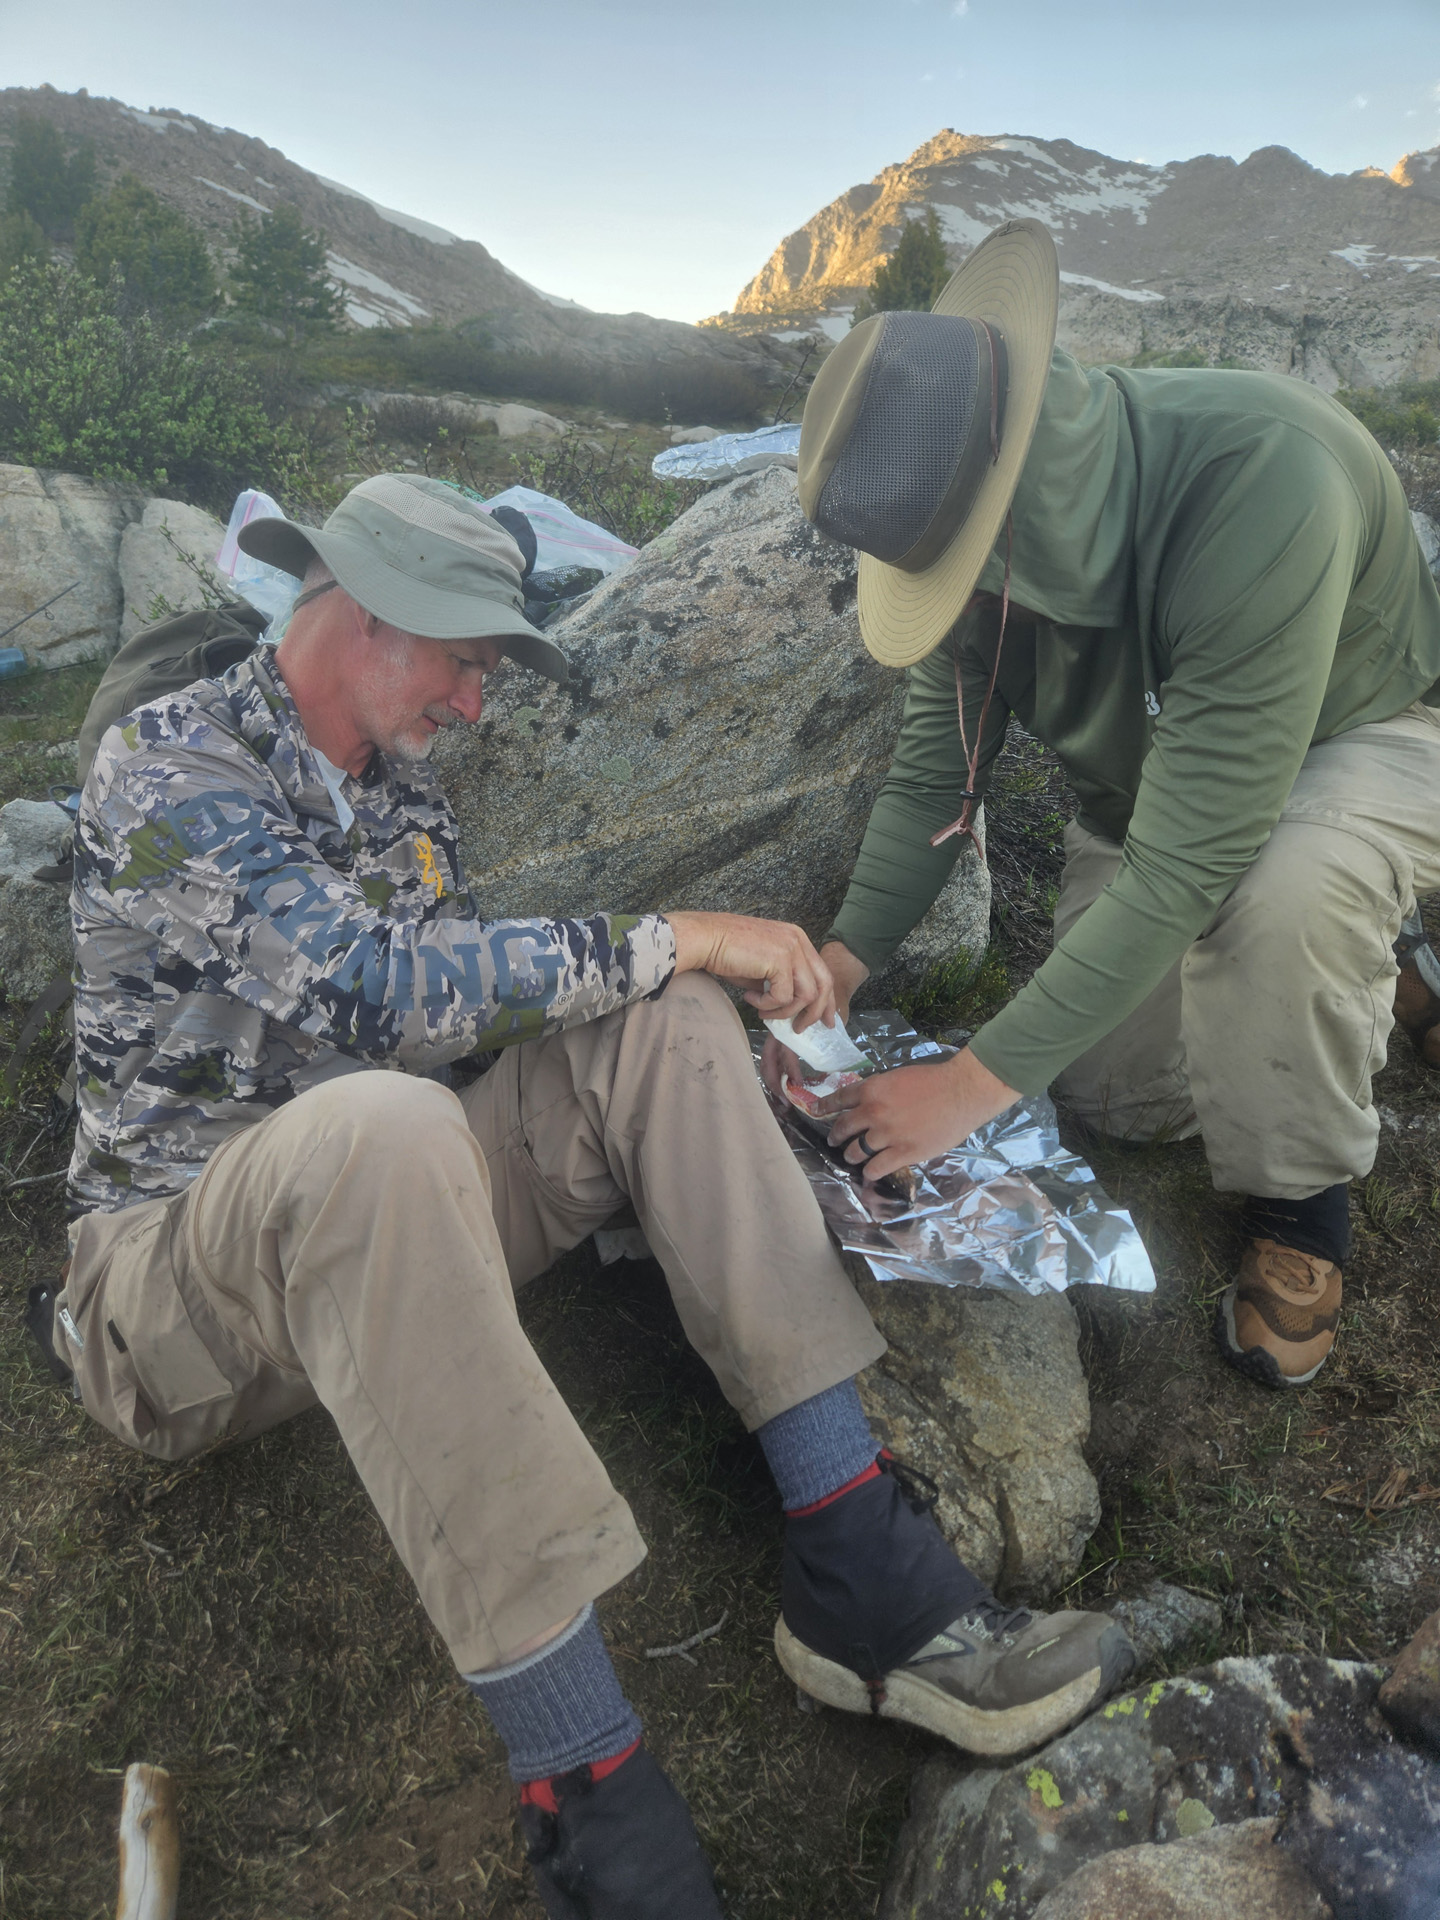
Preparing the trout to be cooked.
The lake trout tasted pretty good. It has white meat instead of the more pinkish meat found in other species of trout. It tasted very similar to chicken, which was surprising to say the least. When we woke up the next morning, we planned to head to the lake where my dad and I caught the most golden trout at last year. However, the dogs weren't feeling well, so we spent most of the day resting and playing a card game called Rummy to pass the time.
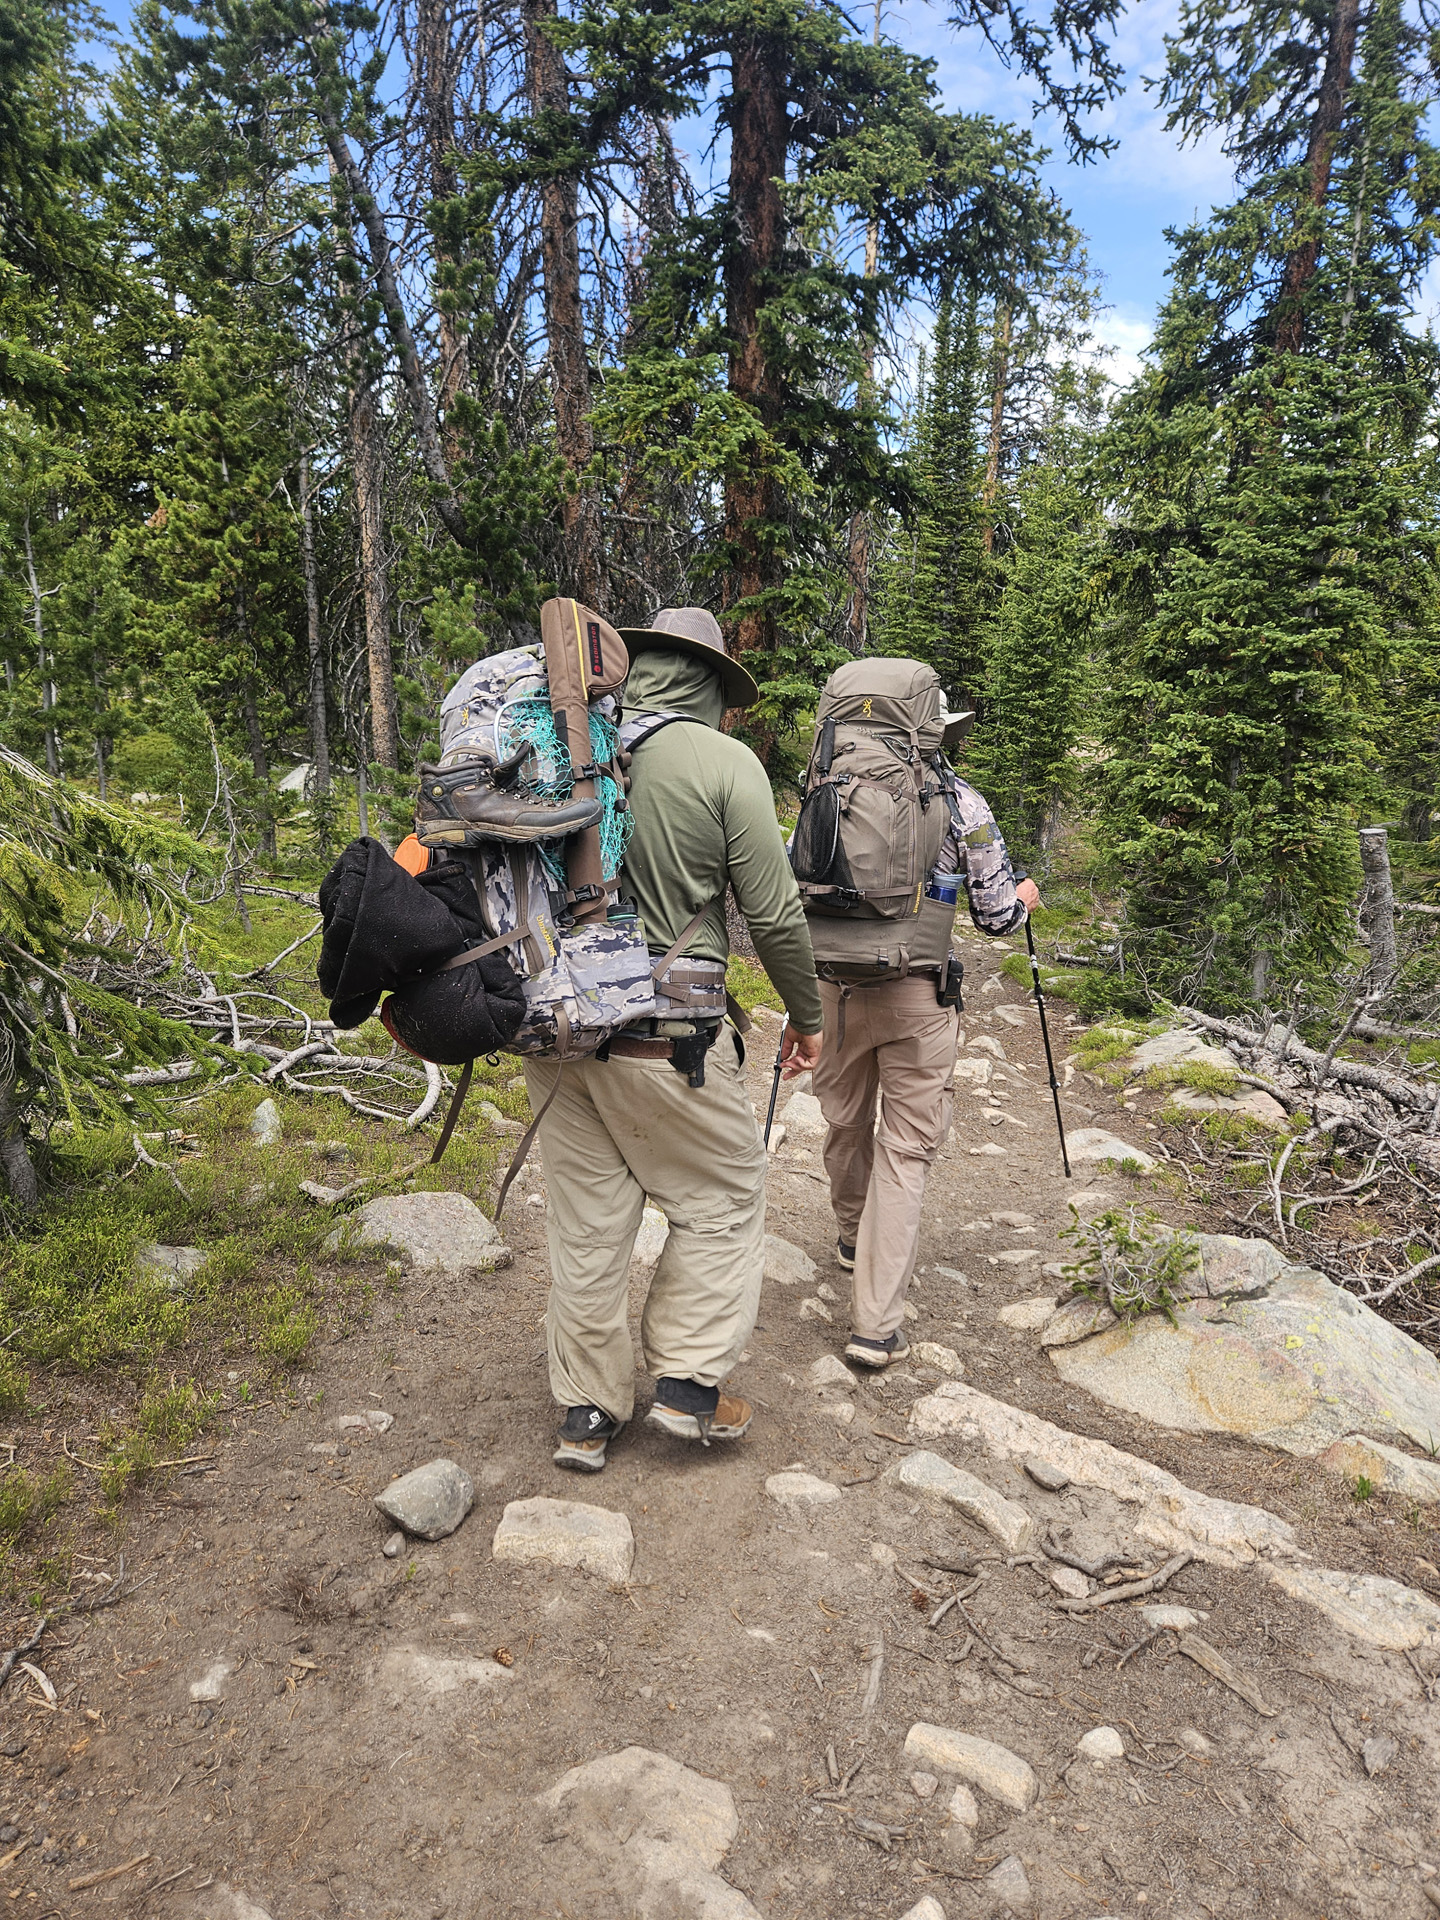
Hiking out of the Wind Rivers.
When it was around three to four o'clock in the afternoon, we hiked back over to the lake where we caught the most fish last year. The next morning, we fished for a couple of hours at the lake before hiking out the rest of the way. Overall, the fishing trip went pretty well. We didn't catch as many fish as the previous year, but we got to share this amazing experience with Dallen, so that was nice.
Below are links to other useful new gear we used during our trip
We purchased Nalgene Water Bottles, choosing the blue and green colors to store our pumped water.
We got Vermont crew socks in blue, gray, and green colors.
Saucony Men's Hiking Shoes were very comfortable for hiking during the trip.
Another stove stand we used was the Fire Maple.
Kahtoola Gaiters were nice for keeping debris out of our shoes.
Sawyer Insect Repellent was sprayed on our clothes to help alleviate bug bites.
The Anker Power Bank was useful for charging our phones at night.
Other Related Articles
I Hate Golden Trout! - 2025 Wind River Backpacking Trip
2024 Golden Trout Wind River Backpacking Fishing Trip
- Details
- Written by: The DIY Hunter
- Category: Outdoor
- Hits: 3091
My personal best golden trout I caught using my 5 Weight Redington Classic Trout rod with an Ultralight Redington Zero Fly Fishing Reel and a black with red wire snow cone fly.
You read correctly, I hate golden trout! The past few years, I have been studying online everything I can find on golden trout, especially catching them in the Wind River Mountains. I even read Fly-Fishing the Rocky Mountain Backcountry, which is full of great information on backcountry fishing and golden trout.
I gave up trying to catch a golden trout in Utah at Echo Lake a couple of years ago. I tried for a few years and could never catch one at Echo Lake, although I see online and hear of them getting caught there on occasion, even though it was last stocked in 2013 there still are a few reproducing in the lake. The last two years I have turned my attention to the Wind Rivers and have taken six-day backpacking trips after these fish each year.
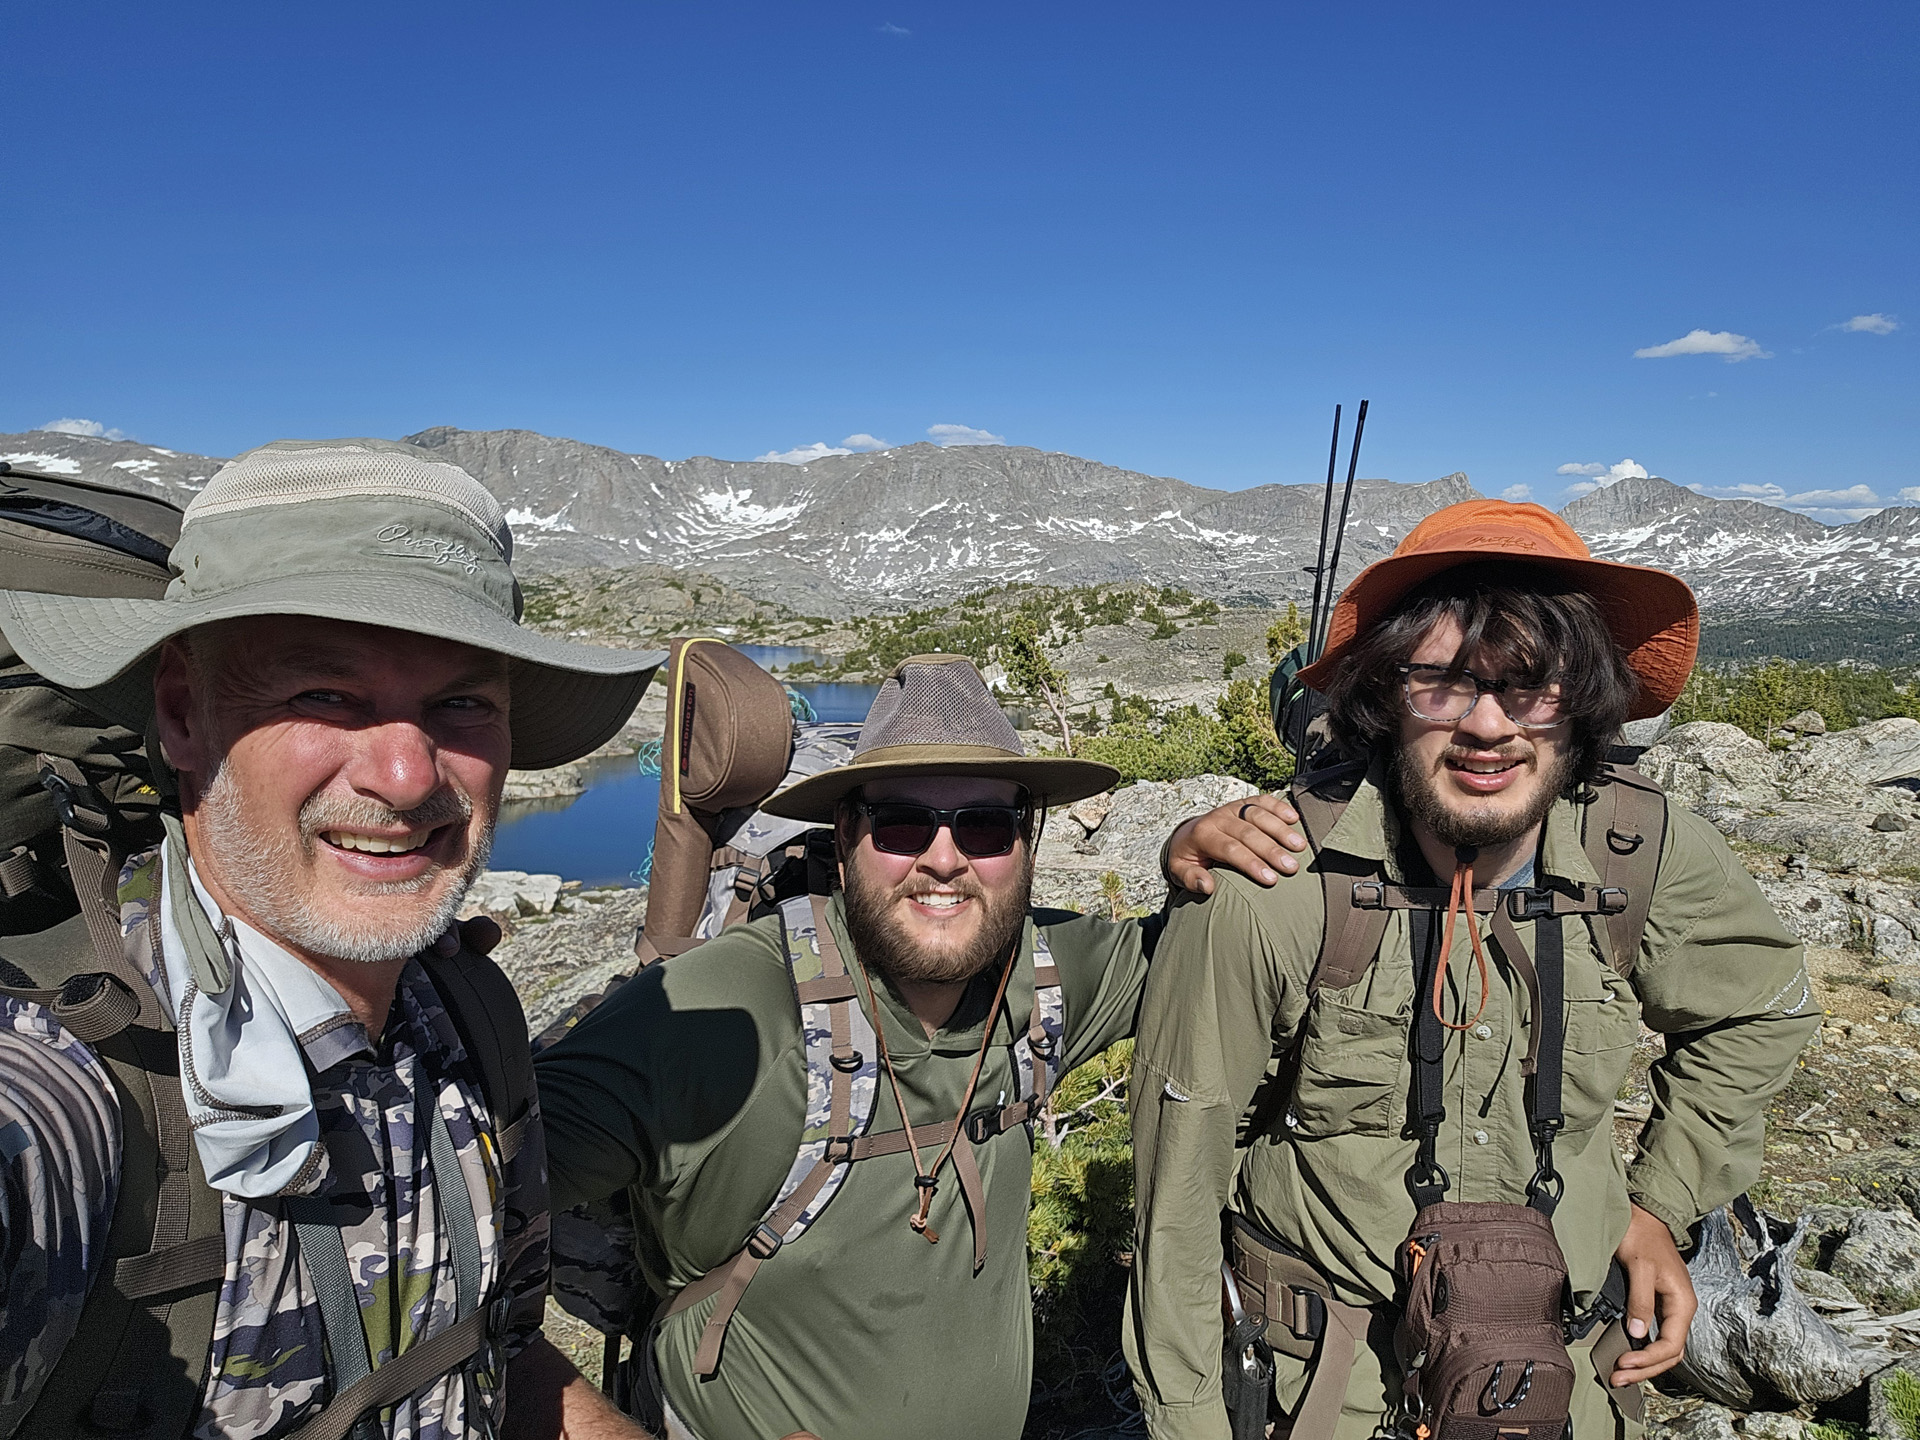
Stopping for a selfie at the highest pass on our Wind River trip.
So here I am sitting at my computer a few weeks out from coming back from the Winds. Me and my two sons had a blast. We all caught goldens, brookies and lake trout on this trip. Lake trout was a new species for all of us and golden trout was a new species for Dallen. We had a blast but I can't help but be somewhat upset with the butt whooping I feel I took from the goldens. In one particular lake I fished on 3 different days, I fished it for around 10 hours, constantly watching fish all around me feeding and I threw every fly I could find at them, only to catch two fish in this lake. The goldens in this lake were mostly 8-10 inches long. Fish that rarely ever see fishermen and one might think they would be eager to strike a fly, but I got rejection after rejection from these little goldens. Am I really that terrible of a fisherman? Do they have better vision? What makes them so dang hard to catch? They are clearly in a different class of difficulty to catch than any other trout species.
Last year, Kaden and I made our first trip to the Winds, specifically after the goldens. While it was challenging, we each caught somewhere between 30 and 40 a piece. All 8 to 12 inches in size and almost all of them were caught with a size 16 beaded Hare's Ear Nymph. This year we went earlier in the year and saw more fish but caught far fewer and only caught a couple with the Hare's Ear Nymph that was so effective the year before.
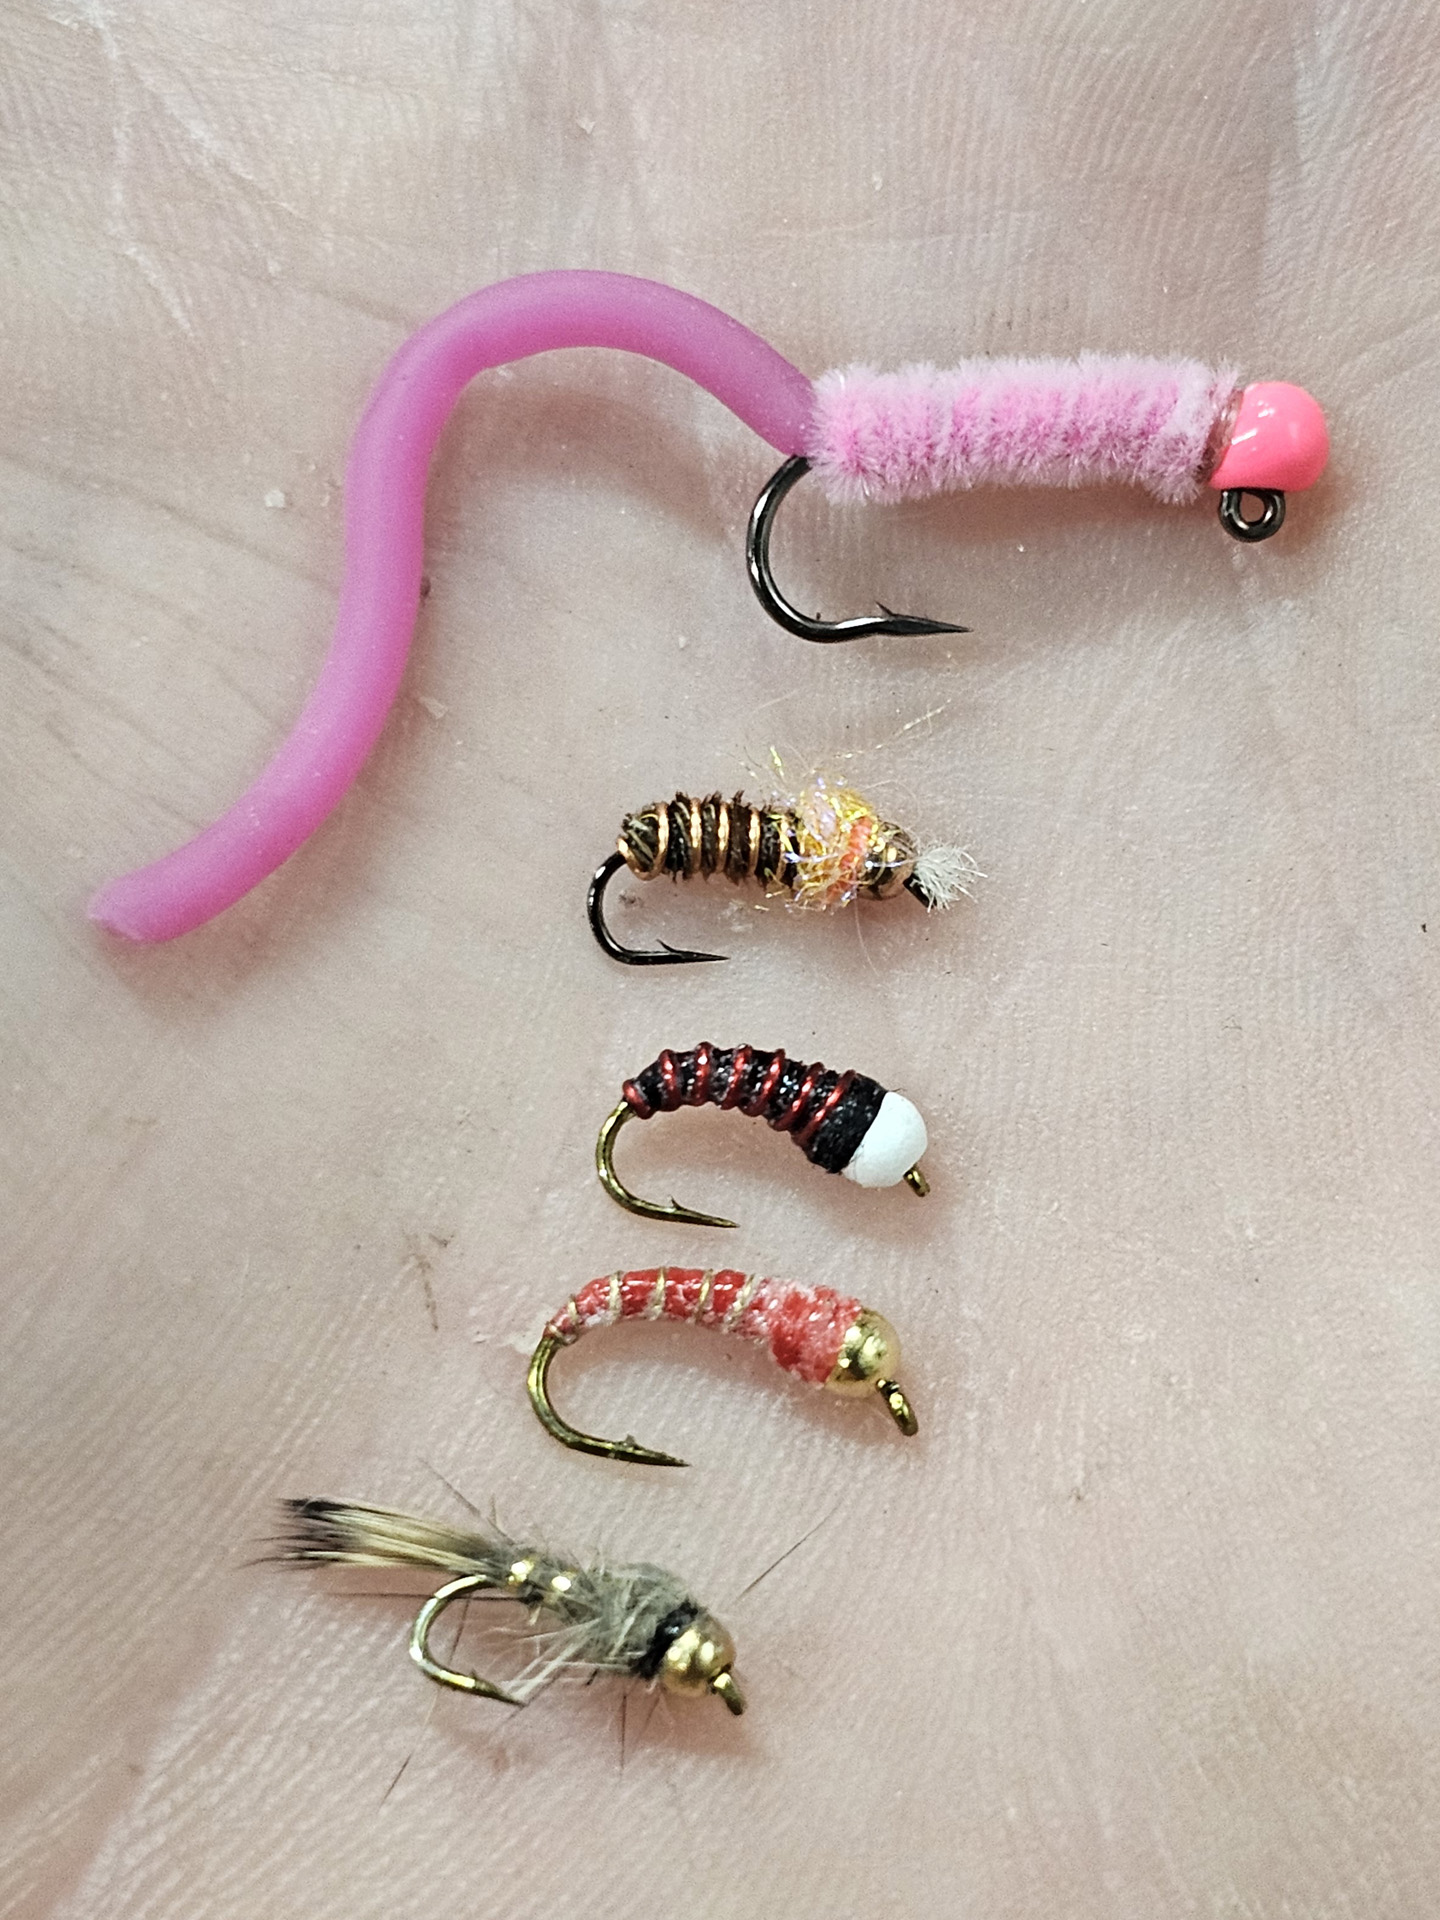
Here are the flies that we were catching golden's with in 2025. I know everyone says large orange/pink scuds are the ticket for goldens. As for me, that doesn't ring true. I have tried and tried various scud patterns and they don't touch them. I don't know what the issue is. I guess they work well for a lot of other, more experienced fly fishermen.
Even though I'm grumbling some I did catch my best golden trout on this trip. We didn't measure the fish, but I'm guessing he was around 16 inches long. If his body fit the size of his head, he would have been 20+ inches long. He clearly wasn't getting enough to eat. I caught him using a black snow cone with red wire.
In truth, I have more of a love/hate relationship with golden trout. Do I love to catch them? Are they beautiful? Yes & Yes! But they are just a pain in the rear to catch. In future trips to the Wind Rivers, I will be going after fish to catch and not specifically after goldens. If I come across a lake with goldens, I will gladly try my hand at seeing if I can get one to take my fly.
For the most part, I like catching fish and when I'm miles and miles into the backcountry, I am hoping for fish that are eager to help me out. Even the smallest of golden's are just several levels harder to catch than brookies, cutthroats, tigers, rainbows and lakers... like many, many levels harder!
Dallen with his first lake trout.
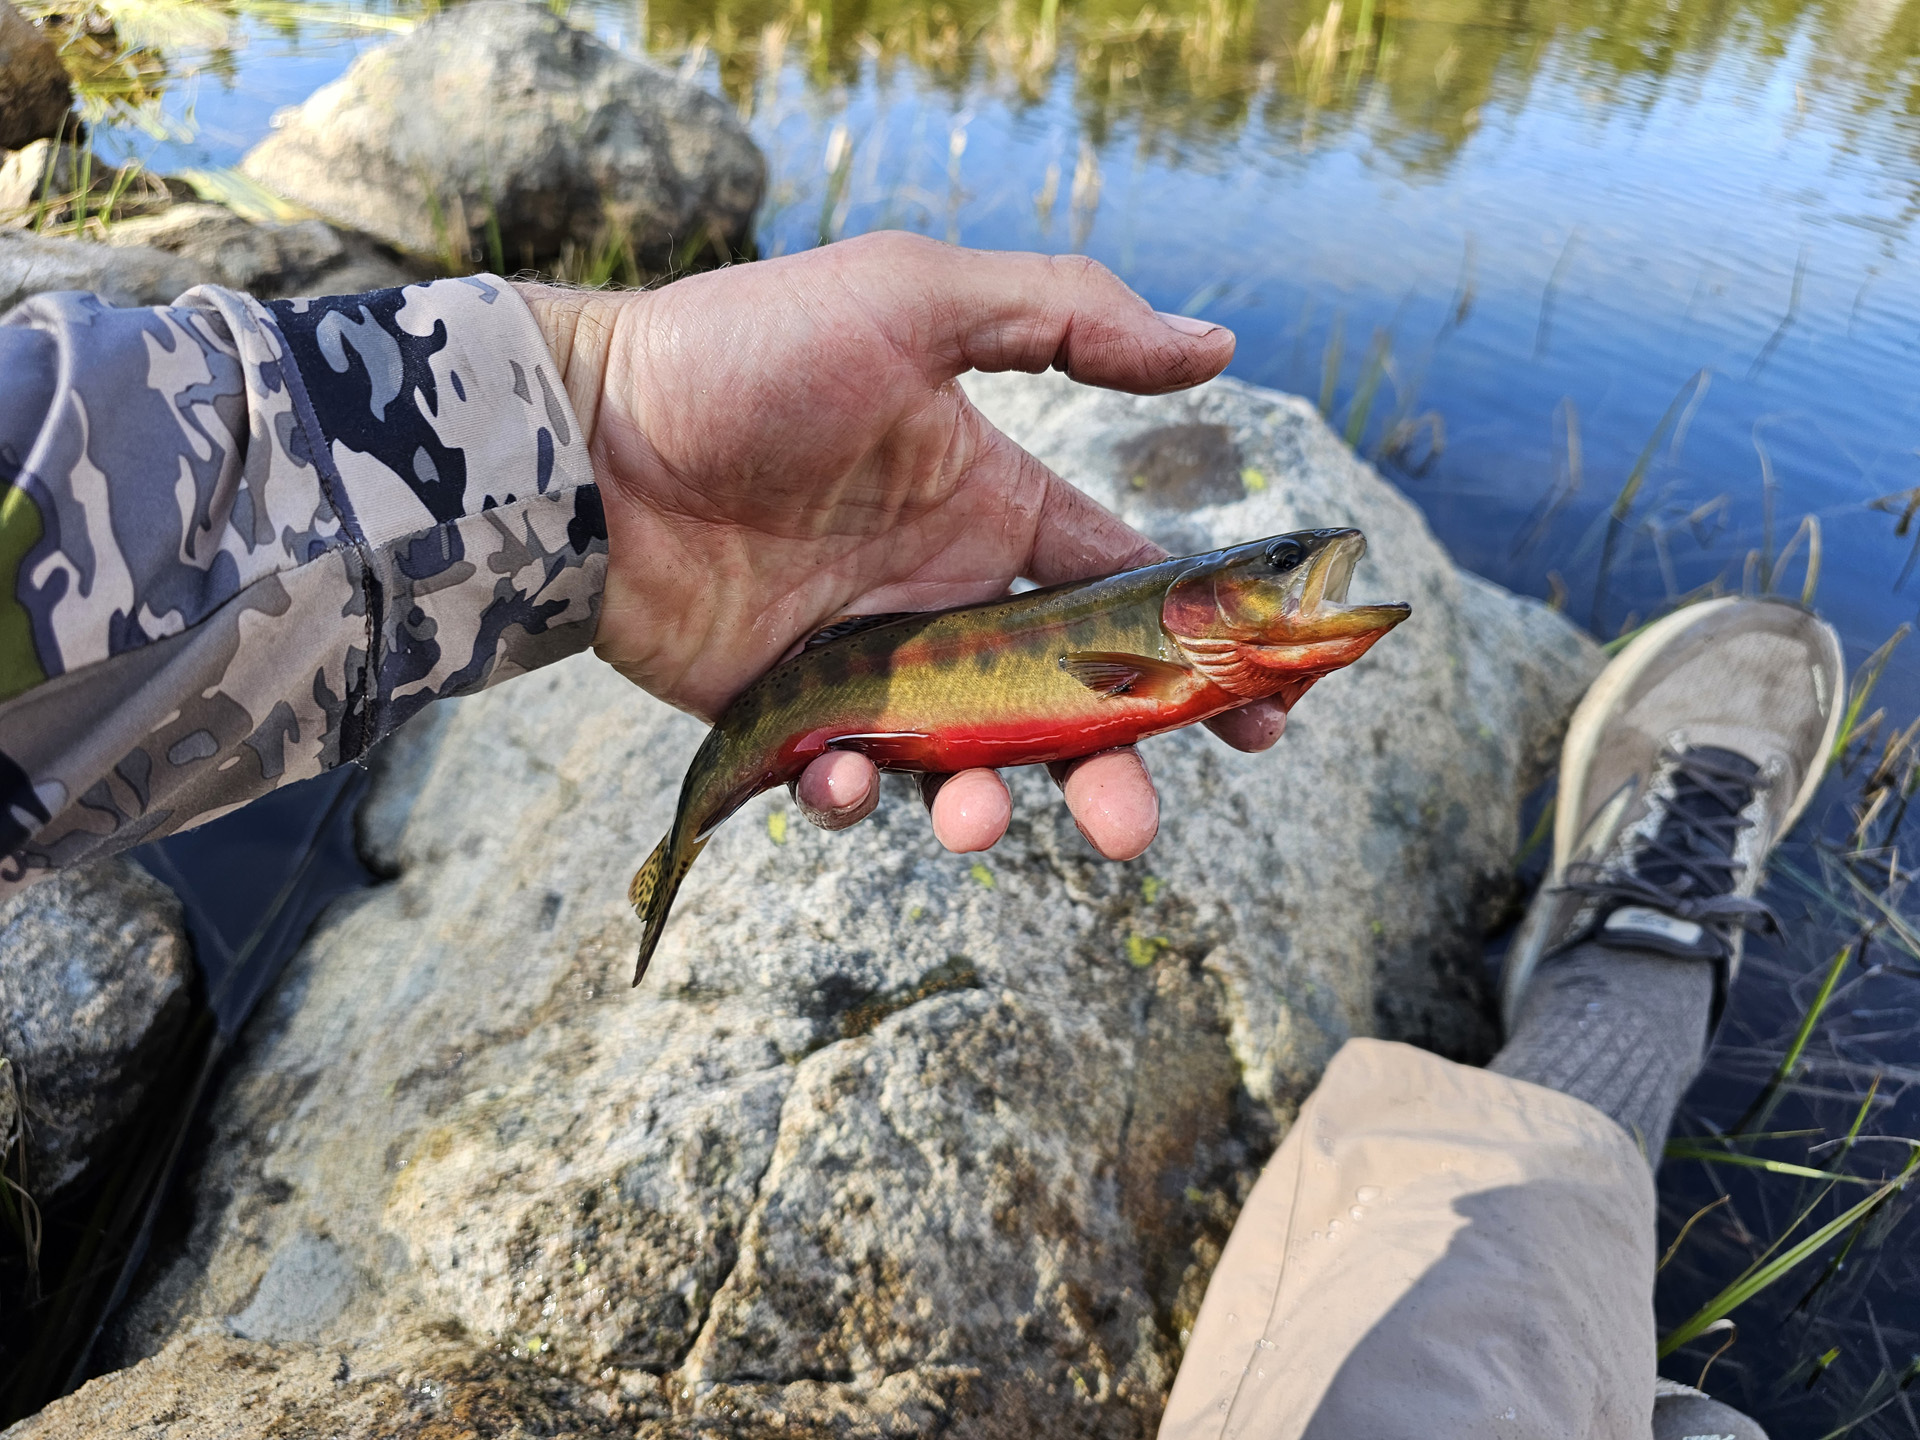
I love these Brooks Divide 5 Trail Running Shoes... and this golden sure is a pretty one.
These shoes have been my all-time most comfortable backpacking shoes. The shoe is very light, has an extremely soft yet supportive feel. I was a little concerned that the sole might get torn up and the rubber tread detach from the foam, but they held up great for me and my 240 pounds plus a 60-pound pack.
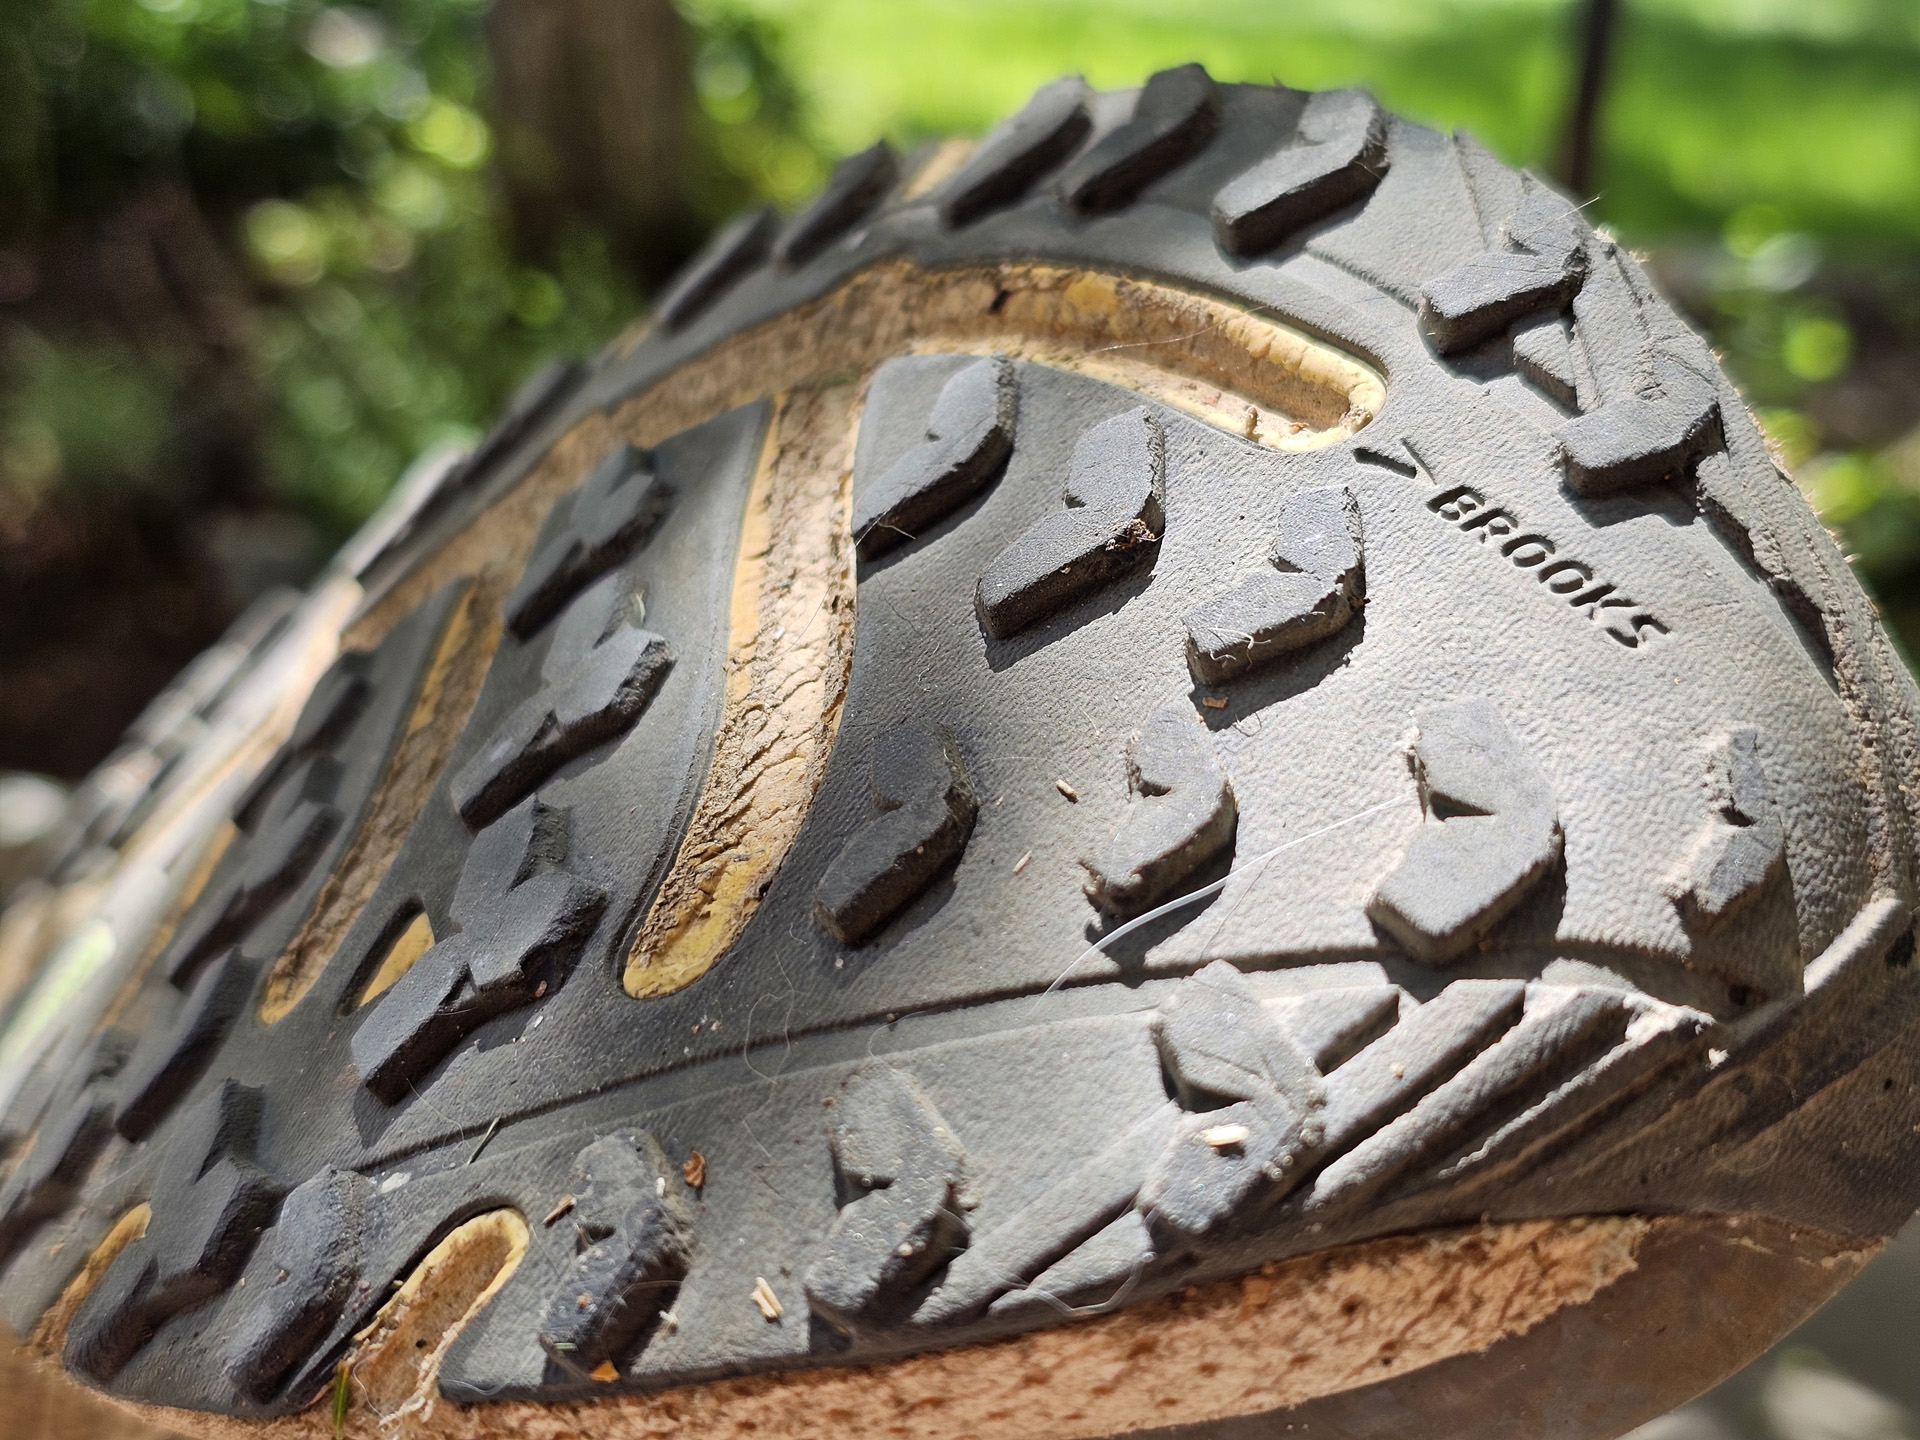
The glued-on tread held up great on my Brooks Divide 5 trail running shoes after 6 days in the backcountry... mostly off-trail hiking.
Kaden's personal best brook trout from our 2025 Wind River trip.
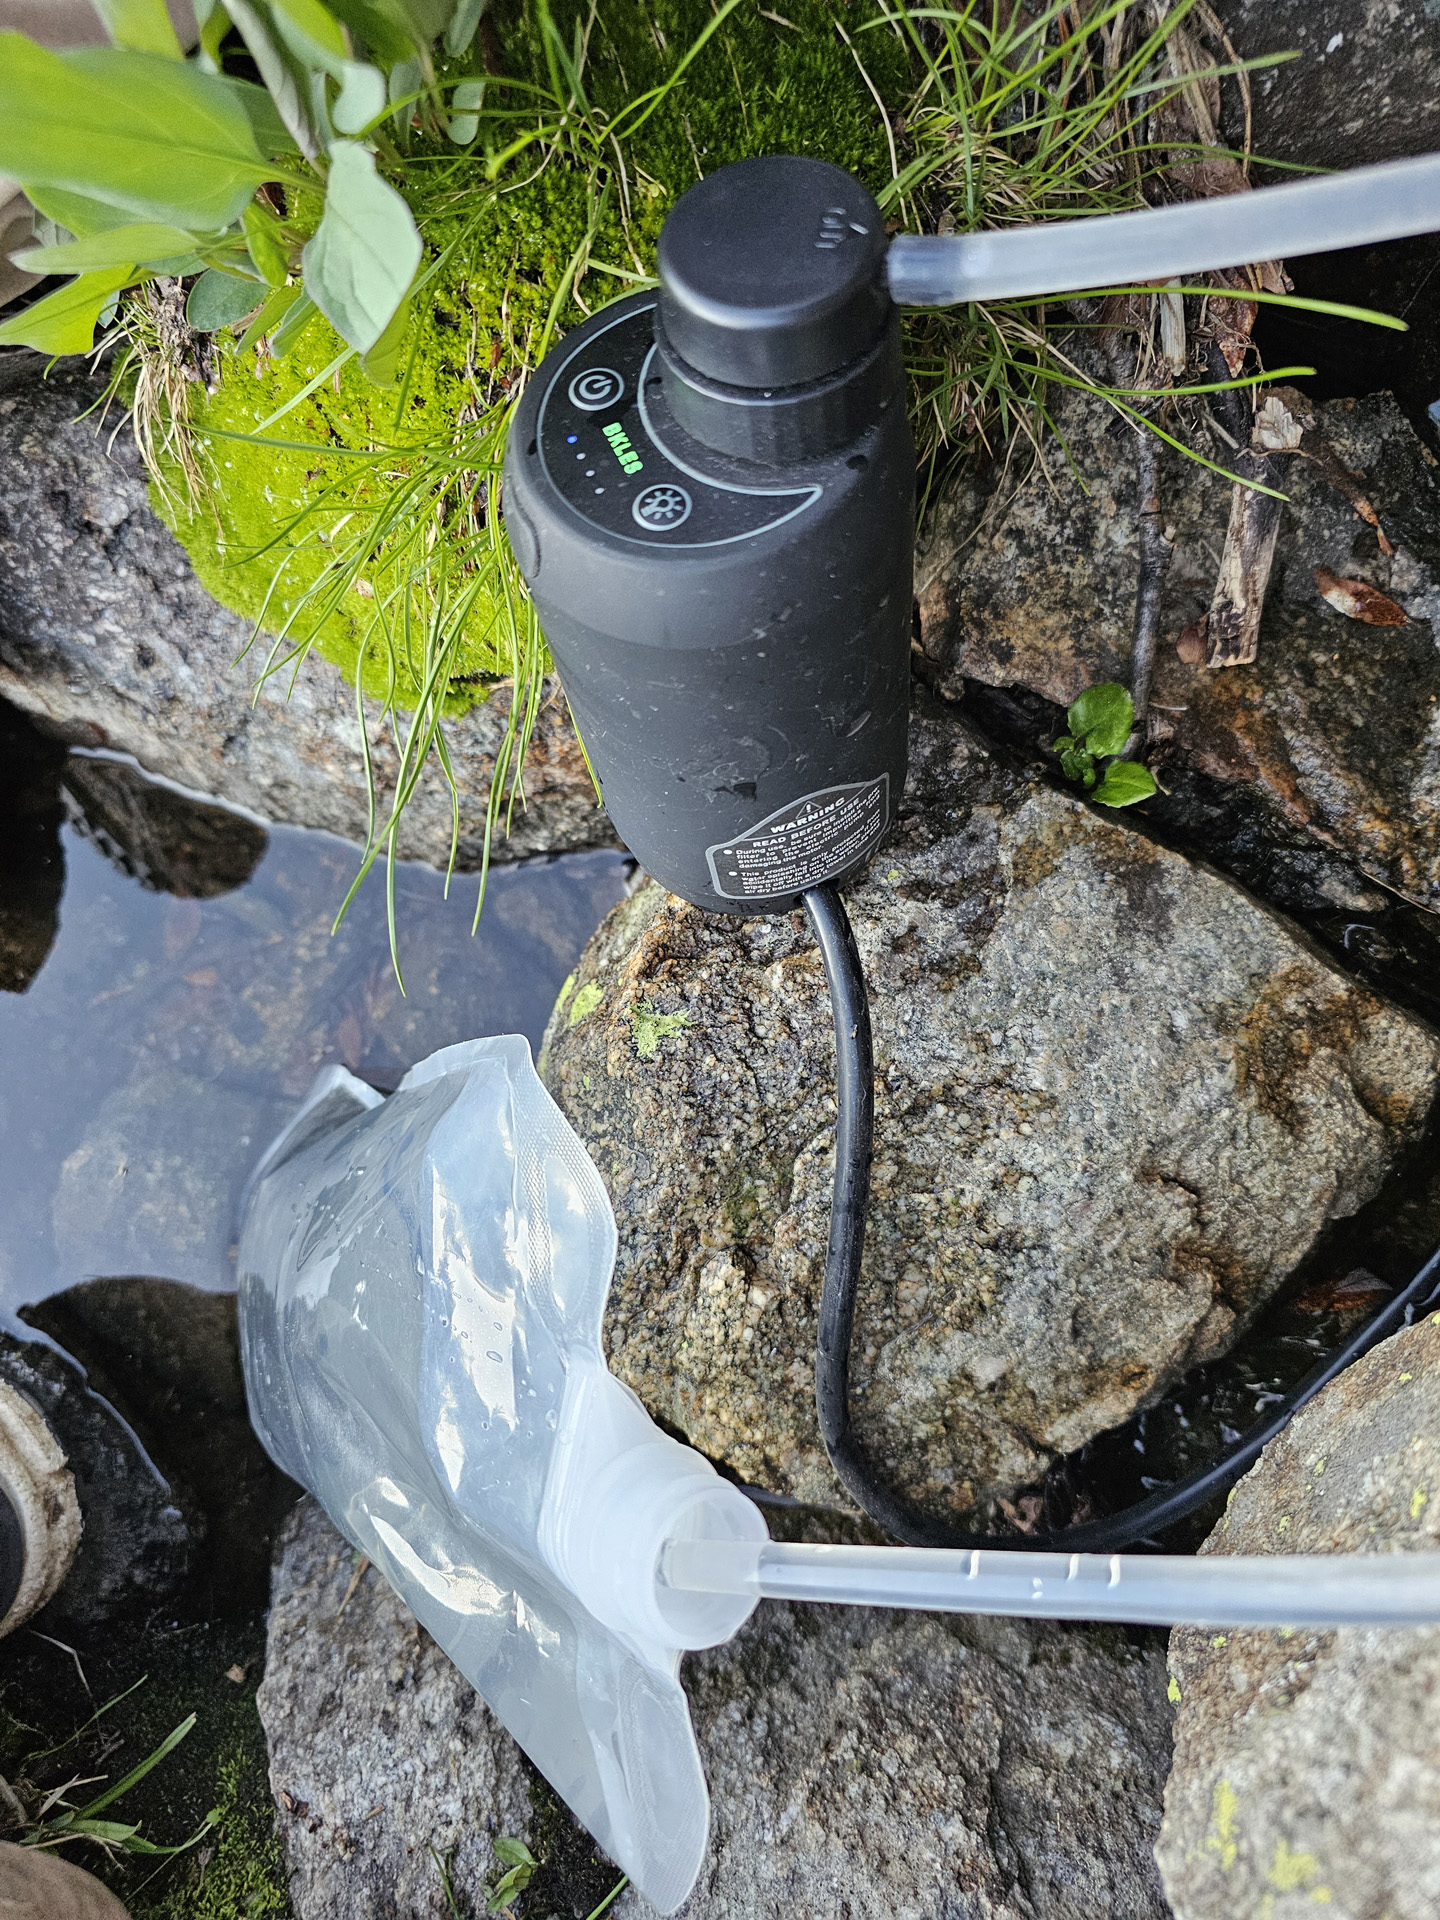
I love this usb rechargeable water pump combined with the collapsible Platypus 2-liter water bottle (see image above). This year, I found a great tip to cut a piece off the side of a plastic pop bottle and place it on the bottom of the water source (see the green plastic below the prefilter in the image below). This super-light plastic keeps the pump from sucking up debris off the bottom and plugging up the filters. It works amazingly and is so simple and lightweight to carry.

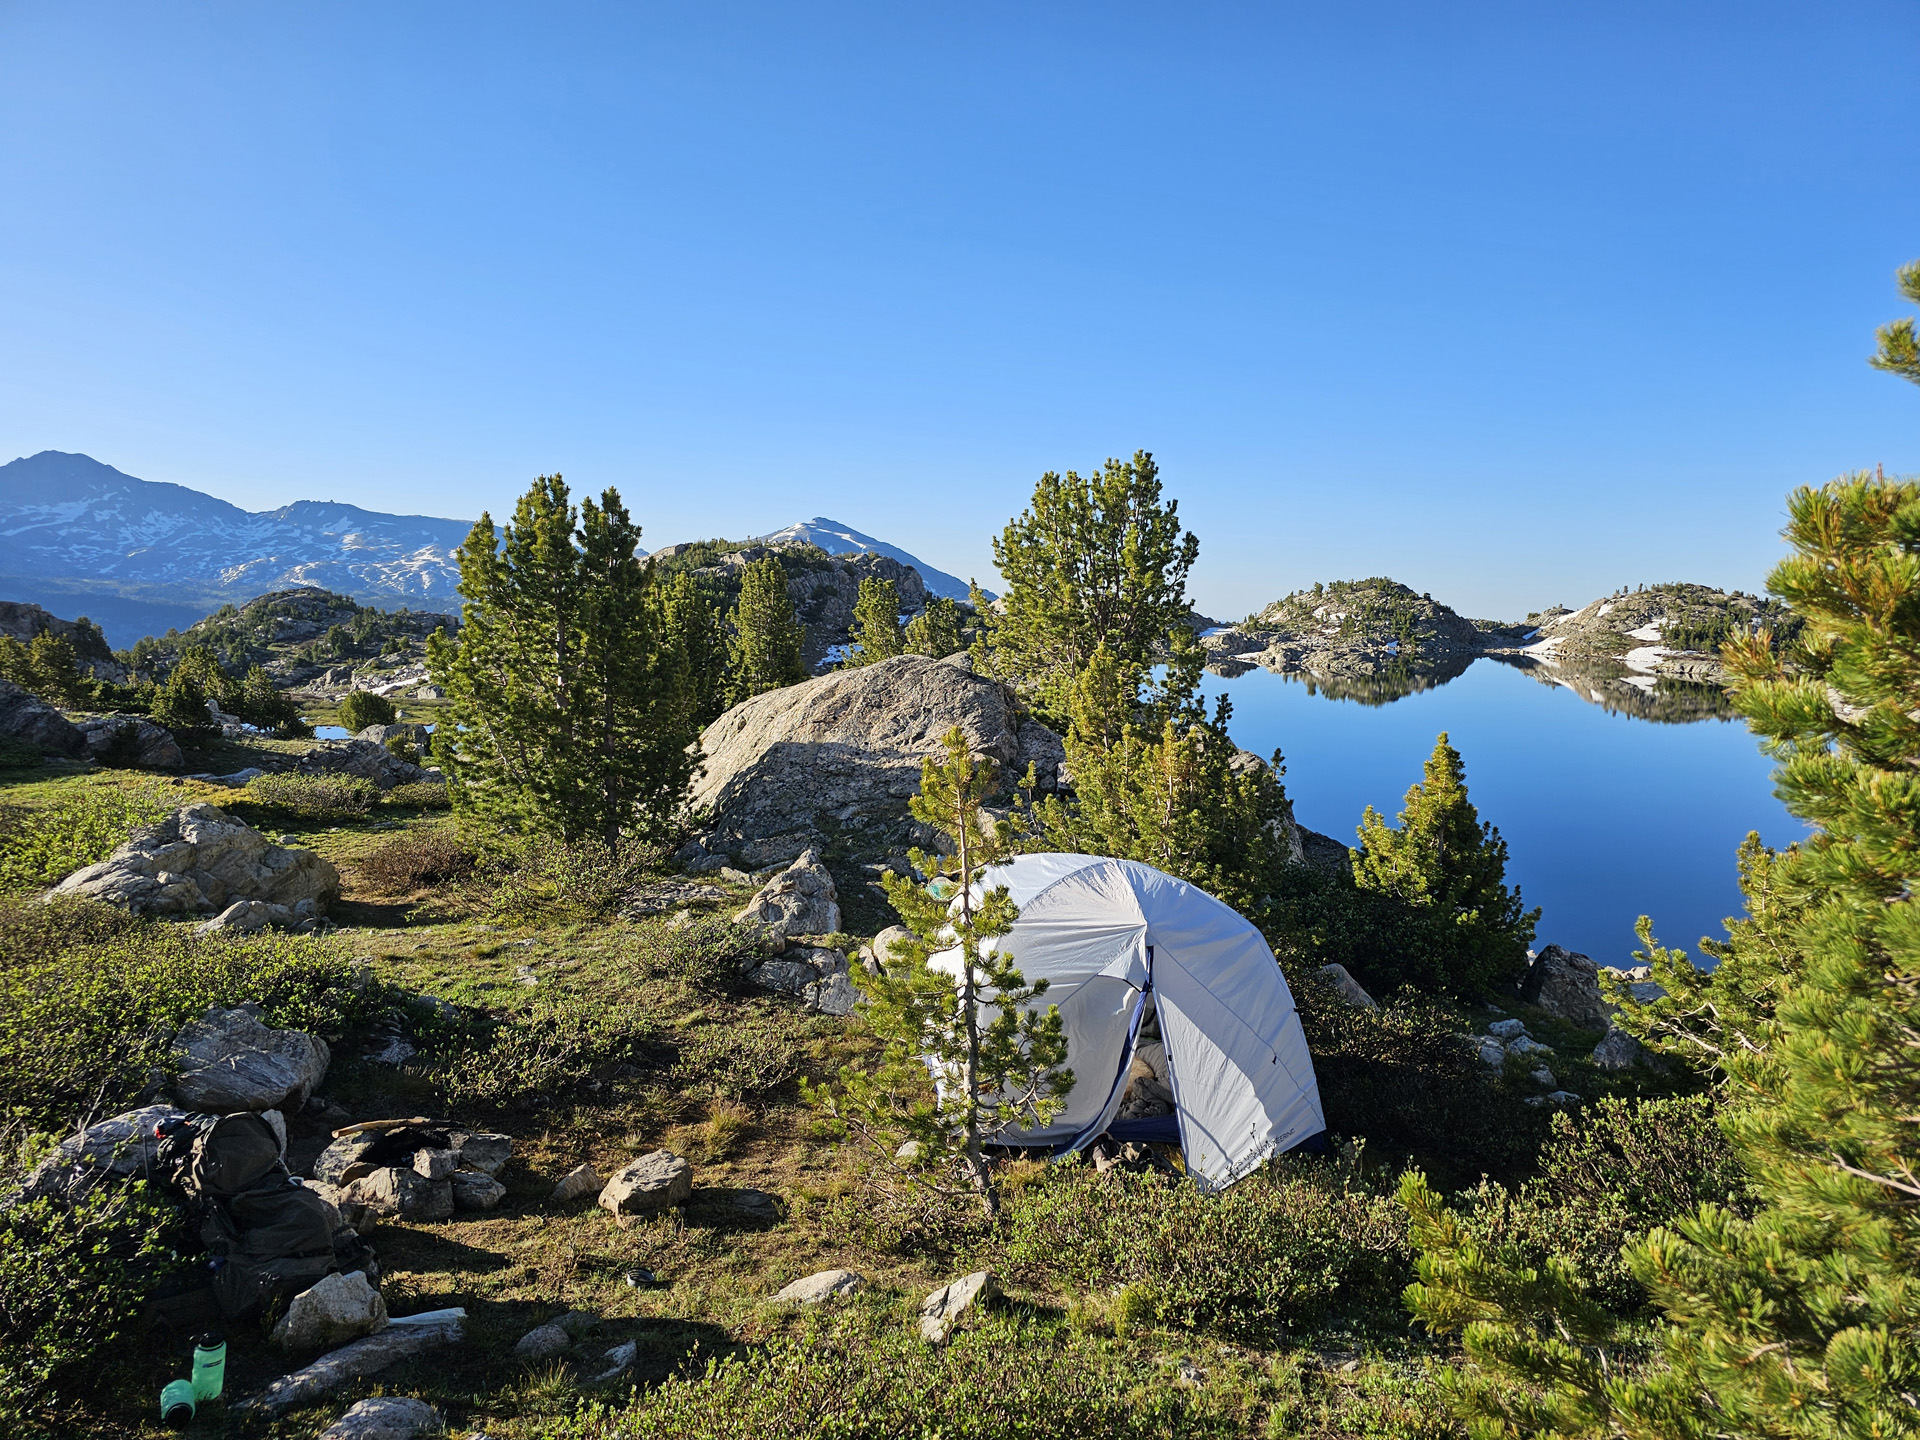
We enjoyed the Alps Mountainerring Acropolis 4-Person Backpacking tent. It had plenty of space for three large guys and two large dogs.
At the trailhead, ready to head into the Wind River backcountry after golden trout.

I got a smaller and lighter solar panel this year that puts out 25W, is only 1.38"x4.65"x6.42" collapsed and weighs in at 0.84 lbs. Shown here is Biscuit overseeing the charging of one of our Meshtastic LoRa radio nodes with a GPS module (We like the Heltec T114 v2 boards and print 3d cases for them). Biscuit also has a small Meshtastic LoRa node (SenceCAP T1000-E) that is sealed with an internal antenna set to tracking mode, that I have set to give out his GPS location every 2 minutes to our group of radios. Biscuit's radio is in the canvas pouch I made to put on his collar. Meshtastic is an inexpensive way to communicate securely with a mesh network that is completely off-grid. We can all see each other's locations and the dog's locations and send text messages to each other. Meshtastic is awesome for backpacking or hunting in the backcountry.
Other Backpacking Adventures

- Details
- Written by: Kaden Smith
- Category: Outdoor
- Hits: 5960
Hi, this is Kaden Smith. I am the son of Brady Smith, who normally writes blog articles on this website. I have been a part of many of his outdoor adventures, and I enjoy writing; as such, we thought this would be a great adventure for me to start learning how to blog. This article's topic will be about a fishing trip this past summer. Fishing has been a big part of my life growing up; it is a passion shared with me by my dad. I hope people who read this post enjoy it as much as I do.
I like fishing for numerous reasons. Firstly, I always relish how relaxing and calm the activity is, where it seems to wash any of your stresses away. The next thing I love about fishing is the anticipation, the anticipation of not knowing what fish you're catching next is very alluring. Every fish is unique in its color pattern, size, and even shape. Lastly, I am fond of the scenery you behold with your own eyes. I have seen many beautiful lakes and mountains.
This video I made showcases our Wind River experience, not just the fish we caught, but the wildlife and beautiful scenery.
Going back to the main topic of this article, this week-long fishing trip had been in the works for over a year. My brother, dad, and I have enjoyed fishing in the Uinta Mountains these past years, fishing even while on elk hunting trips. It is nifty that there are hundreds of fishable lakes in the Uinta mountains, just asking to be fished by a passing fisherman. What inspired this trip was that we'd been going after different trout species. Two new species of fish I recently caught were tiger trout and arctic grayling. Golden trout became a new target after my dad told his story of catching a golden trout when he was young. He mentioned how pretty a trout species they were. I thought it'd be cool to add golden trout to the list of fish species I've caught.
Dad enjoys researching and finding the best places and routes to catch certain fish using the ON X HUNT maps app. With this app, you can download maps that you can view even offline. Before this trip, we fished a few different lakes in the Uinta mountains, specifically Echo Lake, but were unsuccessful in catching any Golden Trout. However, later on, my dad discovered some specific lakes in the Wind River Mountain Range stocked with Golden Trout. This discovery led us to plan our journey to the Wind River Mountain Range. This is a place that my dad and brother have fished before. They didn't go after golden trout on that trip, though. Since they had taken a fishing trip to the Wind Rivers before, it was concluded it would be a special trip with just Dad and me, along with our golden doodle dog named Biscuit. The trip was planned for the last week of July this year. It would include backpacking with all our needed supplies on a designated route. The length was determined based on several factors, the first being that this would be Dad's first big hiking trip after having a total knee replacement. The other reason was bringing Biscuit with us.
Having over a year to plan was helpful in the preparation for this trip. My dad started a good habit/routine of taking Biscuit with him for a couple-mile hike at six in the morning every day. This helped his knee get used to hiking again and improved the dog's endurance. Across this period, we purchased additional gear and had time to work out the details of our excursion. Before this trip, we'd been starting to get into using fly rods, and we started simply using Tenkara rods. Later on, though, my dad decided it would be beneficial to upgrade to some Redington fly-fishing rods. I received one for my Birthday, and he got one for himself just a few months before the trip. He had done a bit of fly-fishing when he was around my age. But in recent years, thanks to recommendations from friends and colleagues, he got back into fly-fishing and helped me get into it. We have always been big on using spinner rods, but we were aware of how much fish like realistic-looking bait. Many people have claimed that fly fishing allows you to catch more fish than with spinner rods.
Another thing to consider upgrading for our big trip was our camping gear. The camping gear needed to be as lightweight as possible, for we were hiking many miles each day, stopping by lakes to fish them as we went. The gear focused on replacing was sleeping pads, sleeping bags, light breathable pants, and water pumps. Some gear needed to be replaced anyway from years of use.
Once all the new gear had arrived, we decided to do some practice/trial fishing runs on some weekends at the beginning of the summer. My dad tied a variety of flies to help us figure out/determine what the fish were most interested in, and we compiled that with the rest of our gear into our backpacks and did a few-mile hike excursions to see how the weight felt. We didn't have our backpacks weighted down to exactly what we wanted, but good enough for some trial runs. When we got to the lakes, we tested our fly rods and got good practice, working on perfecting our casting, etc. Fly-fishing, at least for me, was a little hard to grasp. Especially considering I've only fished with spinning rods and ice fishing rods throughout my life. Essentially, I felt these mini-trips proved important to ensure proper casting techniques were performed, to help improve the odds of bringing in more fish.
As the big trip drew near, Dad continued to work on tying loads of flies. It was funny, I swore whenever Dad came home from work, and I'd go into the kitchen, and I saw him seated at the end of the table, working on tying flies. Dad had access to GoPro cameras due to his job, which we were able to bring along. They would be a nice addition to filming releases and us fishing. We got some extra spinners, including Panther Martins, as we would do some spinner fishing. But we were mainly focusing on this being a fly-fishing trip.
Time flew by so fast that there was only one week to prepare for the trip before we knew it. With the final week arriving, the primary focus was on the backpacks. We concluded that the backpacks should be around thirty-five pounds, which is recommended online, at least. Thirty-five pounds was for everything: food, water, GoPros, fishing gear, clothing, and even safety precautions. For food, we focused on our homemade elk jerky from a cow elk I took last fall, oatmeal for breakfasts, trail mix, and Mountain House for dinners. We got a bunch of Powerade mixes to flavor our water and replenish our electrolytes.
Taking safety gear felt required for Grizzly Bears that are prominent in the Wind Rivers. The safety gear includes bear spray and pistols; you really can never be too careful when it comes to Grizzly Bears. If you're eighteen years or older, you can open carry in Wyoming. Fortunately for me, I am exactly eighteen. A satellite communicator was a last-minute thing that was also bought for our safety. The ability to reach family if an emergency came up was good and would keep our minds at peace, for there is no internet access up in the Uinta mountains or the Wind Rivers.
Dad found some repellent spray you can spray on your clothes to ward off mosquitoes, etc. There are certain areas in the Uintas we have gone to where the bugs have been pretty bad. So we sprayed all the clothes we planned to wear for the trip with some Sawyer Permethrin Insect Repellent and sprayed Biscuit's dog collar. It was smart to use the repellent spray on our clothes, for it worked awesome during our trip.
At last, the day arrived when we embarked on this fishing trip. We woke up at six on Monday morning of the last week of July and immediately started loading up the Jeep. Although it wasn't much loading since it was just the backpacks, us, and biscuit, and we took off at seven. It is around a four-hour drive to reach the Wind Rivers from our house. Biscuit, our dog, has been to the Uinta Mountains occasionally, so he has gotten used to long drives. However, on occasion during the extensive drives, Biscuit will attempt to jump up into the front of the vehicle and sit in our laps. I believe it has to do with him getting lonely sitting by himself in the back of the jeep. It is not optimal for the driver to be distracted by the chaos of the dog lunging at him from the back. So once we got an opportunity to stop, I switched from the front passenger seat to one of the back seats to comfort him for the rest of the ride.
We had one other stop after stopping for Biscuit, it was when we were barely stopped on the road for twenty minutes due to some construction. It was frustrating that only three more cars were being stopped in front of us. We look back on that moment and think that if we hadn't taken the break for me to jump in the back with Biscuit, we would have made it through with no delay. Continuing about the drive, we did happen to see a variety of wildlife, including prairie dogs and a couple of antelope. What amazed us was that as we neared our destination, there was a drastic change in the landscape. For most of the ride, it felt like there were no mountains in sight. The silhouette of the mountains was barely visible behind a vast amount of fog.

Photo taken during our drive to the Wind Rivers. Biscuit likes to stick his head out the window and feel the wind rushing past.
So when Dad was driving, the mountain range kind of just appeared out of nowhere. The Mountain Range is tall and seems to span endless miles. It felt like there was no end to them. When beginning to ascend the mountains, I saw two of the largest lakes I've ever seen. Dad commented that these were naturally made, which I thought was pretty neat. We continued climbing on the road higher and higher till, unfortunately, we got slowed down by a big truck in front of us. I remember the roads being pretty dusty, and that the truck left a thick, hazy dust storm behind it. Dust we had to endure for the remaining minutes getting to the main parking lot, which we arrived at a little after eleven o'clock. This parking lot is connected to the Elkhart Long Lake Trail, a popular trail that people go on. So it was no surprise that the parking lot was filled with parked vehicles.
When getting out, biscuit immediately chased after the squirrel that was chirping in a tree a little way up on the hill from the parking lot. If you know Biscuit, one of his favorite things to do when camping is chase after squirrels. While Dad finished unloading the packs and gathering things, I ended up climbing the hill to retrieve Biscuit, carrying him back in my arms. If you are unaware, golden doodle dogs are a solid 60+ pounds. So it was no easy feat to bring him back down. After that minor setback, we threw on our backpacks and started hiking. Well, we were hiking until Dad remembered he forgot his walking sticks, so I waited on the trail with Biscuit while he went back to the Jeep to retrieve them, then we continued on our hike.

First photo of the whole trip, when our backpacks were loaded up and ready. Biscuit had already hit the ground, protecting us from any pesky squirrels.
The route of our trip was based on some lakes that a colleague of Dad's recommended. He had been fishing a few weeks before us, testing some new backpacks he had been working on. For the first day, we planned on hiking the most, a total of four and a half miles. We were going to fish a lake that only had brook trout in it on the way to our first campsite, only a couple of miles further at a different lake. While hiking on the trail, we passed many people, mainly day hikers, and a few fishermen. A mid-pace was kept, and we took several breaks.
During one of our breaks, a funny family came up to us. They said they came from Arizona to hike this popular Wyoming trail. As they approached us, they asked, “Are there Grizzly Bears up here?” With our responses being “Oh, yeah!”, they then proceeded to reflect on the fact that they hadn't brought any bear spray. Hesitantly, the family continued walking their way up the trail. When only a few minutes passed, they traveled past us, coming back down the trail, stating, “We'd better get some bear spray!” We laughed as they rushed past us with haste. We continued to pass person after person as we hiked on the main trail. It was this way for a couple of miles till breaking off the trail to head to the first lake we fished at.

Dad hiking with his Browning Monroe backpack loaded with gear.
We arrived at the lake around three o'clock in the afternoon. At this lake, there were a few fishermen we saw on the far side of the lake. There were a bunch of fish jumping on the right-hand corner of the lake, so that's where we started fishing. Trying out our fly rods on the lake, we got some bites early on. Dad was able to land two fish on his fly rod early in the fishing session; however, it slowed down quickly. After a while of no bites and trying various lures, I switched to my spinner rod and tried a variety of colored Panther Martins. The regular one amongst others had been unsuccessful, so I decided to put on one of the newest Panther Martins I got. It was a green Panther Martin with red dots. I knew that one had a good chance of landing some Brook trout since it is a similar color to them. When switching to the green Panther Martin and casting, as soon as I began to reel in a fish struck the lure, and I pulled in my first Brook trout on that lake.
I continued catching brook trout with this lure, bringing in two more brook trout. It was nearing six at night, and we had been fishing for a few hours. We realized we'd better start hiking again to get to camp for the night. It would take a while to set up the tent and get dinner ready. One hour of hiking later, we got to our camping spot. At this lake, there are just golden trout stocked in it. We dropped off our backpacks and walked down to fish the lake a little that night before it got dark, but neither of us even got one bite. Even though quite a few fish were jumping all across the lake. While we were fishing, a giant yellow dragonfly landed next to me on the bank. I never usually see yellow dragonflies; they are generally blue.

Me fishing at the first lake we arrived at. I didn't even take off my pack and immediately started fishing lol.
We returned to our backpacks and quickly set up our two-man tent. After the tent was up, we ate our Mountain House dinner on some rocks nearby. They provided a good station to heat our Mountain House food. Later, when the sun came down, we pumped our water from an outlet close to the lake and put our food in the bear bag, hoisting it high up on a tree branch, before sleeping for the night. That was the nightly routine we followed for the whole trip. We woke up at six to have our breakfast of oatmeal in that same rocky area. For the second day of the trip, we planned on stopping by a lake a half mile from camp. Then we would hike two and a half miles to another lake, where we would camp for the night. These lakes would all have just golden trout in them. We fished for just an hour after breakfast at the lake we were currently at.

Picture of Dad fishing at the first lake that held golden trout.
Then, quickly, we set out for today's lakes; it took us about thirty to forty-five minutes to reach the closest lake. It was a pretty steep incline, so it took longer than it normally would have. Our immediate response when seeing this lake was that there were hardly any fish jumping. As usual, we dropped off our backpacks nearby in a shaded area. Then Dad took Biscuit with him to the left side of the lake, and I fished more of the right side of the lake. After thirty minutes of fishing and seeing Dad missed a fish on the left side. I decided to work the left side of the lake as well. Dad continued to move up and to the left corner of the lake. I was still not getting any bites; however, Dad missed two pretty big golden trout. Both fish were hooked for a few seconds, but one broke off, and the other spat the lure out.
After two hours of fishing in this lake, we returned to our backpacks and took a lunch break. Then we got up and continued hiking on a steep incline till we reached a turnoff to the right. On this turnoff, we headed back onto a main trail for a bit, passing some people, when we hadn't for a while. We took a good nap a couple of miles into our hike when we reached the lake right when it began to rain pretty hard. There was a rocky ledge on the mountain that we hugged when pulling out our ponchos, taking cover under them. It rained off and on for about thirty minutes before we started fishing.
At this lake, we had a good feeling about catching some golden trout because of how many were visible schooling near the bank. There were dozens of small golden trout, and when we started casting with our fly rods, I immediately got a bite and pulled in my very first golden trout! It felt good to catch one after so long of going after them. This trip started slow, and we had missed catching any golden trout thus far, and we were a little worried if we'd catch any. Dad filmed and took photos of my first golden trout as I released it into the water. It was cool to see how beautifully colored they are in real life. After that first fish I caught, we continued catching them one after the other for hours on end. I started traveling to the right side of the lake, and Dad to the left again. We both fished our sides for a bit until it was getting late, so we met up again and talked about changing our plans. It consisted of us not camping at this lake for the night and heading up to a lake above us to camp there.

My first golden trout that I have ever caught. They are pretty fish as seen in this photo.
So we quickly started hiking up to it as it was getting late. When climbing, Dad mentioned it was the steepest hike of our whole trip. Shortly into the hike, there were clear signs seen above that it was going to storm again, with thick dark clouds heading in our direction. Our pace increased, but it still took us over an hour after going in the wrong direction. Once we got to the lake, it began to rain again, and the wind picked up. We had to set up the tent faster than ever, to throw our backpacks under to prevent gear from getting soaked. Fortunately, it didn't rain much, and we could continue our nightly routine. The next morning, when I had sat down and was preparing my breakfast, and Dad was tying a fly on his fly rod, a chipmunk was eying us on the cliff boulders above us. It was clear it wanted to have a taste of my oatmeal. It began crawling down slowly till it was near the bottom of the cliff. Eventually, Biscuit saw the chipmunk and bolted after it, spilling some leftover water we had. As Biscuit bolted after the chipmunk, the chipmunk simply responded by quickly retreating further up on the cliff, just out of reach. It felt like it was taunting Biscuit from up there.
With the chaos of Biscuit chasing after the squirrel, Dad accidentally broke the tip of his fly rod as he started to go after Biscuit. Luckily, the fly rod was still usable after some quick testing on the lake. We had to re-boil some water cause I hadn't added it to my oatmeal yet. After breakfast, when I was gathering things to start fishing, my heart sank with the realization I had lost my fish net on the way up to this lake. When mentioning it to Dad, we concluded that we would look for it on the way out of the Wind Rivers. You could say it was a rough morning.
As we began to focus on fishing at this lake, many fish were jumping, but after fishing for a bit, it was clear there were primarily tiny-sized fish held in this lake. In the other lake previously fished at, there were lots of small fish, but these golden trout were more comparable to minnows in size. We started fishing just a little away from camp, but were unsuccessful in catching any fish throughout a couple of hours of fishing. I walked around the lake to the left, sight fishing as I walked through some areas, while Dad stayed back near camp with Biscuit. I saw a couple of fish around ten inches in length, which I cast a fly in front of. However, only one of them committed to the fly, and the fish happened to get off pretty quickly. At this lake, the colleague mentioned before, Dad had said they had tons of bites but didn't land any. But we only had an impressive total of one single bite on this lake!

Picture of one of our campsites with our Alps Chaos tent during the trip.
We were tired of getting nothing again, so we gathered our things and set out for the last lake to camp at. Around this time of day, it got warm, and when beginning to hike, there was little to no shade, and it was a lot of uphill. After about an hour of hiking, we all took a water and rest break. We found a nice area to hunker down in the shade of some pines. After about forty-five minutes of rest, we were ready to go. It was a little after noon, and some clouds had poured in. So the hike felt a lot easier after that point in time. We crossed through a cool ravine and weaved between cliffs when completing the hike. After climbing one last steep hill, we finally got a good view of the lake, which was the most interesting-looking, at least for me. The lake was split into multiple sections, but the main section was parallel to us on the other side. We could either head left or right, and we decided to cross on the left side because it looked like an easier path.
We headed to the left after taking a forty-five-minute water and rest break. When we got up and approached the left side of the lake, there were some boulders we had to cross. Boulders are one of Biscuit's all-time fears, at least they used to be. Like with car rides, by going on various excursions and getting used to it, he had mostly conquered the fear. There was one spot where we had to go precisely around a boulder and avoid getting wet, so I had to help him across. When reaching the other end of the lake, we set up the tent as usual and selected a spot to start fishing at.
It was around five o'clock, so we still had a few hours of light left to fish, and we noticed in the left corner, there was a bunch of fish jumping in a small outlet area. So that is where we began fishing, I got a few bites with the leech I had on, but kept missing. Dad went past me with Biscuit fishing further up on the main lake. He came back later and caught some golden trout with some nymphs. The fish were small, and I was having a hard time hooking them. It was starting to get late, so we all headed back to camp. I fished a little more near our tent before going to sleep.
The next morning, we tried in that small pocket area again, but didn't have the same luck as the day prior. It seemed that the fish had smartened up on the lures we were using the day prior. So we decided to try our luck at a lake further down that held only Brook trout. It started to rain a lot when we began to walk down to it, so we retreated to the tent and had to wait twenty to thirty minutes for the rain to clear. When it cleared, it only took us thirty minutes tops to reach the next lake.

View of the best lake for Brook trout during the trip.
By targeting just brook trout, we fished with leeches the whole time, and we've learned that brook trout love leeches. We saw lots of fish jumping on the right side of the lake, so we all fished that side together. Our leeches were pulling in brook trout after brook trout. While fishing this lake, a big Brook trout jumped out of the wate,r missing my leech barely, so that was pretty cool to see. Dad found a nice, long stick with a branch sticking out that we could place our fish on. We knew they would stay fresh with our short hike back to camp. We caught at least a dozen Brook trout each; however, we decided to only keep the biggest fish for dinner. All the fish we kept were good in size ten inches plus in length. We kept six, which we figured would be plenty for all of us.
We returned to camp and had them for dinner with some seasonings we stored in baggies. The seasonings consisted of garlic and pepper. We wrapped the fillets in some tinfoil to cook them. It took about twenty minutes to cook them in tinfoil, so while Dad worked on that, I prepared some Mountain House. The fish turned out pretty alright when we tasted them; however, when we tried to share some with Biscui, he surprisingly denied the fish. It was suspected that he didn't like the seasonings added to it.
The next day was about hiking halfway back to the Jeep, camping, and fishing at the lake where we caught the most golden trout. When we were hiking, it was funny that Biscuit led us back to the lake, with him taking the lead in front of us, walking back on nearly the exact path we took coming in. When passing through the ravine and hiking over a hill, my spinner rod unfortunately got caught on a tree branch, and a quarter of the rod broke. So Dad and I both broke pieces off our rods. It was good that we brought plenty of rods, or we wouldn't have fished nearly as much.
While we were hiking back, we did happen to see where I dropped the fishing net; it was just lying flat on top of some bushes it had caught on. The area was pretty close to our best golden trout lake for the trip. We were surprised it was just in the wide open; we thought the fishing net would be higher up on the steep stuff. After picking up the net, I decided to hold it just in case, as we completed our hike back to the lake.
We made it back to the lake in just an hour or so and still had plenty of hours left in the day to focus on this lake. It was nice because we were able to fish this lake much more extensively than before, not feeling rushed at all. We went around to the left side, which was the best side of this lake. It did happen to rain pretty hard two times when we had to take a break from fishing and go under the cover of pine trees.

In this picture, I am fishing at the best golden trout lake of the trip.
We hadn't set up the tent, so we hung out under pine tree branches to shield us from the rain. We probably got five or six hours of fishing on that lake that day, fishing right until dark. The next morning, we slept in a little, waking up around eight o'clock, we had whatever else we wanted to eat, and began hiking the rest of the way out. When hiking out, we bumped into a couple returning from a fishing trip just like us. They mentioned they had been up there for a week and hadn't caught any golden trout. Well, except for a sickly one that the guy grabbed out of the water! This couple had been up in the Wind Rivers on various occasions and seemed to know quite a bit about golden trout. We had a nice conversation with them before continuing on our way.
During the hike out, we had our eyes set on any heart-shaped rocks. We did this because my mom loves to collect heart rocks and even puts them in the flower beds. When searching for such rocks, we found three that we could carry back out. We didn't want to carry any massive ones back out.
We made it back to the Jeep in the parking lot fairly quickly. It only took us a couple of hours, thanks to On X Maps. We realized when looking in the app that we made it harder on ourselves in a certain area coming in. Where we could have continued on some trails instead of going off-trail. So we found that trail, which made it significantly faster to complete the hike. Once we made it back to the Jeep, we were pretty exhausted from hiking all week, but we had a good time. From going on this trip, we have learned that golden trout are pretty tricky to catch, at least the big ones are. We hope to apply what we learned from this trip next time we go up to the Wind River, and maybe next time we'll be able to catch bigger ones.

A few miles away from the parking lot during our hike out.

We loved having a Zoleo satellite communicator with us. My dad wishes he had known how affordable the price of ZOLEO Satellite Communicators was and purchased one of them years ago.

We wore Under Armour Men's Charged Maven Trail Running Shoes as our primary hiking footwear. We used Kahtoola RENAgaiter Low Gaiters to avoid debris entering our trail running shoes.

Alps Mountaineering Zenith +30 sleeping bags were comfortable, packed small, and weighed just over two pounds. We also went with Alps Mountaineering Swift air mattresses.
Below are links to other useful new gear we used during our trip
- The USB rechargeable Portable Water Filter works great at pumping fresh filtered water.
- The SteriPEN Adventurer Opti UV Water Purifier functions nicely as well.
- The Lightweight stretchable hiking pants were very breathable and comfy to wear, and they come in 36" inseams for our long legs.
- BigBlue 28W solar panel worked great at keeping our charging bank full.
- We would charge our phones and other equipment at night with an Anker 20,000mAh 87W Power Bank.
Below are links to other backpacking adventures.