- Details
- Written by: The DIY Hunter
- Category: Hunting
- Hits: 6450
Every summer since I was little our family has gone camping for several days in the Cache National Forest of Northern Utah. I have many a great memory of these camping trips. Now that I have my own family we have continued the tradition with our own children and my parents who are now Grandpa and Grandma.
The area that we go camping in always had a lot of coyotes but a couple of years back some pretty extensive reduction of their numbers happened. I believe this came by the hands and helicopters of government employees in which I was happy to see because the deer numbers were getting pretty low at the time. Since then I have seen little sign and usually only when there is a sheep herd within a couple miles. I still always throw in a rifle and caller just in case I happen to find some coyotes but knowing most likely there may not be any in the area.
The first three days of camping this year I was unable to find any coyote tracks or scat within the general area we were camped. On Sunday night about a mile away across the canyon a male coyote surprised me and started doing series after series of challenge yelps, howls and barks for well over an hour straight. It appeared that he was very upset with either another coyote or my wife's little yapper dog that we had with us. Whatever the case, it was Sunday and I have a personal belief that I should not snuff the life out of furry woodland creatures on Sunday. Oh, how I was ever so tempted to sneak past my wife, go across the canyon and silence that song dog... That night I strategized over and over how I was going to out smart him in the morning.
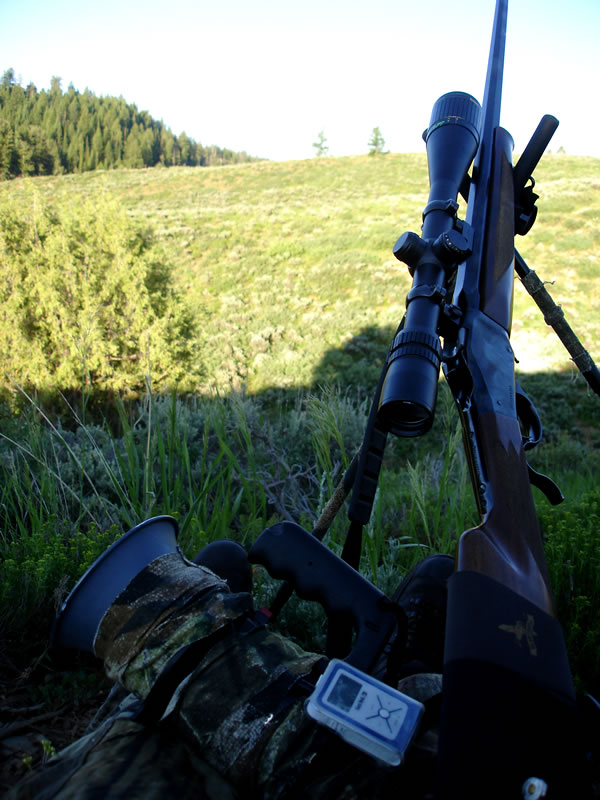
Early the next morning I grabbed my 243 WSSM Winchester Model 1885 single shot rifle, some optics and my homemade DIY electronic predator caller and snuck out of camp before anyone else was up. I slipped into a sagebrush draw that looked across the main canyon directly across from where I had heard the coyote the night before. I figured that at best I could get the coyote to come out of the pines and quaking aspens on the other side of the canyon and look across from some cliffs that formed a gorge like canyon. This would offer a 300 yard shot and if I was lucky I would be able to get him to cross the gorge and offer a closer shot on my side of the canyon, that is, if I could see him in the sagebrush before he winded me.
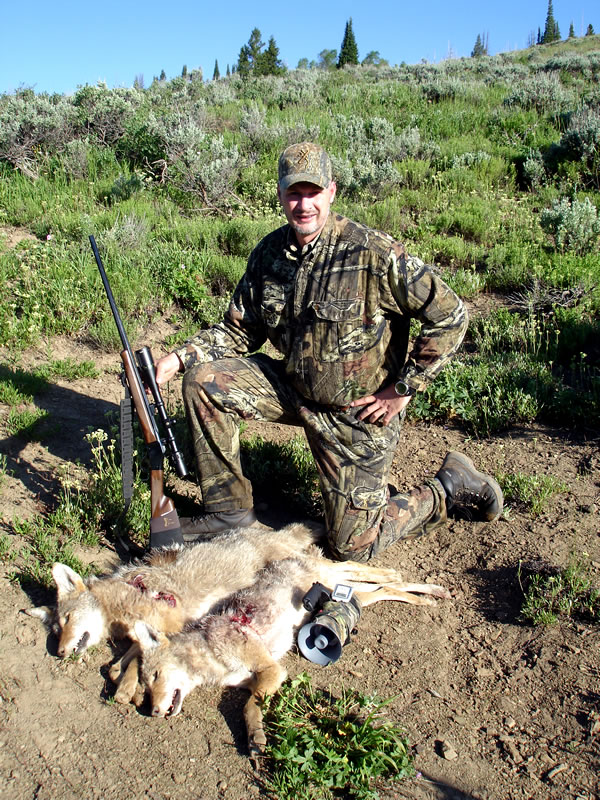
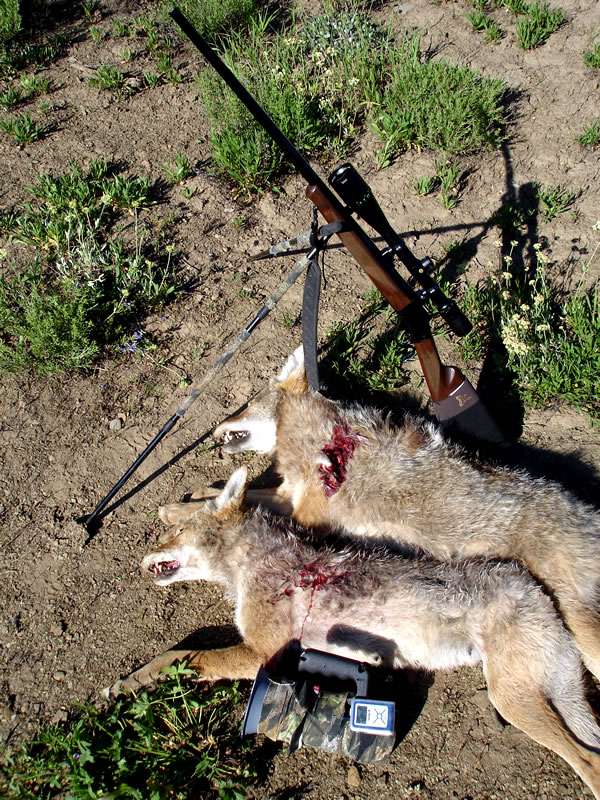
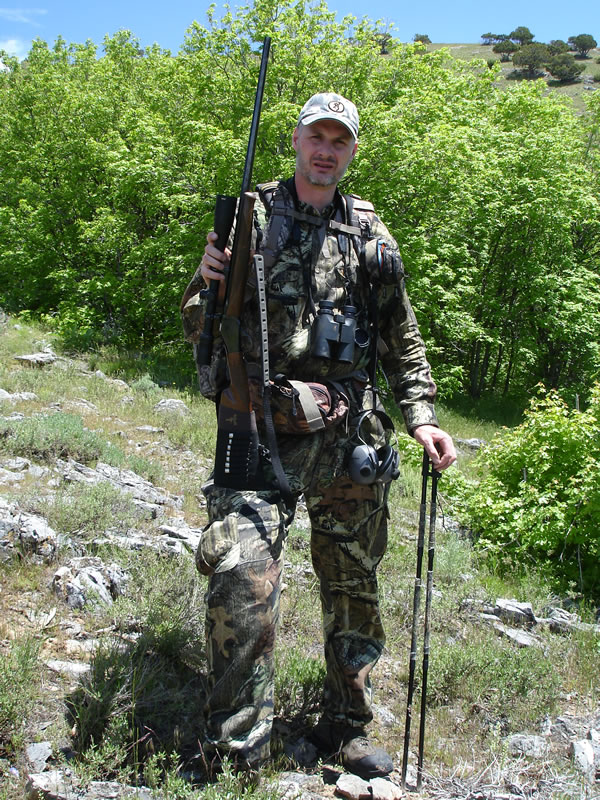
My Winchester Model 1885, 243 WSSM, a homemade electronic coyote caller and the two coyotes I just took. I'm wearing the New Mossy Oak Break-Up Infinity camo pattern which is not too bad of a pattern. Treestand and Duck Blind are my two favorite camo patterns right now.
Once in place, I set my DIY Homemade Electronic Coyote Predator Caller to repeat a series of challenge barks in much the same manner the coyote had been doing the night before. I figured this coyote was obviously upset with someone in his turf and a little challenge might be just the trick to tick him off and let down his guard. I started the caller up and it wasn't 30 seconds and to my right on the same side of the canyon that I was on two coyotes were coming in full throttle through the sagebrush. As they crossed through a small draw and were out of sight I repositioned myself and set up on my shooting sticks. They both stopped at about 100 yards across the draw I was in and I could only see the one so I dropped the hammer on him and down he went.
The sound of the exploding bullet on the coyote and the electronic caller still playing, I think confused the second coyote and she started running parallel to me at about a 100 yards crossing down into the draw I was in. Just before she made it to the thick sage in the bottom of the draw she stopped to look back up at the challenge barking coming from my caller. I was ready and dropped the hammer on her for a double, with a single shot rifle, in less than two minutes of calling.
At first, I figured that the coyotes had to be young uneducated coyotes to come in so fast however they were an adult male and female pair. This makes sense because the challenge barks I was making probably would scare off the younger coyotes.
I was using Winchester factory loaded 243 WSSM 55g Ballistic Tip bullets that chronograph at 4240 fps from this rifle. The coyotes were 95 and 97 yards away according to my Bushnell Elite 1500 range finder.
- Details
- Written by: The DIY Hunter
- Category: Hunting
- Hits: 4867
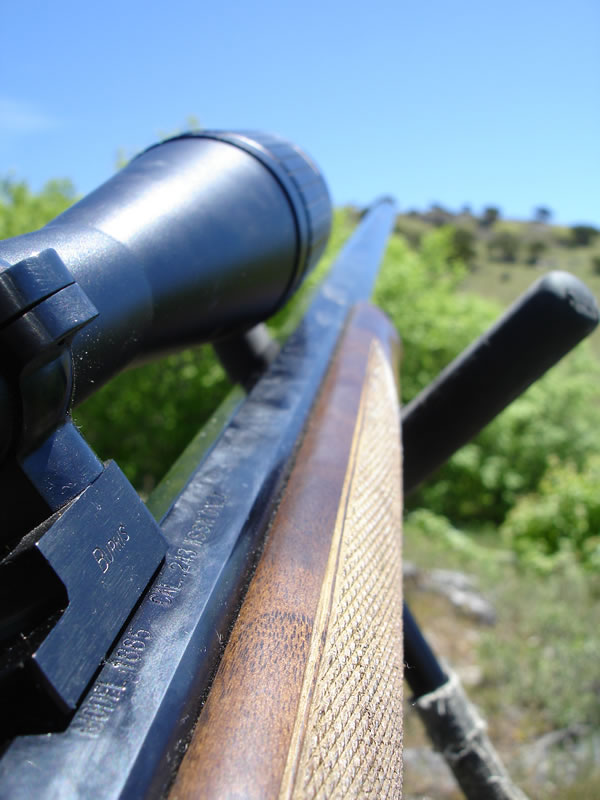
View of my 243 WSSM Model 1885 from my lap while rock chuck hunting.
Dallen and I took a hike to hunt rock chucks this past week. We went into an area that usually has abundant numbers of chucks however this year we only found a handful of chucks. We had given the area a break from hunting the previous year so maybe some else had been in the area the past two years. Who knows. We did find a few rock chucks and were able to have some fun.
Dallen was packing his Browning A-Bolt Stainless Stalker in 223 Rem. and was shooting a 50g V-Max handload clocking right at 3,000 fps. I was packing my Winchester Model 1885 in 243 WSSM shooting factory 55g Ballistic Tips, clocking in at 4240 fps, with this 28" long-barreled rifle.
Both of us are shooting from a sitting position. I am using a set of Stoney Point Shooting Stix and Dallen has a large Browning Bi-Pod on his rifle. He prefers Shooting Stix but we think his set got left on the mountain when we shot our cow elk this past winter.
I let Dallen take the first crack, at the first chuck. It was a small chuck, at 246 yards. It takes him three shots to connect on this rock chuck. His first two shots are near misses. I have to give him credit as he is only using a 3-9x Bushnell Elite 3200 rifle scope and shooting with a bi-pod from a sitting position. After his first two shots I decide to take a "warm-up" shot myself and just skim the top of it's back for a miss... and I have no excuse, I just missed. You will notice a considerable difference in the speed of the bullet and the impact on the rock on the third shot in this video. When I have my rifle down to reload Dallen center punches the chuck on his third shot.
This rock chuck is at 244 yards and I send him flying with a center punch from my 243 WSSM Model 1885, using a 55g Ballistic Tip, having a 4240 fps muzzle velocity.

Dallen with the thumbs-up after he shoots his first rock chuck for the year.
Dallen turns the camera on Dad.
We didn't get to shoot very much this trip out but we had a lot of fun nonetheless. The trip also provided some much-needed exercise. I have put a few pounds on this past winter. I need to get in a little better shape and take several more trips like this before summer is over. Dallen and I had a great time. I really enjoy the talks we have when we are out hunting together. He's growing up on me.
- Details
- Written by: The DIY Hunter
- Category: Hunting
- Hits: 11918
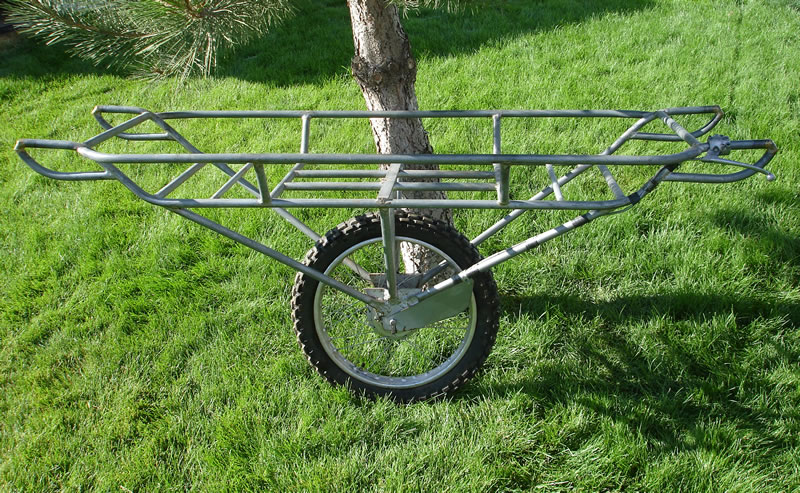
If you can get this game cart to your downed animal and you have at least a second person with you this single wheel big game cart is as good as it gets for hauling out the entire deer or elk from just about anywhere. A big game cart very similar to my father's cart is GameTote's big game cart.
Years ago my father built a one-wheeled elk and deer cart. As you can see my father was a source for my big game hunting passion and where I got some of the creative DIY hunting ideas. Many of my fondest memories were hunting with my father in my youth. It is now fun to pass that passion along to my children as they are getting old enough to hunt with me.
This cart is the mother of all deer carts. It's as solid a big game cart as it gets and will haul deer and elk out easily. The cart was built back in the day when big bucks were abound within a few miles from the road and boning a deer out was not as common a practice as it is now.
The cart is built around a single motorcycle wheel and has a great break system built right into it. With this deer cart, you can put a couple of whole deer on it and two guys can haul them out of almost anywhere. The cart can be used by one to four people or more people at a time depending on how many guys you have and the size of the load.
I used this game cart a few times with my father when I was a teenager. Since those early hunting days I have changed much of my hunting style and choose to hunt areas that require a backpack to get in and out off.
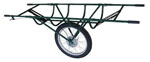 GameTote big game cart at GameTote.com