- Details
- Written by: The DIY Hunter
- Category: Outdoor
- Hits: 4546
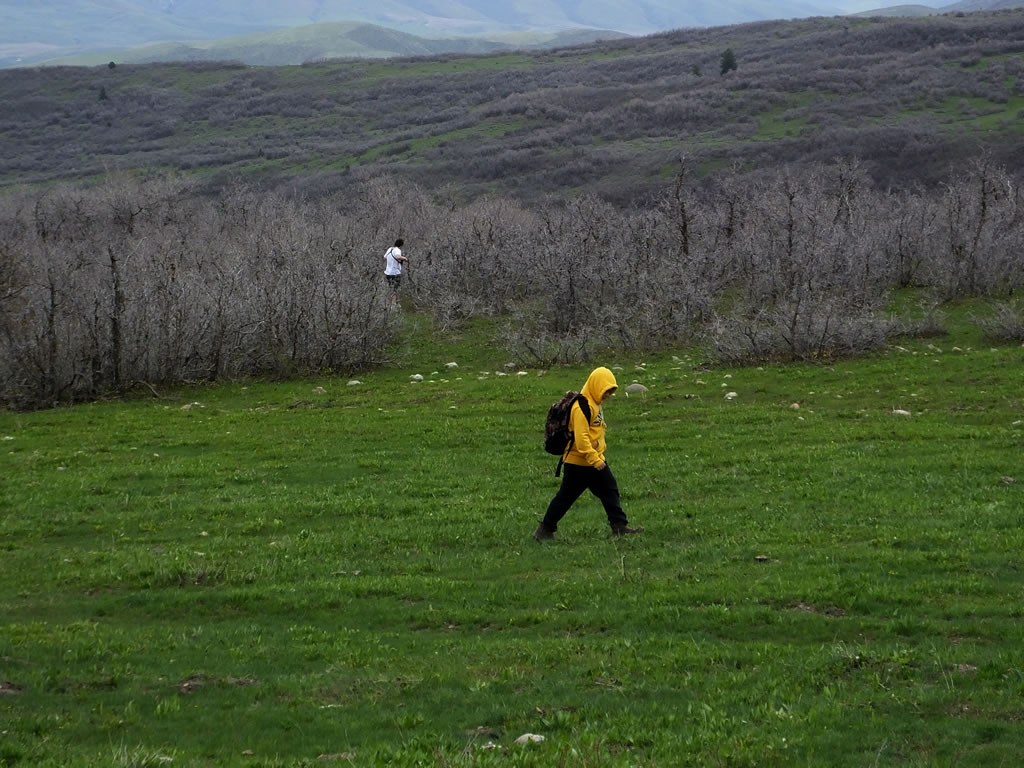
KB and Dallen looking for shed elk antlers.
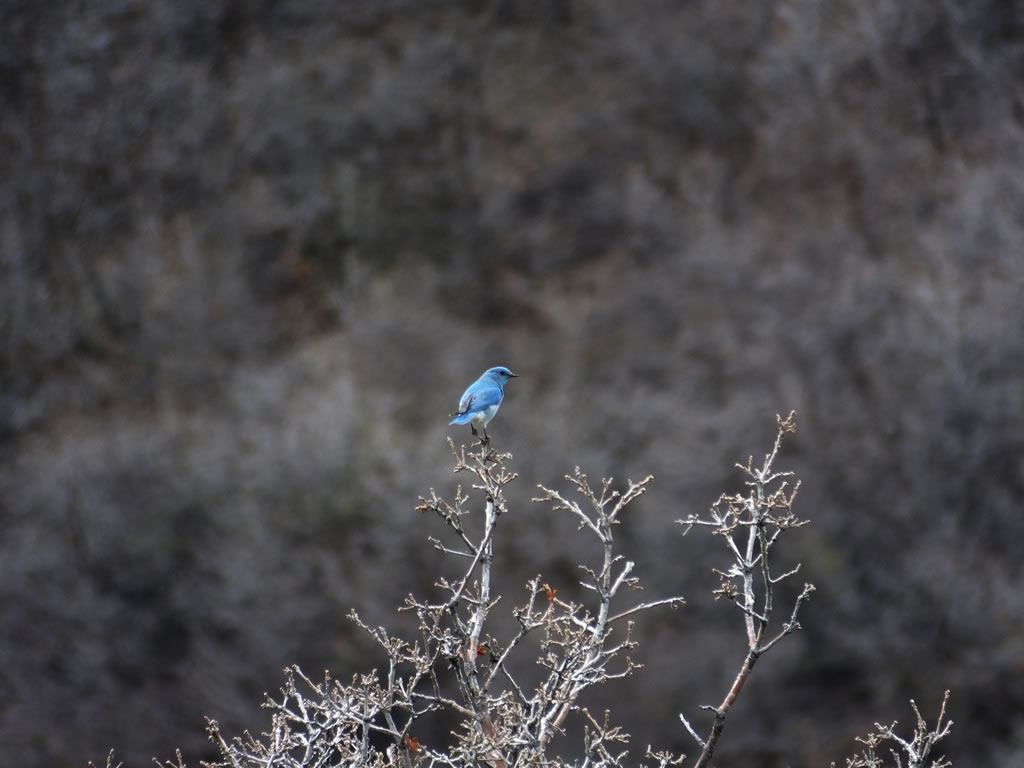
Mountain Bluebird watching us from the oak brush.
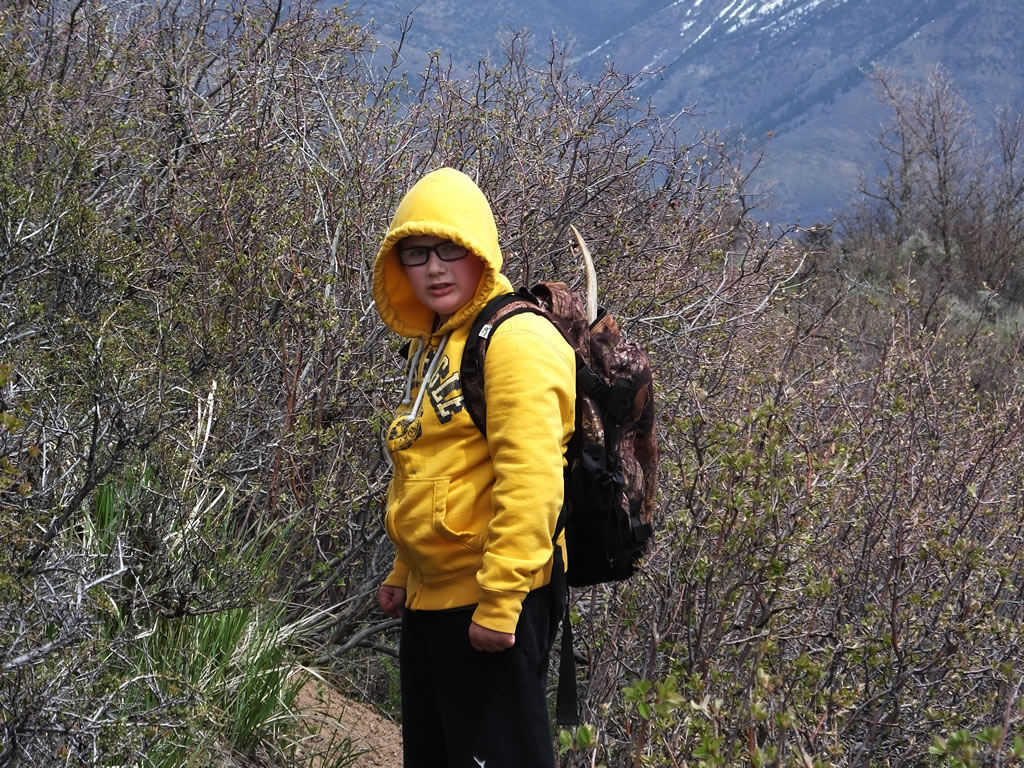
KB packing some spike elk antlers in his backpack.
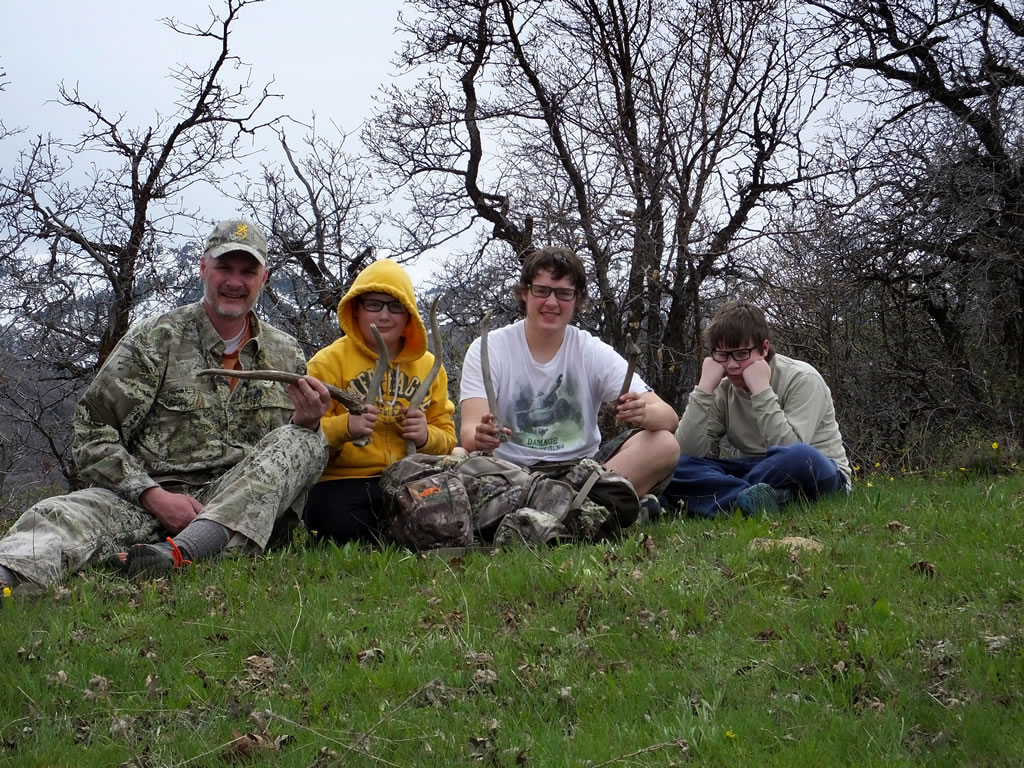
The crew of us boys with our five spike elk antlers. Landen was a little down for the photo. He wanted to find a big antler. Me too, me too.
My three boys and I decided to go hunt for shed elk antlers over Easter break. I was off for Good Friday and so I took the boys out to see what we could find.
I knew a very general area of where the elk would be this time of year and we set out to scour the area. The elk would have been shedding their antlers over the past several weeks with the smaller bulls probably just losing their antlers.
The area we were hunting in has lots of thick oak brush. We spent a couple hours weaving around and around looking for antlers. We were finding a great deal of fresh elk tracks so they had to of dropped their antlers somewhere near by.
After a couple hours we found a nice brown elk spike in a meadowy area. After finding this one we really scoured that area very carefully and ended up finding five spike antlers within about 200 yards of each other. Two of the spikes were brown and three were whiteys from years past.
So we have a pretty good idea of where we can find spikes in future years to come but where were the bachelor groups of bulls hanging out when they dropped their antlers? I figured they would be lower because they would have dropped their antlers sooner than the spikes. We spent another couple hours working our way down the mountain hoping to find some nice branched antlers but we couldn't find any.
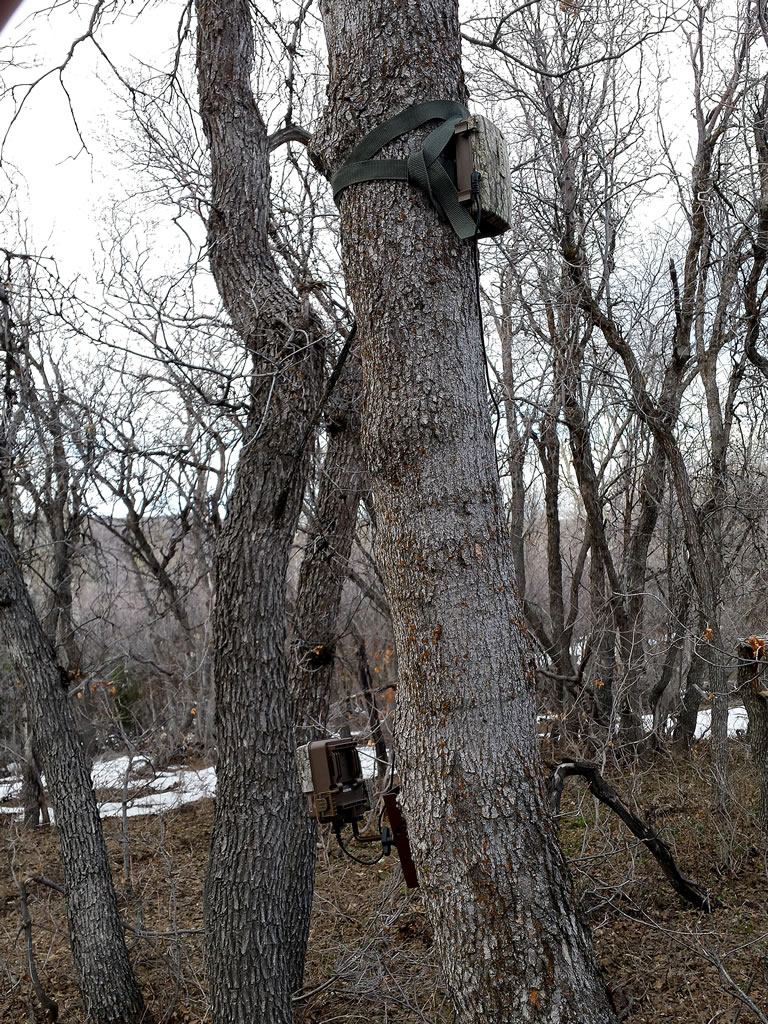
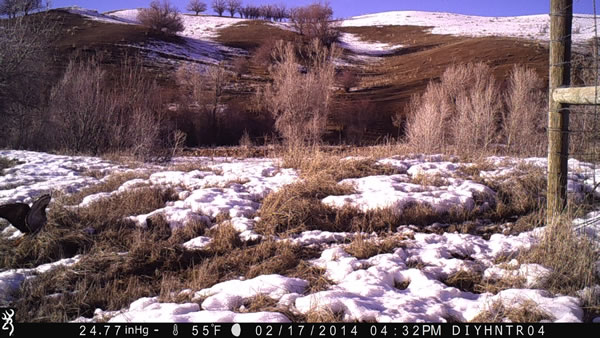
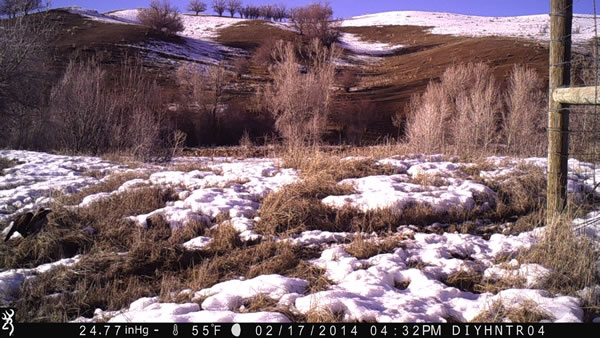
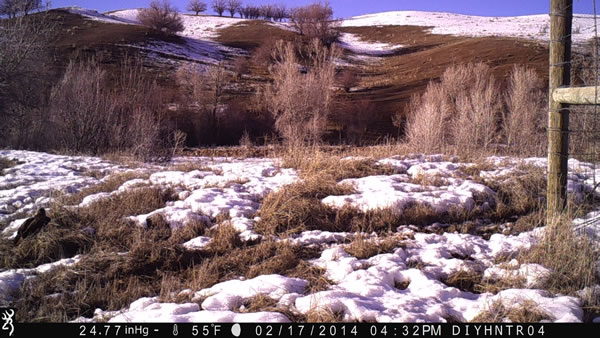
I had brought a couple of Browning's newest trail cameras with me in my Alps Pathfinder pack. The boys were a little tired so I let them play together building a fort while I hiked up a draw to set out the trail cameras.
I was excited to get a couple of new Recon Force XR, BTC-2XR trail cameras and a Strike Force, BTC-5 trail camera. I have loved the cool videos and images I have been getting with my 2013 models of Browning BTC-1, 2, and 3 trail cameras and I'm excited to try out Browning's new 2014 models this year.
The Strike Force BTC-5 trail camera is really small and is packed with awesome features. I can't wait to see what it captures. It's a little early in the year but I would love to catch some bears or young calf elk and whatever else I can on the cameras.
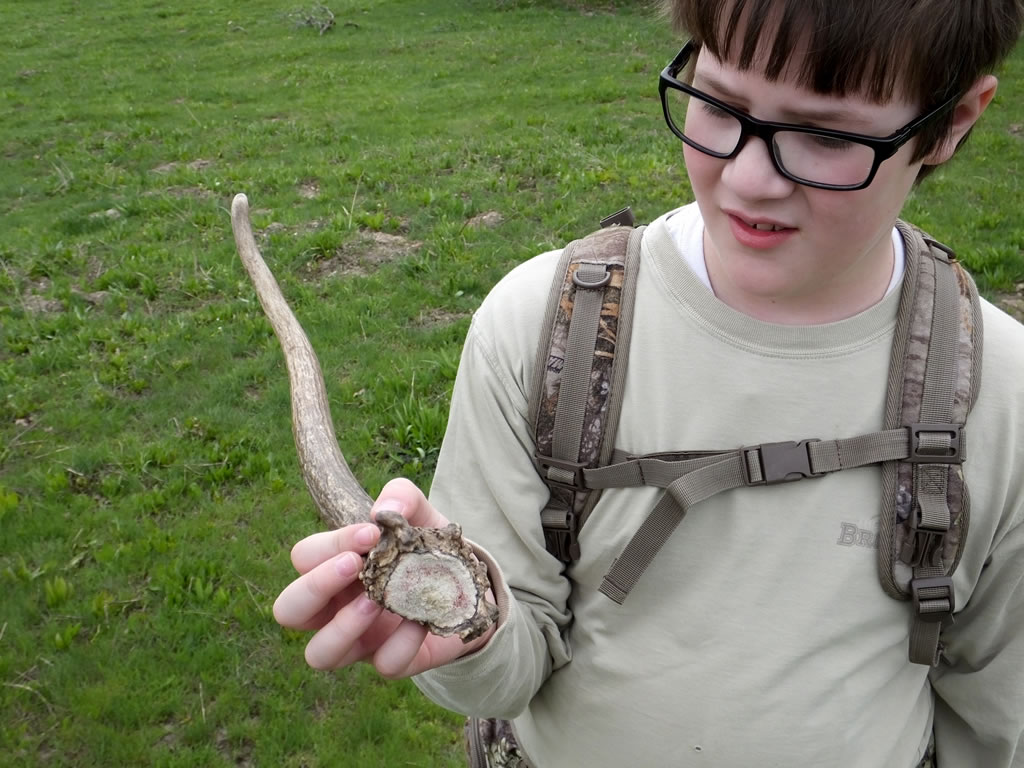
As luck would have it, as I was out setting out the trail cameras I stumbled onto a small five point elk antler. How funny! I didn't think I was in an area that they would have shed their antlers. The boys weren't amused that somehow I found the "big" antler while I told them to have fun here while I go off to setup trail cameras.
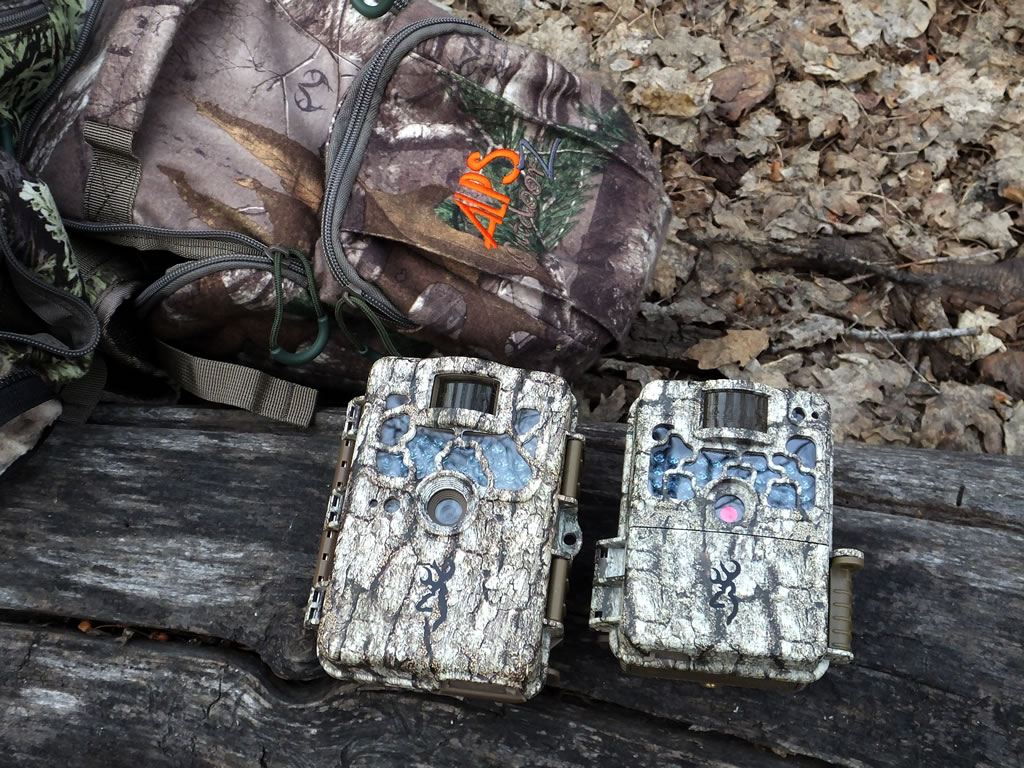
Browning Recon Force XR next to the smaller Strike Force trail camera.
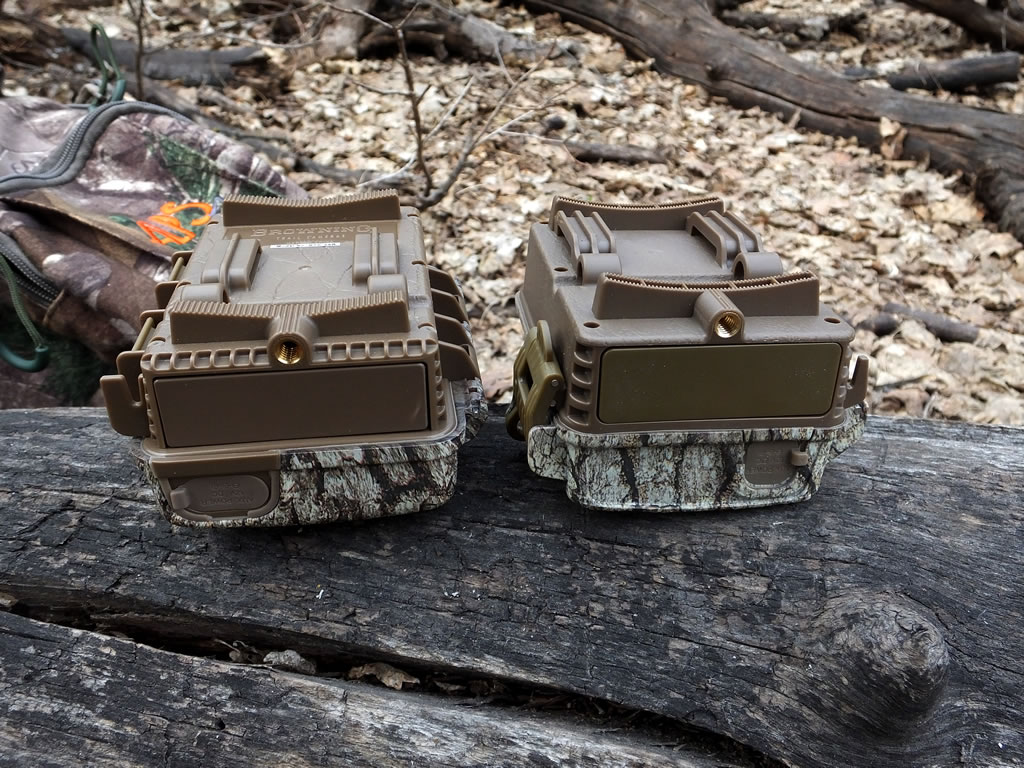
The bottom and back view of a Browning Recon Force XR next to the smaller Strike Force trail camera. I like the heavier duty strap loops on the back of the Strike Force.

This Recon Force XR trail camera looks much the same as the original Recon Force. One noticeable change are the back-lit buttons when in update mode. Most of the changes come in the form of better images, video, IR lighting and sensors.

I hiked up a draw to put out some trail camera while the boys were playing and building a fort. Oops, the boys aren't going to be happy about me finding a five point antler.
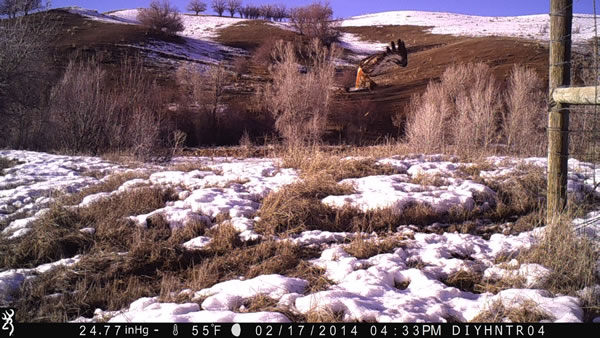
I setup a Browning Strike Force trail camera with a Browning Trail Camera Power Pack watching one of my favorite locations from last year. I am curious to see how well the batteries last with this camera and with the power pack setup.
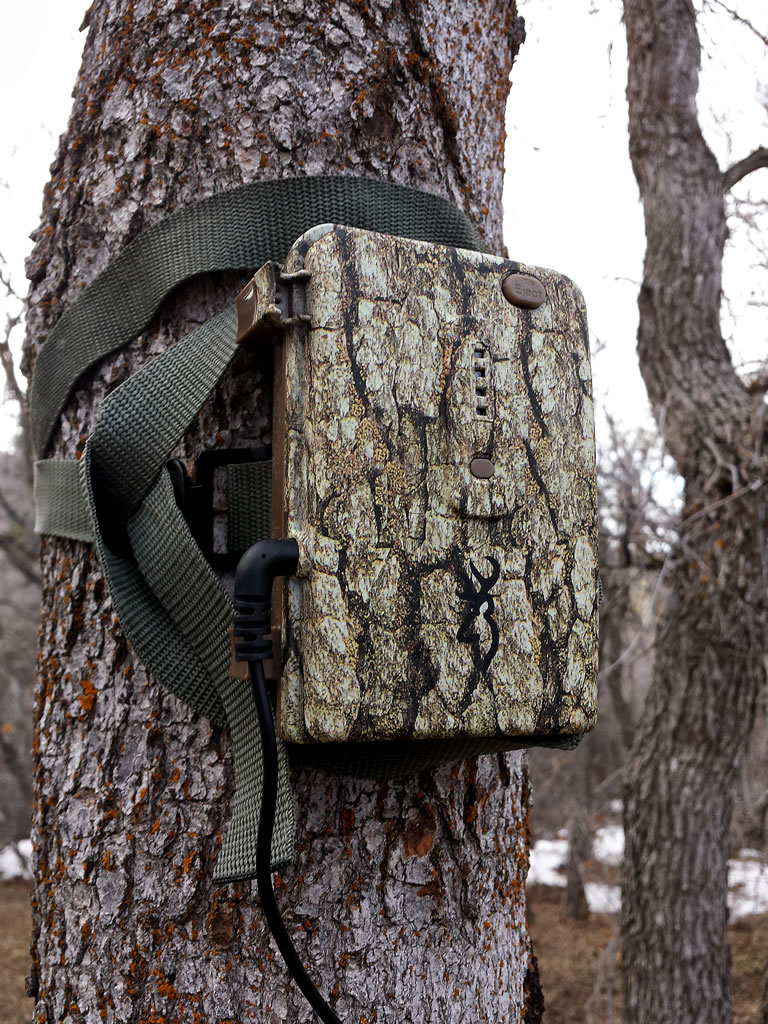
Here's a closer view of the Browning Trail Camera Power Pack.
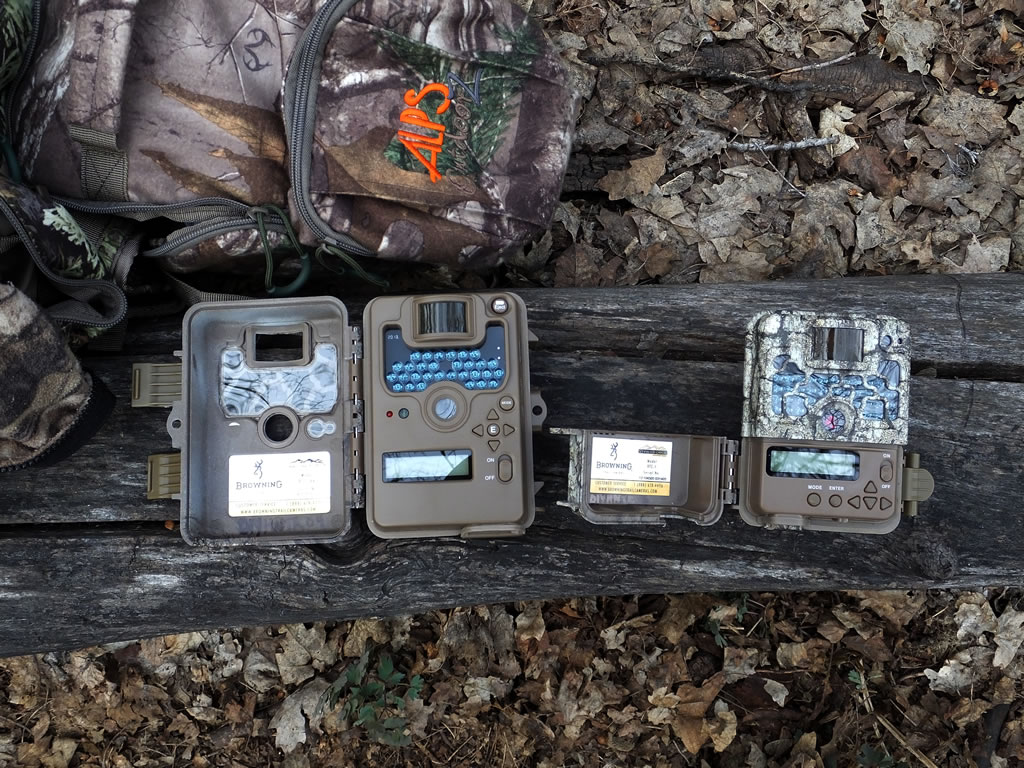
This shows the Browning Recon Force XR next to the smaller Strike Force trail camera with the doors open.
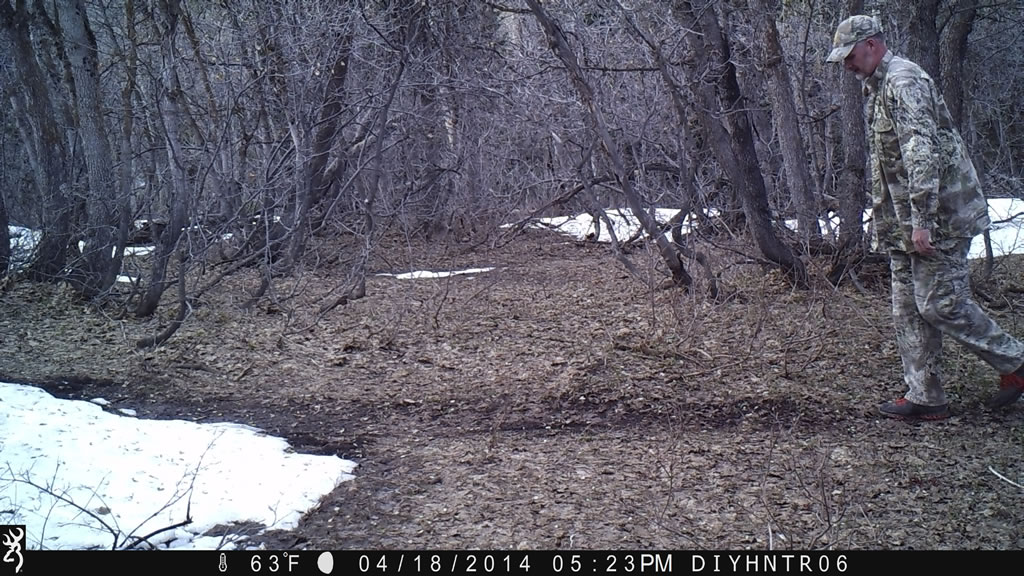
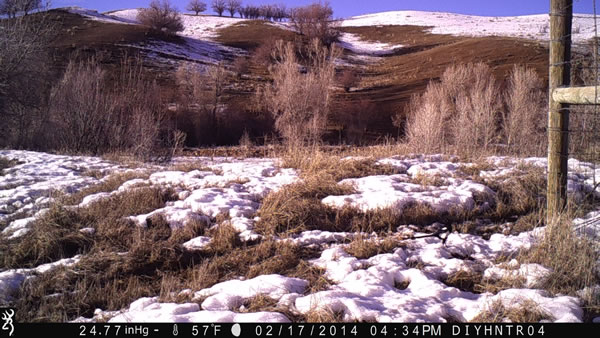
Here's a sample image taken from the Strike Force trail camera. It was a dull cloudy day and as you can see the snow is still on the ground from winter. Within a couple weeks things should really start to green up.
Here's a link to the original high resolution jpg image the Strike Force trail camera took which is a 10 MegaPixel image with a 2.8 MB file size.
- Details
- Written by: The DIY Hunter
- Category: Outdoor
- Hits: 3805
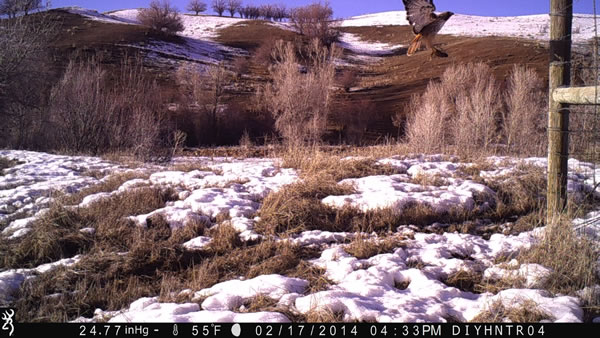
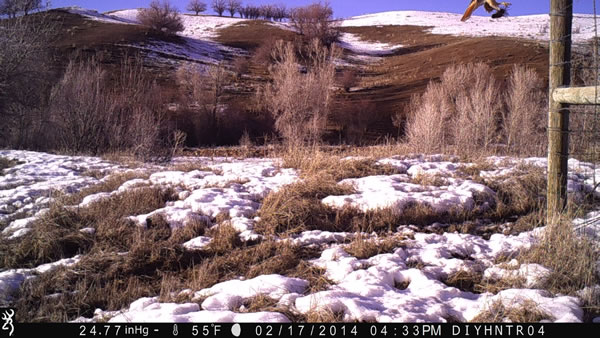
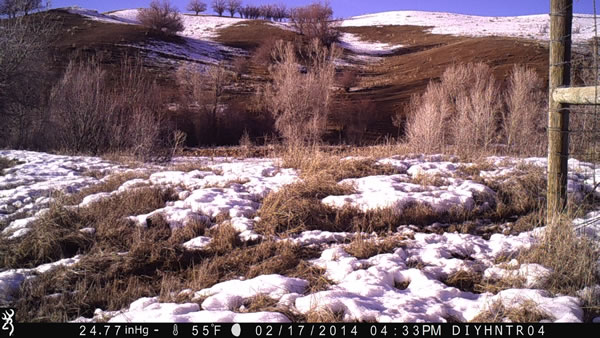
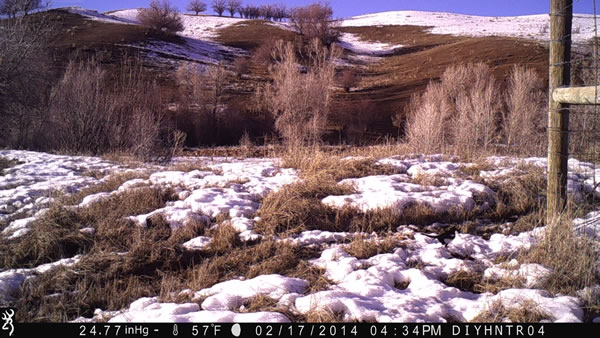
During this winter I have set out my trail cameras in a creek bottom where mule deer and turkeys like to winter. In this setup I have a Browning Spec Ops trail camera watching the edge of a fence corner post where deer like to funnel around. I have many, many deer photos and videos from this location. As I was scrolling through the many deer photos from this camera from the past couple weeks I came across these photos of a Red-Tailed Hawk pouncing on a rodent, fly up to a fence post and then a Magpie comes in to scavenge below the hawk. The trail camera was set to take six rapid-fire photos. In this setting it starts taking photos about six tenths of a second after it is triggered and then it takes six photos rapidly in two seconds time. And I have the camera set to a five second delay before it can be triggered again.
In this series of photos the camera is triggered just before the hawk hits the ground. Then sometime five or more seconds later the hawk takes off triggering the camera again and it starts taking photos as it is flying up to the post. Finally a Magpie flies in triggering the camera and gets his picture taken six times.


- Details
- Written by: The DIY Hunter
- Category: Outdoor
- Hits: 4768
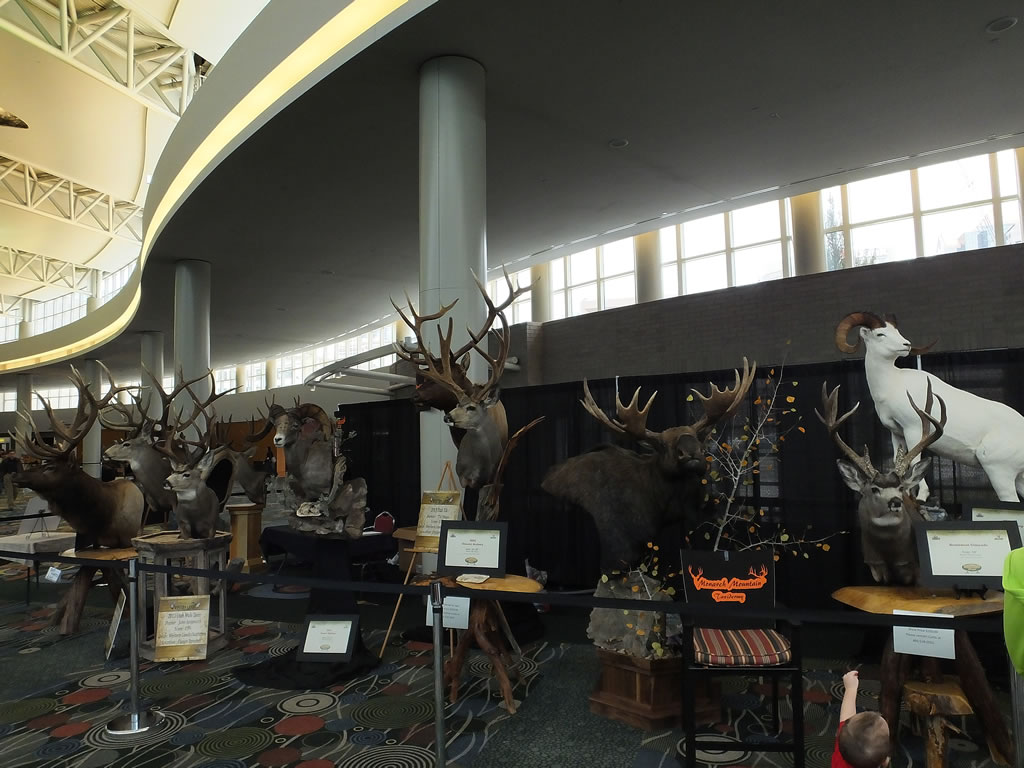
Here are just a few of the many mounts that can be found at the 2014 Western Hunting and Conservation Expo.
I had a little time between work and Dallen's High School basketball to check out some of the booths at the Western Hunting Conservation Expo this year. I decided to donate $50 to put in for some of the hunting draws I would like most. The Desert Big Horn and Rocky Mountain Bighorn were no brainers. The Hunt Expo is most likely my only chance to draw one of them. By the time I have enough points to draw my once in a lifetime moose hopefully before I die, I think I will put in for a Mountain Goat and there's no way I'm living long enough to start on a third once in a lifetime big game animal.
Anyhow with the $50 for ten different hunts, $12 for parking, $10 to get in the show and my gas to drive down. It's worth it to have another chance to get a limited entry hunt in Utah.
As usual, there is some pretty cool stuff at the show. The place is just packed with huge mule deer and elk mounts not to mention tons of sheep and other critters. I do like walking through the taxidermy judging section. I feel a lot better seeing realistic sized deer and elk in this section. Many of the mounts are of deer with antlers the size I might actually see in the areas I hunt. Now throughout the rest of the show, the antlers just don't look real. I've hunted hard my whole life and never seen bucks or bulls anywhere near the size of most of them found in the show... wow!
![]()
Here is the Poison Arrow elk decoy collapsed on a bow.
![]()
Here Poison Arrow Gear's cow elk decoy deployed on the side of a bow. You can see how you can hide your draw behind the decoy.
Anyhow there where two products that caught my eye as I walked the show this year.
First was a lightweight decoy/blind that Poison Arrow is making that mounts to an arrow in your bow quiver. Being a solo DIY archery elk hunter I have many a time found it difficult to call in a bull within range without getting busted. My most successful technique is to ambush elk along an active trail or water hole. There are times when I am calling and I can see that carrying just a few more ounces of weight on my bow with one of Poison Arrow's cow elk decoys could help buy me some precious time to get the shot.
The decoy is a "flag" of material with a cow elk head printed on it. There is a small bungee cord that ties the decoy flag down by being wrapped through the nock of the arrow that the decoy is attached too. The decoy can be deployed in just a couple of seconds. The decoy attached to the arrow can also quickly be removed from the quiver and attached to a tree or brush etc.
Most of the time I try to ambush the elk and would prefer not to have the decoy visible attracting attention to me however sometimes I do have to cow call to pull a bull within range and if I have a bull coming directly to my calls this decoy might just buy me the time to get the shot. I can also see that it would offer a great shield to block the view of me drawing my bow. I might have to get one of these before next archery elk season.
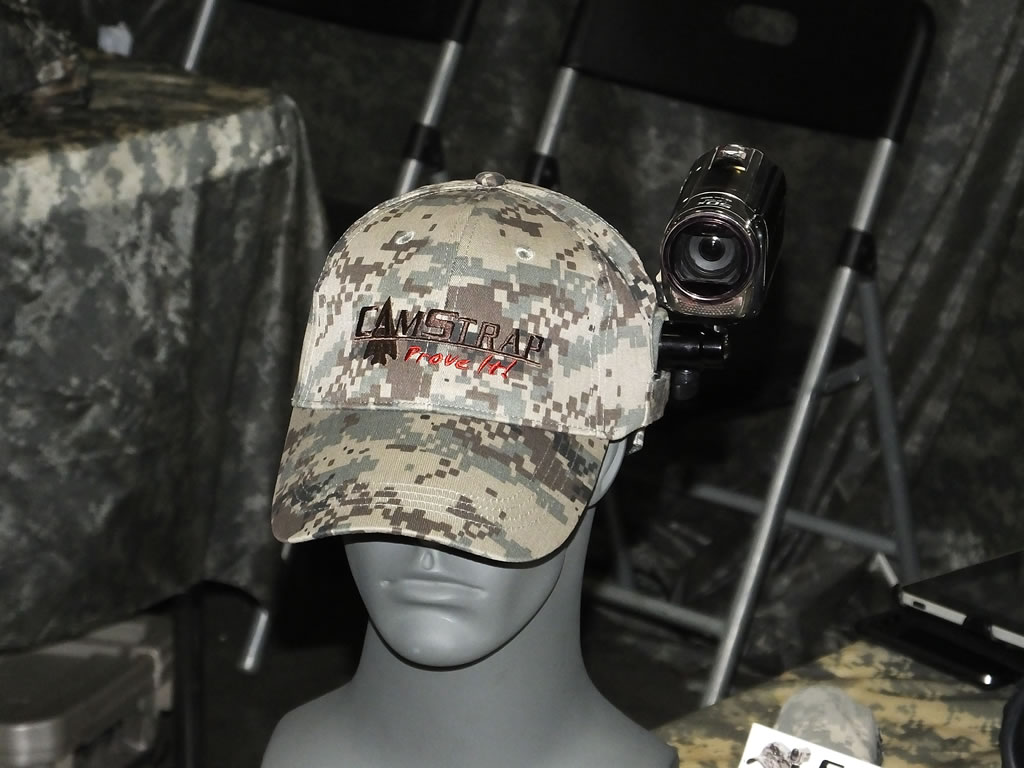
Solvid's CamStrap video camera head mount and one of their hats with a slot in the side for the mount to come through.
Another product that looked pretty cool was a nice solid camera mount that straps around your head called a CamStrap from a company called Solvid. Unlike GoPro cameras and mounts this mount appears very strong and secure allowing for the use of variable zoom digital video camera. The footage they were showing of archery mule deer hunting and other hunting was pretty amazing. I was impressed.
I could see how this could get awesome footage of my archery hunts and I could see how it could be very valuable to review the footage after a shot to see how well my shot placement was on an elk. A GoPro is cool but the footage is so wide-angled that anything past a few yards looks very distant. This system can bring the action in much closer. This could be a lot of fun as long as I'm not fiddling with the camera when I should be focusing on taking the shot.
Now if I get one of these straps I'll have to get a camera to use with it, hmm....
For more information about the Western Hunting and Conservation Expo check out huntexpo.com.